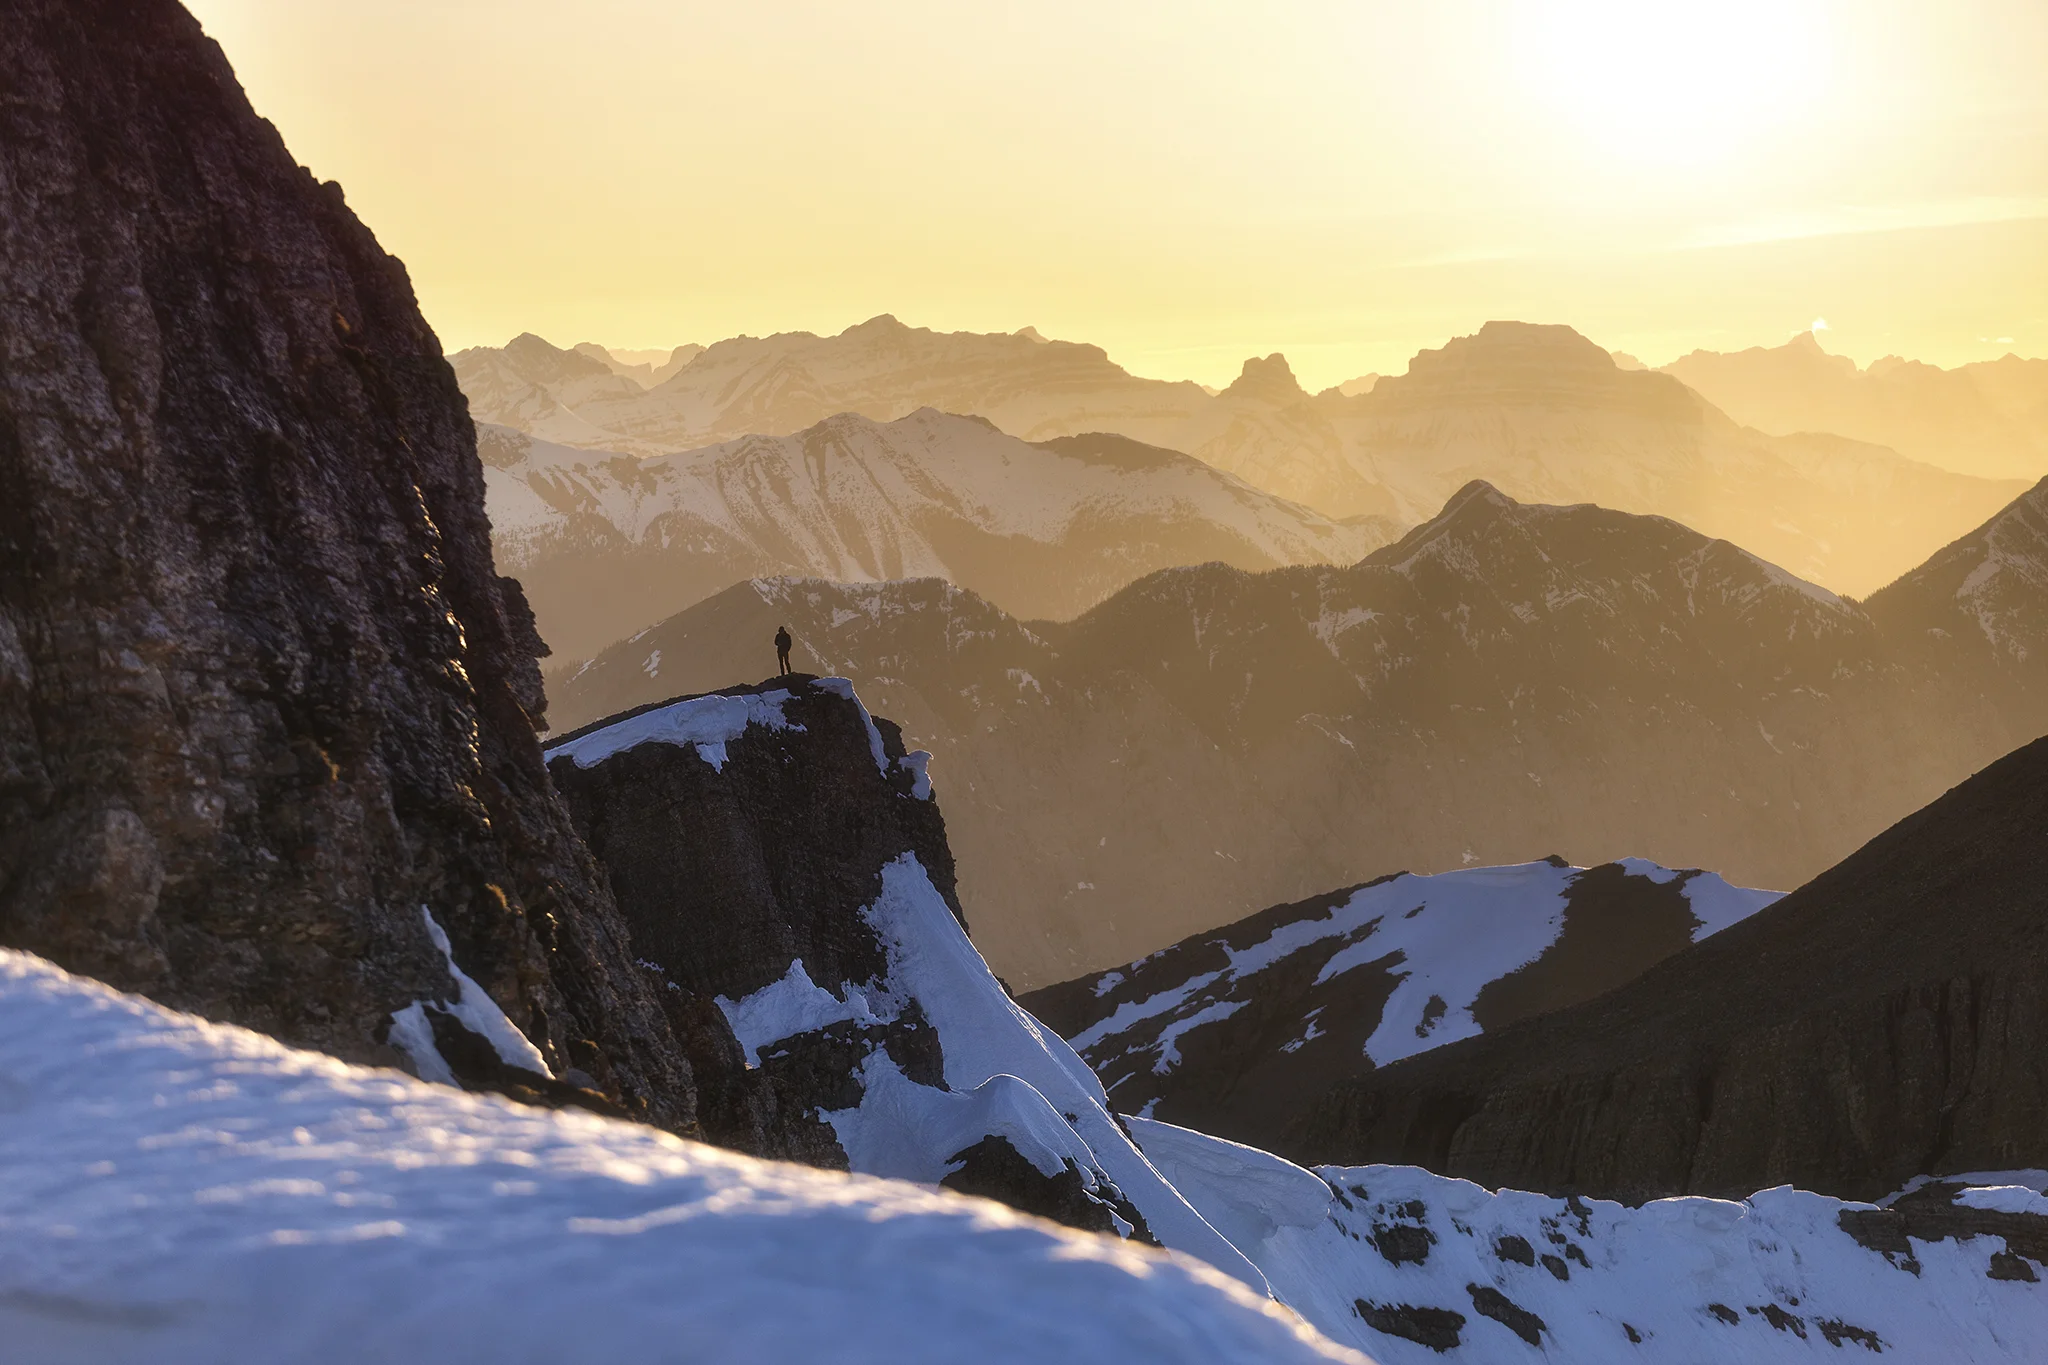
King's Creek Ridge

Time: 3.5 - 4.5 hours depending on fitness level.

Distance: 7km out and back

Elevation Gain: 780 metres

Access: Head south on Highway 40 through Kananaskis for approximately 50kms after the turn off from Highway 1. The trail head can be found on the left side of the road just before the turn off on the right that goes towards the Upper Kananaskis Lake campground. There is parking available in the Kings Creek Ridge day use area.

Kings Creek Ridge offers plentiful views and great early season hiking - often hikes on this part of highway 40 are free of snow a few weeks before trails further into the Rockies. However check to see if it’s snow free before heading out!

The hike is relatively straight forward with the only notable fork being early on, take the left hand side, this is the new trail and the fork to the right should be blocked with stones/logs.

This trail is steep and relentless however you will have about 10 minutes of easier walking to warm up as the trail briefly runs parallel to the road below. After this the trail will start baring right and up, all the way up! There are what look like multiple trails crisscrossing each other created by wildlife and humans alike on the ascent however most cross each other and join back up. The main direction you need to be heading is up!

Once up on the ridge you’ll be rewarded with views of Mt. Wintour and the unique mountain ranges that make Kananaskis a world class hiking destination. The path follows the ridge until you come across the false summit, marked with a large rock cairn. Along the ridge there are multiple small open meadow sections that make for a great stop for lunch or a quick break however it is always worthwhile plodding on to the true summit!

Mt. Wintour bathed in golden light.

Mt. Wintour just after sunset surrounded by alpine glow.

Heading north along the ridge you’ll come across a short scramble with a little exposure before making your way to the true summit.

On the way back it’s simply a case of retracing your steps, the descent is of course steep so be careful with your foot placement and as always I recommend taking poles.

Josh on the true summit

Floe Lake And Numa Pass

Time: 6 - 7 hours, although an overnight stay is always recommended! Add 2 - 3 hours if heading up to Numa Pass

Distance: 20 km out and back to the lake, add 5.4 km up to Numa Pass.

Elevation Gain: 730 metres to the lake add 300 metres to Numa Pass.

Access: Coming from Banff take Highway 1 heading west until you come to exit 50. Take highway 93 heading south for approximately 32kms until you come across the Floe Lake Trail head car park on the right hand side.

Floe Lake has to be one of the most stunning lakes in all of Canada. The trail is littered with wild flowers in spring and engulfed in golden larch trees late in the hiking season, there really isn’t a bad time of year to visit.

Nearby wild fires make for an atmospheric sunrise as smoke roles in.

Floe lake is surrounded by a huge peak and head wall of the same name, the towering mountains are so high you’ll be straining your neck to take it all in!

As for the first section of the hike the trail is relatively easy to follow with no real forks or direction changes. One thing to note however is that the whole area was victim to a large wild fire in 2003. This means the trees are bare and respite from the sun is almost nonexistent. If you’re hiking this trail on a hot summers day you won’t really get a break from the sun until you get to the steep incline about 9 km in.

However the trail does cross multiple rivers offering a great opportunity to cool down or top up on water, if it’s hot I would highly recommend taking advantage of these stops.

As mentioned before the elevation gain doesn’t really start until around 9kms in to the trail. In the last km you’ll take on about 400km of elevation gain as you make the final ascent to the lake. This is when the hike gets tough but for the first time there is some shade on offer.

If you are able to I highly recommend camping at the lake, sunrise here is just other worldly and I don’t think I’ve ever sat anywhere more impressive as we enjoyed our breakfast. The number of pitches is limited and these book out super quickly, if you aren’t able to get a campsite the hike in and out is certainly short enough to achieve in a day. You can make reservations on the Parks Canada website.

Having coffee at Floe Lake

If you have the energy and can drag yourself away from the incredible vistas of the lake side I highly recommend taking on the 5.4km return trip to Numa Pass. Up to the pass adds 300 metres of elevation gain but the gain is relatively gradual. During the fall you’ll be walking through forests of bright yellow larches and in spring you’ll be met by fields of wild flowers as you summit the pass. The pass itself is clear of trees and offers incredible views over the lake and mountains below.

Views from Numa Pass during peak wild flower season.

Best Milky Way photography Spots in the Bow Valley

Over 50 locations in Banff and Lake Louise in one guide, download today: DOWNLOAD HERE

Intro

Astrophotography is always exciting, getting to see your favourite locations set under the Milky Way is endlessly rewarding and having the knowledge and ability to capture the scene is even more so.

As in most locations in the world, there are only a few months of the year where you can capture the milky way core in the rockies so doing some research is key. You can normally capture the milky way during the months of May, June, July and August but you will also need to take into account the moon phases and cloud cover to get the best shots. I recommend apps like Stellarium and Photopills to help with this planning. I’ve gone in to more depth in how to plan and execute a Milky Way shot here.

In general though you’ll be looking for compositions that look to the south, here are a list of some of the best locations I’ve found so far!

1) Two Jack Lake

This location couldn’t be more perfect for photographing the Milky Way. During the spring and early summer the Milky Way core sits perfectly above Mount Rundle and reflects in Two Jack Lake below. The lake itself is just a short drive from the town of Banff and then the shore front is an easy walk from the car park. Easy access and perfect alignment really makes this a great location for anyone to capture the stars.

TwoJackAstroFB.jpg

2) Policemen’s Creek - Three Sisters

This creek is a pretty famous spot for photography in Canmore, even during winter there is often enough open water to get epic reflections of the three sisters. This location does however come with a warning! Cougars live in the woods surrounding the short trail from the road to the creek. I myself have heard them whilst walking back in the middle of the night, I also know other people who have had run ins with Cougars in this area. So if you go, don’t go alone and be sensible, respect the wildlife, at the end of the day you are in their territory!

PolicemensCreekFB.jpg

3) Vermilion Lakes

These famous lakes close to the Banff townsite offer great photography day or night. During Milky Way season you can get some great shots. especially from the last lake on the road. Here you have a small dock with mountains in the background and the opportunity for more Milk Way reflections!

VermilionLakesAstro

4) East End of Rundle

Now this location takes a little more planning. I had had this shot in mind for several years, I knew at the right time of year the Milky Way would sit above Ha Ling Peak it was just a matter of waiting for the right moon phase and weather. This image is taken from about half way up the East End of Rundle trail where there are fantastic views of the great peak opposite. We hiked in the dark for just over an hour and then spent several more sat here watching the stars. It’s a night I’ll always look back on with fond memories, hanging out with like minded people in the dark and cold!

Again this region is home to wildlife, most notably bears live here! There are always precautions you should be taken whilst hiking and this is no different at night. Use a head torch, hike in a group, be aware of your surroundings and make noise as you travel. Bears don’t want to run in to you as much as you don’t want to run in to them, if they hear you coming the chances are you’ll never see them!

Pano01FB.jpg

There are of course lots of other places to shoot the stars in the Bow Valley these just happen to be some of my favourite shots from over the years. I’ve captured the nights sky at Lake Minnewanka, Moraine Lake, Kananaskis and further afield. If you aren’t after the Milky Way itself there are always star trails to play with too, you can learn more about shooting star trails here.

If you know of any other epic locations I would love to hear them so leave a comment below!

Over 50 locations in Banff and Lake Louise in one guide, download today: DOWNLOAD HERE

Photography Spots Walkable From The Town of Banff

Over 50 locations in Banff and Lake Louise in one guide, download today: DOWNLOAD HERE

INTRO

Have you just moved to Banff or are you planning a visit? Are you looking to get out and shoot but don’t have your own transport? I was exactly the same when I first moved to the town of Banff but was keen to get out to shoot. Unfortunately public transport won’t run early enough or late enough to capture sunset and sunrises around the town so you’ll need to use a little man power to get around.

There are a lot of incredible photography opportunities in Banff national park and the surrounding mountains. Some are buried deep in the backcountry or hours away by car, however some are much closer to town, these are the locations I’m going to share in this post, my favourite photography spots walkable from the town centre of Banff. There are a lot more than you might think especially if you’re prepared to put in a little bit of effort!

1) Banff Avenue

This one’s a given and one I’m sure you’d have worked out on your own! The main road in town is called Banff Avenue, this was purposely constructed to run north to south and perfectly line up with the impressive Cascade Mountain to the north. Almost all hotels sit along this road or are a short walk to it. You can jump out of bed shoot sunrise and be back at your hotel in time for breakfast with some amazing shots under your belt.

I’d recommend trying to shoot from as far back as the bridge on the south end of the road with a long lens. This will give some great perspective compression and make Cascade appear even larger than usual. You can see the difference in the two images below one shot at 35mm and one shot at 60mm from further back.

Shot at 35mm from just behind the famous fire hydrant which you’ll see in a lot of photographers images!

Shot at 35mm from just behind the famous fire hydrant which you’ll see in a lot of photographers images!

Banff Avenue shot from towards the south end of Banff Avenue at around 60mm. Notice how much larger the mountain looks?

Banff Avenue shot from towards the south end of Banff Avenue at around 60mm. Notice how much larger the mountain looks?

BanffAveFlowersFB.jpg
BanffAveSunflowersFB.jpg

During the summer of 2020 Banff Avenue was closed to traffic and planted with lots of beautiful flowers, this opened up the possibility for some creative compositions.

2) Cascade Gardens and the Parks Canada Building

Second on the list sits on the south end of Banff Avenue, opposite to that of Cascade mountain. These gardens are home to the impressive Parks Canada administration building as well as beautiful landscaping. From here there are lots of compositions to play with, depending on the time of year you visit you might be blessed with fresh flowers in full bloom or pure white snow and festive lights.

LightsCascadeFB.jpg
ParksBuildingFB.jpg

During winter the Cascade gardens are festively lit allowing for some great blue hour shots as seen above. Below there are two further compositions one shooting back towards Cascade Mountain and the last being taken from behind the Parks Canada building. If you walk around the back of the building, stand close to the edge of the woods and look north you’ll notice that the historic building aligns perfectly with Cascade Mountain, almost as if some clever architect planned it that way!

BanffMainStreetFB.jpg
IMG_6872.jpg

3) The Fairmont Banff Springs

This famous hotel was where it all started! Originally built by the Canadian Pacific Railway to draw people to the area it has now been rebuilt multiple times after going through several devastating fires. This location is a little further out of town but still easily walkable. Head south down Banff Avenue and take a left after the main bridge, if you like you can even walk alongside the bow river and keep an eye out for signs to the Fairmont.

The grand building is an impressive sight both inside and out and certainly worthy of a photograph or two!

FairmojntNight01.jpg

4) Surprise Corner

Now you’re starting to use those legs! This spot is around a 20 minute, mainly uphill, walk from the town centre and offers great views over the Fairmont Hotel and Bow River. One of my favourite images from this spot was during some heavy snow fall, I love the fallen tree acting as a leading line leading your eye to the hotel in the background.

BranchFairmont.jpg

5) The Bow River

The Bow River runs around the outside of the town flowing from Vermilion Lakes, down the Bow Falls and continues on to Calgary. Not only does it allow for some great photography but there is also lots of opportunity for canoeing, paddle boarding and wildlife spotting.

BowVAlleyReflectionFB.jpg

This image was taken during summer months when the river was lower and not frozen. This allows for some smaller puddles to form on the rivers edge and provides great reflections. In frame is the pedestrian bridge and just behind me would be the main bridge coming off of Banff Avenue, in the distance is Mount Rundle . This spot is easily accessed from the foot path that runs along side the Bow River just to the left of frame and is only a few minutes walk from the town centre.

6) The Peak of Mount Rundle

Banff's second most famous mountain is visible from all over town and there are lots of locations to photograph it from. The peak has a distinctive shape to it and I was once told it’s one of the most tattooed mountains in the world! If you’re lucky enough you might be able to see this peak from your hotel balcony, if not you’ll be able to get a good view of it with a short walk from wherever you are as long as you’re staying locally. The clouds have a habit of photogenically peeling off of the top of the often snow covered peak. If you have a long lens and a bit of patience there are always some moody, dramatic shots to be had. This photo below was taken from the balcony of the flat I was living in at the time.

rundleViewsFB.jpg

7) Tunnel Mountain

Now this location is a bit more of a walk than a lot of the others on this list but is more than achievable for people of all abilities. The Tunnel Mountain trail is approximately 4.5 km return with 266 metres of elevation gain, the trail starts on St Julien Road. There’s a car park at the bottom of the trail but as this is about walkable spots you can also easily walk to the trailhead. Starting from the centre of town walking to the trail head will add about 1km each way to your hike so make sure to account for that if you are planning to shoot for sunrise or sunset.

The trail is wide, well defined and well maintained with a steady incline. If hiking in winter I’d recommend taking some cleats as the path can get slippery, if you don’t have any you can rent some from Ultimate Sports where the staff will also be happy to point you in the right direction. Most people complete this hike at some point during their visit to Banff so why not take your camera and go for sunset and get some incredible views over the town below?

The town of Banff shot from Tunnel Mountain at sunset.

The town of Banff shot from Tunnel Mountain at sunset.

8) Vermilion Lakes

I couldn’t not include this location in this list! These lakes are about a 30 minute walk from the town centre but the walk is almost completely flat and along paved side walks making it a nice, easy stroll for most people. When I first moved to the town I often walked here from the other side of the bridge and it would take close to an hour however it was always more than worth it!

You’ll most likely bump in to a few other photographers whilst here due to the endless composition possibilities. During summer you’ll have great reflections of Mount Rundle and in winter the constant stream of warm water from the nearby thermal spring leaves an ever changing section of open water.

Vermilion Lakes before winter sets in. This was one of the first images I ever took in Banff and was one of the best sunrises I experienced.

Vermilion Lakes before winter sets in. This was one of the first images I ever took in Banff and was one of the best sunrises I experienced.

During the winter months the shape of the open water always changes meaning no matter when you visit there are always unique compositions to be had.

During the winter months the shape of the open water always changes meaning no matter when you visit there are always unique compositions to be had.

Hopefully this list gives you enough insight in to what is possible within Banff by just using your legs to get around. Once you are able to travel further afield the possibilities really are endless, I’d suggest starting off by reading my other posts about my Top 5 Winter Photo Spots Near Banff and my recommendations of the Best Photo Spots On The Icefields Parkway.

Over 50 locations in Banff and Lake Louise in one guide, download today: DOWNLOAD HERE

Northover Ridge - Kananaskis

Time: 2 to 3 days - there’s a lot to enjoy so I suggest 3 days.

Distance: 34 km

Elevation Gain: 2200 metres approx - lots of ups and downs

Access: This trail is a loop and starts/ends at either Upper Kananaskis Lake day use area or North Interlakes parking lot. Both are just shy of two hours from either Banff or Calgary. Simply follow Highway 1 until you reach the Kananaskis turning and follow highway 40 south until you see signs for the lakes.

Northover Ridge is a fantastic but challenging multi-day hike through widely varied terrain across the border of Alberta and BC. You’ll hike over ridge lines, through alpine meadows and past perfect lakes. It’s certainly a tougher hike than some with lots of elevation gain and loss throughout your trip, you are however rewarded with stunning views across Kananaskis in all directions.

Conditions

You’ll need to use your judgement on this hike, the elevation increase is extensive and you’ll hike close to 3000 metres at certain points. You’ll be hiking on snow during certain sections and weather in the mountains can change in a split second so you’ll need to be prepared. Bring warm, waterproof and windproof layers, depending on the time of year micro spikes and other equipment may be necessary to make it over the ridge. We took on this hike in late July and only had to navigate short snowy sections, I heard of several groups turning back just the week before as weather made the ridge line impassable, you need to be an experienced hiker to tackle this loop. Due to the elevation I would leave this route for later in the summer months.

Which Way Round?

This is a big question with this hike being a loop, we spoke to multiple people on the trail to get their opinion. We completed the hike clockwise, starting at Upper Kananaskis Lakes day use area and ending at Interlakes Parking lot. Several people told us that the opposite direction was the best way due to easier route finding however having completed the trail I believe clockwise has the more pleasant elevation gain and route finding wasn’t really problematic. Hiking clockwise there are multiple steep scree slopes you descend which would be incredibly unpleasant on the way up, it also means your last day is almost completely down hill on easy, wide trails. I’ll go more into the differences throughout the post. Which ever way you choose to go I would highly recommend leaving a car at each end, we didn’t, and an extra few kms with a heavy pack after a long hike to get back to your car isn’t what you want! No matter which direction you go there is still some route finding involved so take a map, not just on your phone but a paper copy too, we had both and had to refer to them several times to make sure we were on the right route.

Camping Options

Even though this hike is achievable in 2 days, 1 night I would recommend taking a little longer. Some of the elevation gain is pretty draining and if you’re like me and take a heavy pack full of camera gear you’ll be grateful for the shorter days. We chose to do the loop over 3 days and 2 nights, there are multiple camping options along the way.

Aster Lake is 10.8 km from Upper Kananaskis day use area with approximately 550 metres of elevation gain. This campsite only has 5 sites so booking here is very difficult, it does however have bear lockers and a drop toilet. Open from 24th of June to November 30th and can be booked here.

Three Isle Lake is 12.5 km from Aster Lake campground if going clockwise and 10.3 km from North Interlakes Parking lot if completing the loop anti-clockwise. This campsite has 16 sites, bear lockers, picnic benches and a drop toilet. It books up fast so it’s worth planning early, bookings are available from the 24th of June to the 30th of November and can be made here.

Northover Tarns Wild Camping. This spot is approximately 2 to 3 km further on from Aster Lake. Once at the tarns you have left Alberta and entered British Columbia, in BC wild camping is permitted. If you are camping here you will need to be well equipped and take the necessary precautions in regards to food storage, cooking and wildlife. Wherever you are camping you should leave no trace, pack out what you pack in and be considerate to the environment you are in.

Due to availability we chose to camp at the Northover Tarns the first night and Three Isle Lake the second.

Upper Kananaskis Day Use to Northover Tarns

We started the loop at the Upper Kananaskis day use area, the trail starts off wide and simple. You’ll be following the Upper Kananaskis Lake trail around the left hand side of the lake, this is the same trail you use to get to Rawson Lake and Sarrail Ridge. Rather than forking off to Rawson Lake you’ll need to follow the trail round until the next left turn, approximately 4 km from the trail head, this is the trail to Hidden Lake. Follow the Hidden Lake trail up to the lake where the trees will open up and you’ll be rewarded with a nice open area, perfect for taking a rest before the elevation hits. From this open area you’ll be able to see the ascent you’re in store for up the scree in the valley. Once you’re fully rested there are two trail options, both to the left of Hidden Lake. You can either choose to follow the very edge of the lake, which is probably a little more scenic, or head through the shaded woods. Either option is easy to follow, especially later in the season when it’s already well trodden, the woods can be a harder trail to find during early season. We opted for the forest trail to stay in the shade as we had an uphill, exposed slog ahead of us.

Once out of the woods you’ll need to keep a closer eye on the trail as it winds over scree and small boulders with a small river/snow crossing depending on the time of year. On your right hand side you’ll see the impressive Fossil Falls bellowing in the distance however keep left aiming for the ridge line to the far left of the falls. As you ascend you will need to do some small, basic scrambling to get over some of the steeper sections. Once you’ve reached the top of this ridge line you’ll see the Aster Lake campground on your right, head up a littler further and you’ll see Aster Lake itself.

This is where things can get a little confusing and where we ended up doing an extra hour of detour! There are two trails, one each side of Aster Lake, we decided to take the left hand side. Once past the lake the trail disappears and there are rock cairns scattered across the hill side in front of you. This isn’t where you want to go! The real trail is just on the left hand side of the furthest right inflow to Aster Lake, the best way to approach this section may be to follow the trail on the right hand side of the lake as this will most likely better match up with the upward ascent towards the tarns. This small section will most likely be a mixture of scree and snow, once on top of the pass you’ll see the trail running along the right hand side before it makes it’s way up an intimidatingly steep ascent up on to Northover Ridge as well as the tarns lower down to the left. Luckily the tarns are a great place to wild camp and spend the night allowing you to rest up before tackling the uphill in the morning. If you choose to wild camp here please be respectful and pack all your waste out and store your food sensibly as there are a lot of marmots and small rodents in the area. We decided to bag up our food in dry sacks and throw it out onto a floating ice shelf, you can however purchase smell proof sacks and bags to store food, if you’re worried these may be a worthy investment.

Here you can see the first tarn towards the centre of the image. If you look closely you can see the trail continuing along the right hand side. The ascent to the ridge can be seen just to the left of Mount Northover, a mixture of snow and scree.

Here you can see the first tarn towards the centre of the image. If you look closely you can see the trail continuing along the right hand side. The ascent to the ridge can be seen just to the left of Mount Northover, a mixture of snow and scree.

Approaching our campsite for the night.

Approaching our campsite for the night.

Views from camp as the sun sets.

Views from camp as the sun sets.

Northover Tarns to Three Isle Lake

After spending a beautiful night under the stars surrounded by towering peaks, endless views and curious marmots it’s time to tackle your steepest ascent!

The sun coming up over the ridge lines means it’s time to tackle the ascent! Best done in the morning before it gets too hot.

The sun coming up over the ridge lines means it’s time to tackle the ascent! Best done in the morning before it gets too hot.

However always time for a bit of breakfast!

However always time for a bit of breakfast!

From the tarns to the top of Northover Ridge can be a pretty grueling mixture of sliding scree and slippery snow, this section certainly reminded me I’m now in my 30’s! We managed this part of the trail with decent boots and poles but at certain times of year I could see how cleats or micro spikes could be useful. Also don’t forget to look back and enjoy the view every once in a while!

Starting the ascent, as you can see the most direct route was covered in snow!

Starting the ascent, as you can see the most direct route was covered in snow!

The route is steep and relentless with difficult terrain.

The route is steep and relentless with difficult terrain.

Once you reach the top you’ll be stunned by views across glaciers, mountains and ridges, at this point on our hike the route looked almost impassable with snow covering the vast majority of the mountains in sight. Once you ascend a little higher you’ll be able to see the ridge line trail you’ll be following for the next few kms, thankfully for us there was very little snow on the sections we actually needed to use.

Views from the top of the ridge line.

Views from the top of the ridge line.

Some of the narrower more exposed sections you’ll need to navigate.

Some of the narrower more exposed sections you’ll need to navigate.

As you follow the ridge line trail there are some very narrow sections to negotiate; confidence, balance and the use of your hands is key at certain points. The ridge can be exposed so if you have a fear of heights you may want to avoid this hike. Soon enough you’ll be able to see a lake in the valley below, this is where you’re heading! Stick to the ridge line until you see the trail descending through steep scree, going down hill in terrain like this is always good fun as you run and ski to the bottom, up hill I imagine this section to be pretty brutal. Once in the valley you’ll be able to follow the river bed to the lake shore line, head right until you come to the campsite. Be prepared for mosquitoes, we were heavily harassed from the moment we set up our tents and whenever there wasn’t a breeze, pack bug spray and use it generously!

The view from the ridge line of Three Isle Lake.

The view from the ridge line of Three Isle Lake.

Three Isle Lake from the shorefront.

Three Isle Lake from the shorefront.

Three Isle Lake to Interlakes Parking Lot

Now you’re on the home straight! The best part about doing the trip this way around is the trip out on your last day. There is no difficult terrain,very little up hill and good shade from the sun or rain in forests throughout large sections. After leaving camp you’ll have to complete a small up hill section climaxing with views over the valley ahead, after this point it’s pretty much all down hill to the valley floor. Follow the easy, flat, wide trail through the woods to Forks Campground - this is a great place to grab some water and a snack before continuing on. From this point you’ll just need to follow the Three Isle Lake trail down stream until you can see Upper Kananaskis Lake here you can decide to stay high or take a short descending switch back to take the lake side trail. There is a small amount of up and down but not enough to make you work too hard! Due to the easy trail and lack of elevation gain you can make your exit from Three Isle Lake relatively quickly, we took 3 hours from campsite to the parking lot. If, like us, you haven’t pre-planned and left a car here you’ll need to walk the extra 2.5 km back to your car. You can choose to take the trail along the lake side but along the road is shorter and faster which is my preferred method after 3 days of hiking!

This trail although challenging is very rewarding and I would highly recommend giving it a go if you’re an experienced hiker. It’s always best to be prepared so if you have any other questions please don’t hesitate to leave a comment below!


Mount Lady Macdonald

Time: 6 - 8 hours

Distance: 10 km

Elevation Gain: 1300 metres

Access: Easy parking at Cougar Creek in Canmore. From here the trail start is very obvious, just head north past the Cougar information signs.

Lady Mac took me by surprise! It’s a hike commonly talked about in the Bow Valley and offers some stunning views however it isn’t for everyone! This trail has some seriously steep sections gaining over 1300 metres in elevation in around 5 km and ends with some of the most exposed hiking I’ve ever done. To reach the true summit you’ll need to be experienced, careful and brave.

Once you’ve followed the trail partly down Cougar Creek you’ll see the path head off to the left, here the incline starts! The trail is very easy to follow however there is the odd off shoot but all lead back to the same place.

You’ll start off in the woods getting a solid work out with all the elevation. Once you’re above the tree line you’ll come to the Heli Pad, a wooden structure overlooking the town of Canmore below and a great spot for a rest and snack, a lot of people call it a day at this point. Whilst you relax and take in the views you’ll be able to get a good idea of what you’re in store for. The elevation increase kicks up a notch yet again with some steep scree and rock to ascend to make it to the start of the ridge line.

Once at the top of the ridge line the view really opens up giving expansive vistas of the town below as well as mountains and ridges to the north, this is your last chance to turn back and I wouldn’t blame you if you did!

Views of Grotto Mountain before the ridge line starts.

Views of Grotto Mountain before the ridge line starts.

Sun beams through the valley, another view before the ridge line.

Sun beams through the valley, another view before the ridge line.

The true summit is at the end of a very exposed ridge line walk with plummeting drop aways. You’ll need great balance and nerve to negotiate the narrow and steep path. The views at the summit are very similar to the start of the ridge line but sometimes you just feel like you have to get to that highest point! To complete the ridge line you’ll need good, supportive boots and need to use your hands to climb and balance. If you have a fear of heights this last section really isn’t for you!

Views towards the North that you get before the ridge line as well as on the summit.

Views towards the North that you get before the ridge line as well as on the summit.

Image showing part of the ridge line you’ll need to negotiate to summit. Not the steep drop in the left hand side.

Image showing part of the ridge line you’ll need to negotiate to summit. Not the steep drop in the left hand side.

Pocaterra Ridge

Time: 6 - 7 hours

Distance: 11 km point to point (You’ll need to either have two cars or hitch a ride back to the start point)

Elevation Gain: 730 meters

Access: The trail is best started from the Highwood Pass parking lot, as this way you’ll minimise your up hill walking a little. This parking lot is on Highway 40 approximately 50 minutes south of the Trans Canada Highway. At the north end of the parking lot you’ll see a gravel trail, follow it across the foot bridge and you’ll see a sign asking that hikers keep to the established trails. The trail will be just to the left of the sign.

Pocaterra Ridge has to be one of my favourite trails in the Kananaskis region. In general Kananaskis is stunning but this ridge gives you the best vantage points of some of the most incredible peaks and rock formations you’ll ever see.

Once you’ve found the trail as described above you’ll be able to follow this path until you reach a small tarn. After this point the trail forks; left to Pocaterra Cirque but keep right to continue on to the ridge. The first ascent is the steepest of the trip but you are rewarded with incredible views.

From this point the trail is fairly obvious as you are simply following the ridge line up several other small summits.

The ridge line fading into the distance.

The ridge line fading into the distance.

In the foreground is the ridge line you’ll follow up and down to several smaller summits.

In the foreground is the ridge line you’ll follow up and down to several smaller summits.

Once you’ve followed this ridge line for some time it will slowly start to descend into the woods. The trail is relatively straight forward and the ridge line runs pretty much parallel to Highway 40 the entire way and this is where you are looking to end your hike. If you’ve come out the right way you’ll be across the road from Little Highwood Pass parking lot. If you’ve managed to bring two cars you should look to leave one at each end to save yourself the walk back. If you only have one vehicle you’ll need to either walk the 7km or hitch a ride back to your start point.

This hike is most scenic during the fall where you have fields of larch trees adding even more to the impressive scenery. However at this time of year weather can be even more unpredictable than usual so be prepared for snow, wind, rain, heat and more!

The larch trees add to an already stunning landscape.

The larch trees add to an already stunning landscape.

A blizzard sets in as we make our way along the ridge.

A blizzard sets in as we make our way along the ridge.

Blending Light and Time

Intro

I recently posted a couple of pictures that use a sort of time blending technique and I had a few people ask how it was done, so here it is!

The effect can be used to combine multiple different light conditions or times of day in to one single image to allow for more dynamic landscape shots.

In this tutorial I’ll be going over a couple of example images to show you what’s possible.

Equipment

The best thing about this technique is you don’t really need any fancy equipment, you do however need a lot of patience!

Tripod: This is the most important thing, you’ll be setting up a shot and staying put for an hour or two so you’ll need a sturdy tripod that can hold your frame for that whole duration.

Camera and Lens: Any camera and lens will work for this technique, a camera that can shoot raw files will give you the best results though.

Software: For this technique we’ll be combining multiple images, I find Photoshop is the best for this but there are multiple other options out there.

Technique

With this technique what you're looking to do is combine multiple times of day into one frame. Most commonly this would be a combination of all/some of the following: blue hour, golden hour, sunrise, sunset and twilight.

This will give you fantastic warm light on your shot, colour in the sky, as well as lights on in any buildings and towns in the frame. I find this technique works best with images that include some form of man made structures as well as impressive natural landscapes.

Be sure to make sure your tripod is locked off and is in a safe place where it won’t fall or get knocked, you’ll need to take multiple pictures from the exact same position.

The image above is a result from blending 3 different images over a time frame of close to two hours.

The image above is a result from blending 3 different images over a time frame of close to two hours.

The three images I combined to produce the final result above.

The three images I combined to produce the final result above.

The easiest way to explain this process is by using the examples above. Image A was shot during the golden hour to get some good light on the mountain tops. Image B was shot around 20 minutes later to get some nice alpine glow in the sky as well as a good exposure for the darker parts of the town. Image C was shot during civil twilight, so not quite pitch black but dark enough to pick up lots of lights in town. These were all combined in Photoshop.

LightBlend.jpg

Firstly I loaded the images in to Photoshop. In step one I have loaded two in as layers, the base image (Image B) at the bottom and Image C on top. To combine these two images I simply select layer 1 (image C) and then select ‘Lighten’ in the layer blend mode drop down menu (highlighted in yellow) as seen in step 2. This means that only the parts of the image that are lighter than the one below it will show through. This is a super simple way to combine lights or multiple light trails into an image.

Adding in image A is a littler trickier. The only aspects of image A I wanted to include in the final edit was the light cast upon the mountain range. If I was to only use the ‘Lighten’ option, like before, I would also be able to see the blown out sky in Image A on my final blend. To overcome this I had to uses a mixture of blend modes and masks.

Masks are very easy to create in Photoshop and not too difficult to learn to use effectively. To create a mask simply click a layer and then click the mask button at the bottom of your layers panel as highlighted in yellow in Step 3. This will then create a small white box to the right of the picture preview, you can then use a mixture of techniques to select areas and mask out certain sections. With the brush tool selected you can paint with black to block sections out and white to add sections in. As you can see on Layer 2 in Step 3 I have used a mask and black paintbrush to remove the over exposed areas that I didn’t need.

After these blending steps I then go through my usual steps of adjustments to colour, contrast and sharpness.

Example 2

The ‘Lighten’ blend mode on your layers panel can easily be used to add in extra light trails from cars or any light painting you may have done. To collect the images you’ll need to use a tripod and grab a couple of shots. One from a golden hour/sunset and several a little while later. You’ll need to wait for it to get dark enough for cars to have their lights on and for you to be able to shoot a long enough exposure to get the length of trails you require.

MountCookFB1-4.jpg

The 4 images above were combined using the previously mentioned ‘Lighten’ Blend Mode technique. Image 1 is the base image with some nice glow in the sky and some good light on the mountain top. Images 2, 3 and 4 have different light trails in different colours in different parts of the road. These images were all layered on top of each other in Photoshop with 1 being at the bottom. Images 2, 3 and 4 were then selected and changed to the ‘Lighten’ blend mode previously mentioned, this only allows for the brighter parts (in this case the light trails) to be visible. Again masking can be used to fine tune what does and doesn’t shine through.

After a series of other colour and contrast adjustments, I then sharpened and cleaned up the image to give the result below.

Mount Cook

I hope that goes some way to helping you understand the process. Once you try it out it isn’t so difficult, so get creative and give it a go! If you’ve managed to make it this far and have any further questions or anything else you’d like me to do future blog posts on feel free to leave a comment or get in touch!