Intro
I recently posted a couple of pictures that use a sort of time blending technique and I had a few people ask how it was done, so here it is!
The effect can be used to combine multiple different light conditions or times of day in to one single image to allow for more dynamic landscape shots.
In this tutorial I’ll be going over a couple of example images to show you what’s possible.
Equipment
The best thing about this technique is you don’t really need any fancy equipment, you do however need a lot of patience!
Tripod: This is the most important thing, you’ll be setting up a shot and staying put for an hour or two so you’ll need a sturdy tripod that can hold your frame for that whole duration.
Camera and Lens: Any camera and lens will work for this technique, a camera that can shoot raw files will give you the best results though.
Software: For this technique we’ll be combining multiple images, I find Photoshop is the best for this but there are multiple other options out there.
Technique
With this technique what you're looking to do is combine multiple times of day into one frame. Most commonly this would be a combination of all/some of the following: blue hour, golden hour, sunrise, sunset and twilight.
This will give you fantastic warm light on your shot, colour in the sky, as well as lights on in any buildings and towns in the frame. I find this technique works best with images that include some form of man made structures as well as impressive natural landscapes.
Be sure to make sure your tripod is locked off and is in a safe place where it won’t fall or get knocked, you’ll need to take multiple pictures from the exact same position.
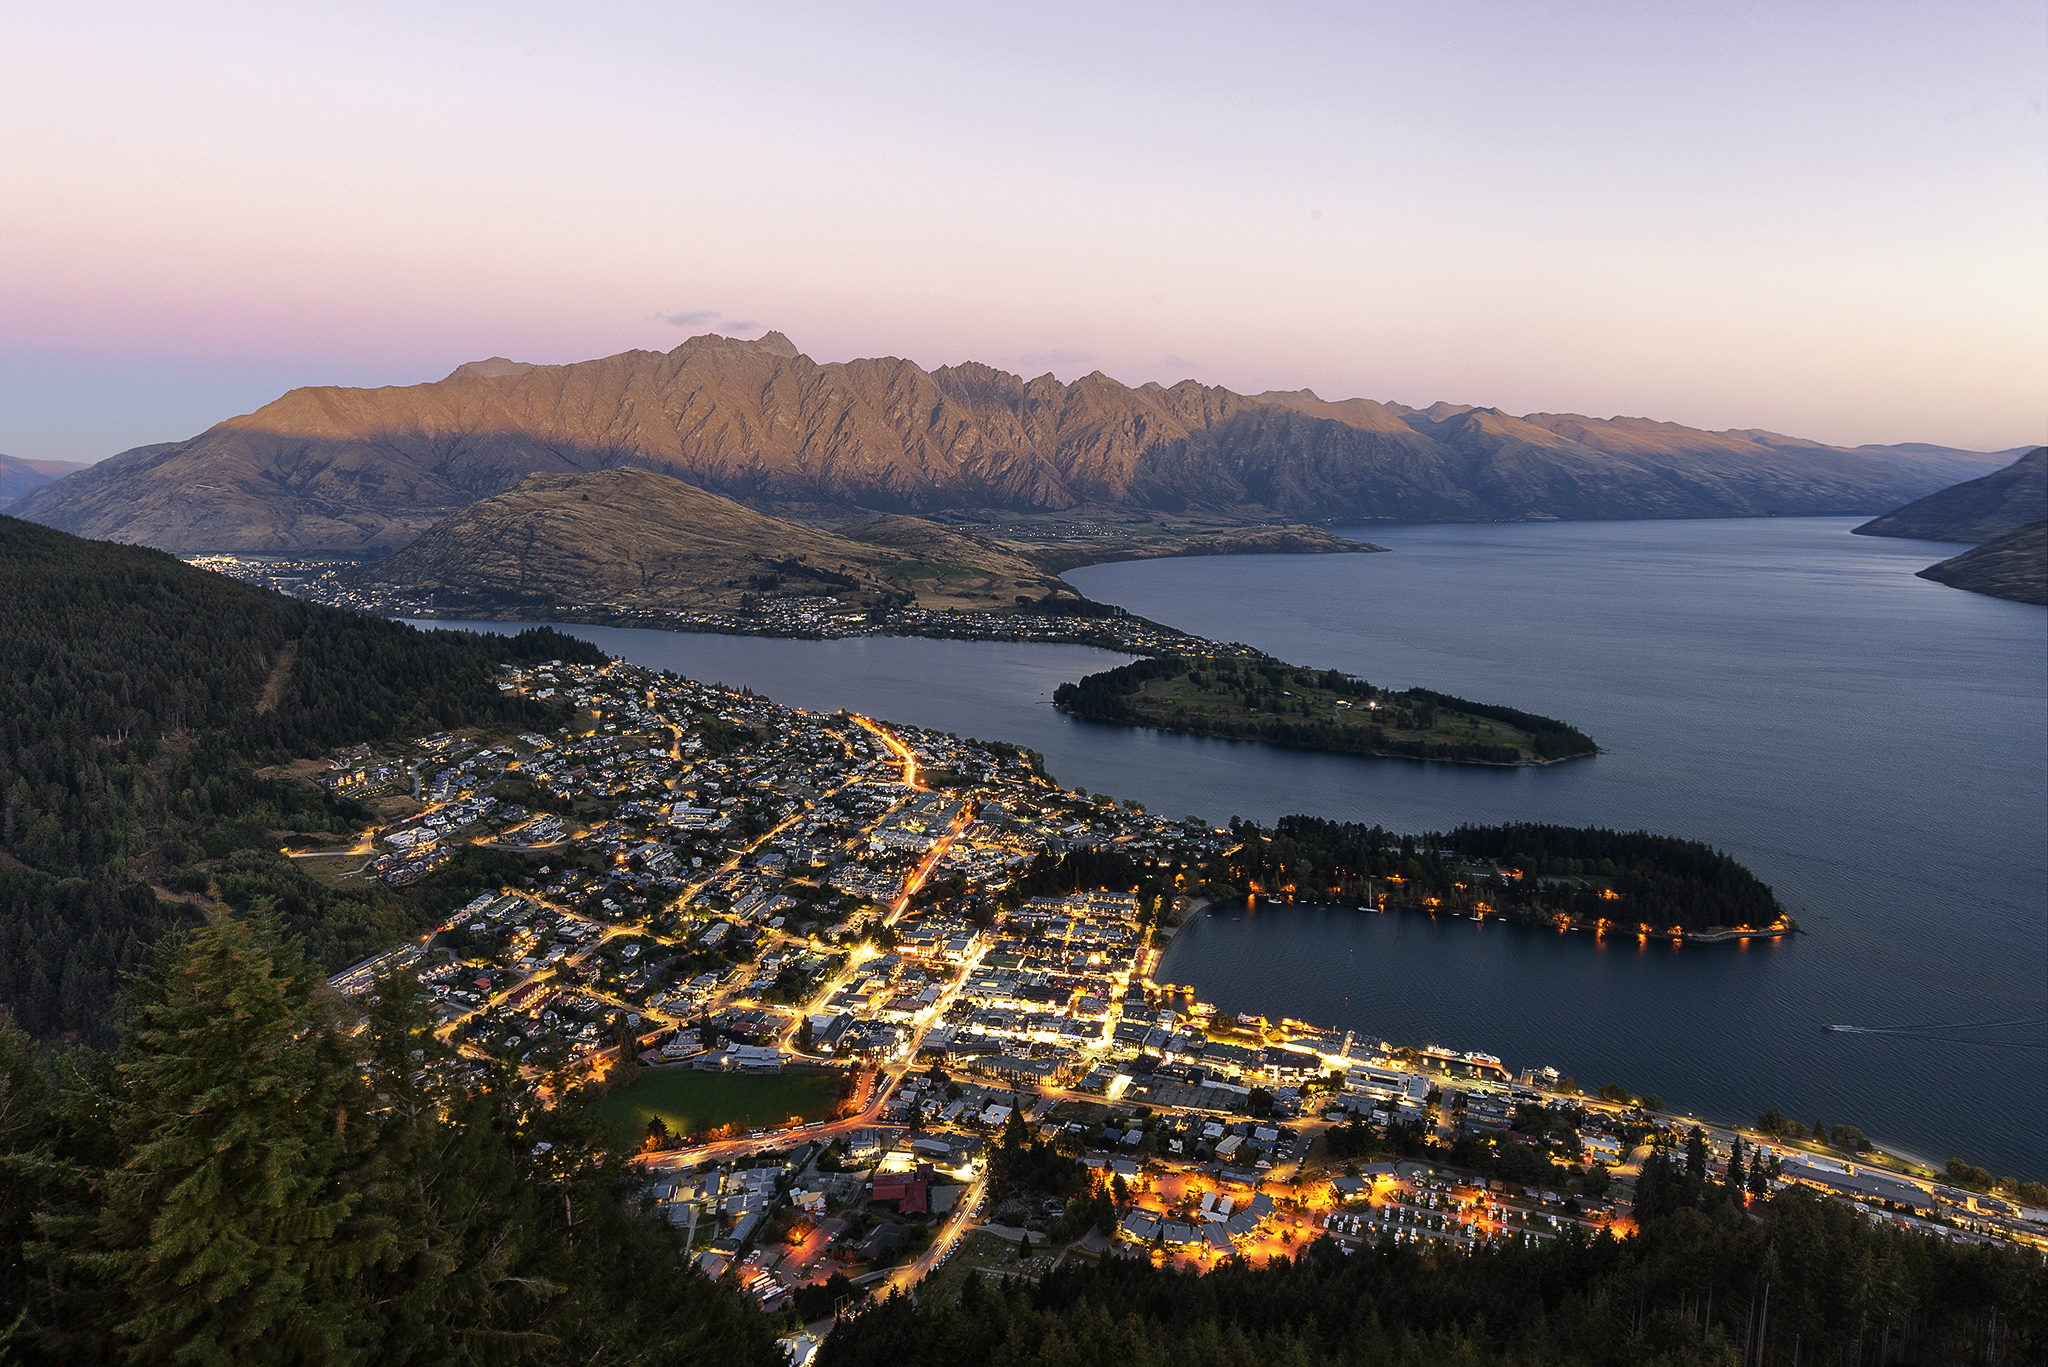
The image above is a result from blending 3 different images over a time frame of close to two hours.

The three images I combined to produce the final result above.
The easiest way to explain this process is by using the examples above. Image A was shot during the golden hour to get some good light on the mountain tops. Image B was shot around 20 minutes later to get some nice alpine glow in the sky as well as a good exposure for the darker parts of the town. Image C was shot during civil twilight, so not quite pitch black but dark enough to pick up lots of lights in town. These were all combined in Photoshop.

Firstly I loaded the images in to Photoshop. In step one I have loaded two in as layers, the base image (Image B) at the bottom and Image C on top. To combine these two images I simply select layer 1 (image C) and then select ‘Lighten’ in the layer blend mode drop down menu (highlighted in yellow) as seen in step 2. This means that only the parts of the image that are lighter than the one below it will show through. This is a super simple way to combine lights or multiple light trails into an image.
Adding in image A is a littler trickier. The only aspects of image A I wanted to include in the final edit was the light cast upon the mountain range. If I was to only use the ‘Lighten’ option, like before, I would also be able to see the blown out sky in Image A on my final blend. To overcome this I had to uses a mixture of blend modes and masks.
Masks are very easy to create in Photoshop and not too difficult to learn to use effectively. To create a mask simply click a layer and then click the mask button at the bottom of your layers panel as highlighted in yellow in Step 3. This will then create a small white box to the right of the picture preview, you can then use a mixture of techniques to select areas and mask out certain sections. With the brush tool selected you can paint with black to block sections out and white to add sections in. As you can see on Layer 2 in Step 3 I have used a mask and black paintbrush to remove the over exposed areas that I didn’t need.
After these blending steps I then go through my usual steps of adjustments to colour, contrast and sharpness.
Example 2
The ‘Lighten’ blend mode on your layers panel can easily be used to add in extra light trails from cars or any light painting you may have done. To collect the images you’ll need to use a tripod and grab a couple of shots. One from a golden hour/sunset and several a little while later. You’ll need to wait for it to get dark enough for cars to have their lights on and for you to be able to shoot a long enough exposure to get the length of trails you require.

The 4 images above were combined using the previously mentioned ‘Lighten’ Blend Mode technique. Image 1 is the base image with some nice glow in the sky and some good light on the mountain top. Images 2, 3 and 4 have different light trails in different colours in different parts of the road. These images were all layered on top of each other in Photoshop with 1 being at the bottom. Images 2, 3 and 4 were then selected and changed to the ‘Lighten’ blend mode previously mentioned, this only allows for the brighter parts (in this case the light trails) to be visible. Again masking can be used to fine tune what does and doesn’t shine through.
After a series of other colour and contrast adjustments, I then sharpened and cleaned up the image to give the result below.

I hope that goes some way to helping you understand the process. Once you try it out it isn’t so difficult, so get creative and give it a go! If you’ve managed to make it this far and have any further questions or anything else you’d like me to do future blog posts on feel free to leave a comment or get in touch!