Over 100 Photography locations in Banff, Lake Louise, Moraine Lake, Canmore and Icefields Parkway in easy to use guides, download today:
DOWNLOAD HERE
INTRO
Have you just moved to Banff or are you planning a visit? Are you looking to get out and shoot but don’t have your own transport? I was exactly the same when I first moved to the town of Banff but was keen to get out to shoot. Unfortunately public transport won’t run early enough or late enough to capture sunset and sunrises around the town so you’ll need to use a little man power to get around.
There are a lot of incredible photography opportunities in Banff national park and the surrounding mountains. Some are buried deep in the backcountry or hours away by car, however some are much closer to town, these are the locations I’m going to share in this post, my favourite photography spots walkable from the town centre of Banff. There are a lot more than you might think especially if you’re prepared to put in a little bit of effort!
1) Banff Avenue
This one’s a given and one I’m sure you’d have worked out on your own! The main road in town is called Banff Avenue, this was purposely constructed to run north to south and perfectly line up with the impressive Cascade Mountain to the north. Almost all hotels sit along this road or are a short walk to it. You can jump out of bed shoot sunrise and be back at your hotel in time for breakfast with some amazing shots under your belt.
I’d recommend trying to shoot from as far back as the bridge on the south end of the road with a long lens. This will give some great perspective compression and make Cascade appear even larger than usual. You can see the difference in the two images below one shot at 35mm and one shot at 60mm from further back.

Shot at 35mm from just behind the famous fire hydrant which you’ll see in a lot of photographers images!

Banff Avenue shot from towards the south end of Banff Avenue at around 60mm. Notice how much larger the mountain looks?


During the summer of 2020 Banff Avenue was closed to traffic and planted with lots of beautiful flowers, this opened up the possibility for some creative compositions.
2) Cascade Gardens and the Parks Canada Building
Second on the list sits on the south end of Banff Avenue, opposite to that of Cascade mountain. These gardens are home to the impressive Parks Canada administration building as well as beautiful landscaping. From here there are lots of compositions to play with, depending on the time of year you visit you might be blessed with fresh flowers in full bloom or pure white snow and festive lights.


During winter the Cascade gardens are festively lit allowing for some great blue hour shots as seen above. Below there are two further compositions one shooting back towards Cascade Mountain and the last being taken from behind the Parks Canada building. If you walk around the back of the building, stand close to the edge of the woods and look north you’ll notice that the historic building aligns perfectly with Cascade Mountain, almost as if some clever architect planned it that way!


3) The Fairmont Banff Springs
This famous hotel was where it all started! Originally built by the Canadian Pacific Railway to draw people to the area it has now been rebuilt multiple times after going through several devastating fires. This location is a little further out of town but still easily walkable. Head south down Banff Avenue and take a left after the main bridge, if you like you can even walk alongside the bow river and keep an eye out for signs to the Fairmont.
The grand building is an impressive sight both inside and out and certainly worthy of a photograph or two!

4) Surprise Corner
Now you’re starting to use those legs! This spot is around a 20 minute, mainly uphill, walk from the town centre and offers great views over the Fairmont Hotel and Bow River. One of my favourite images from this spot was during some heavy snow fall, I love the fallen tree acting as a leading line leading your eye to the hotel in the background.

5) The Bow River
The Bow River runs around the outside of the town flowing from Vermilion Lakes, down the Bow Falls and continues on to Calgary. Not only does it allow for some great photography but there is also lots of opportunity for canoeing, paddle boarding and wildlife spotting.

This image was taken during summer months when the river was lower and not frozen. This allows for some smaller puddles to form on the rivers edge and provides great reflections. In frame is the pedestrian bridge and just behind me would be the main bridge coming off of Banff Avenue, in the distance is Mount Rundle . This spot is easily accessed from the foot path that runs along side the Bow River just to the left of frame and is only a few minutes walk from the town centre.
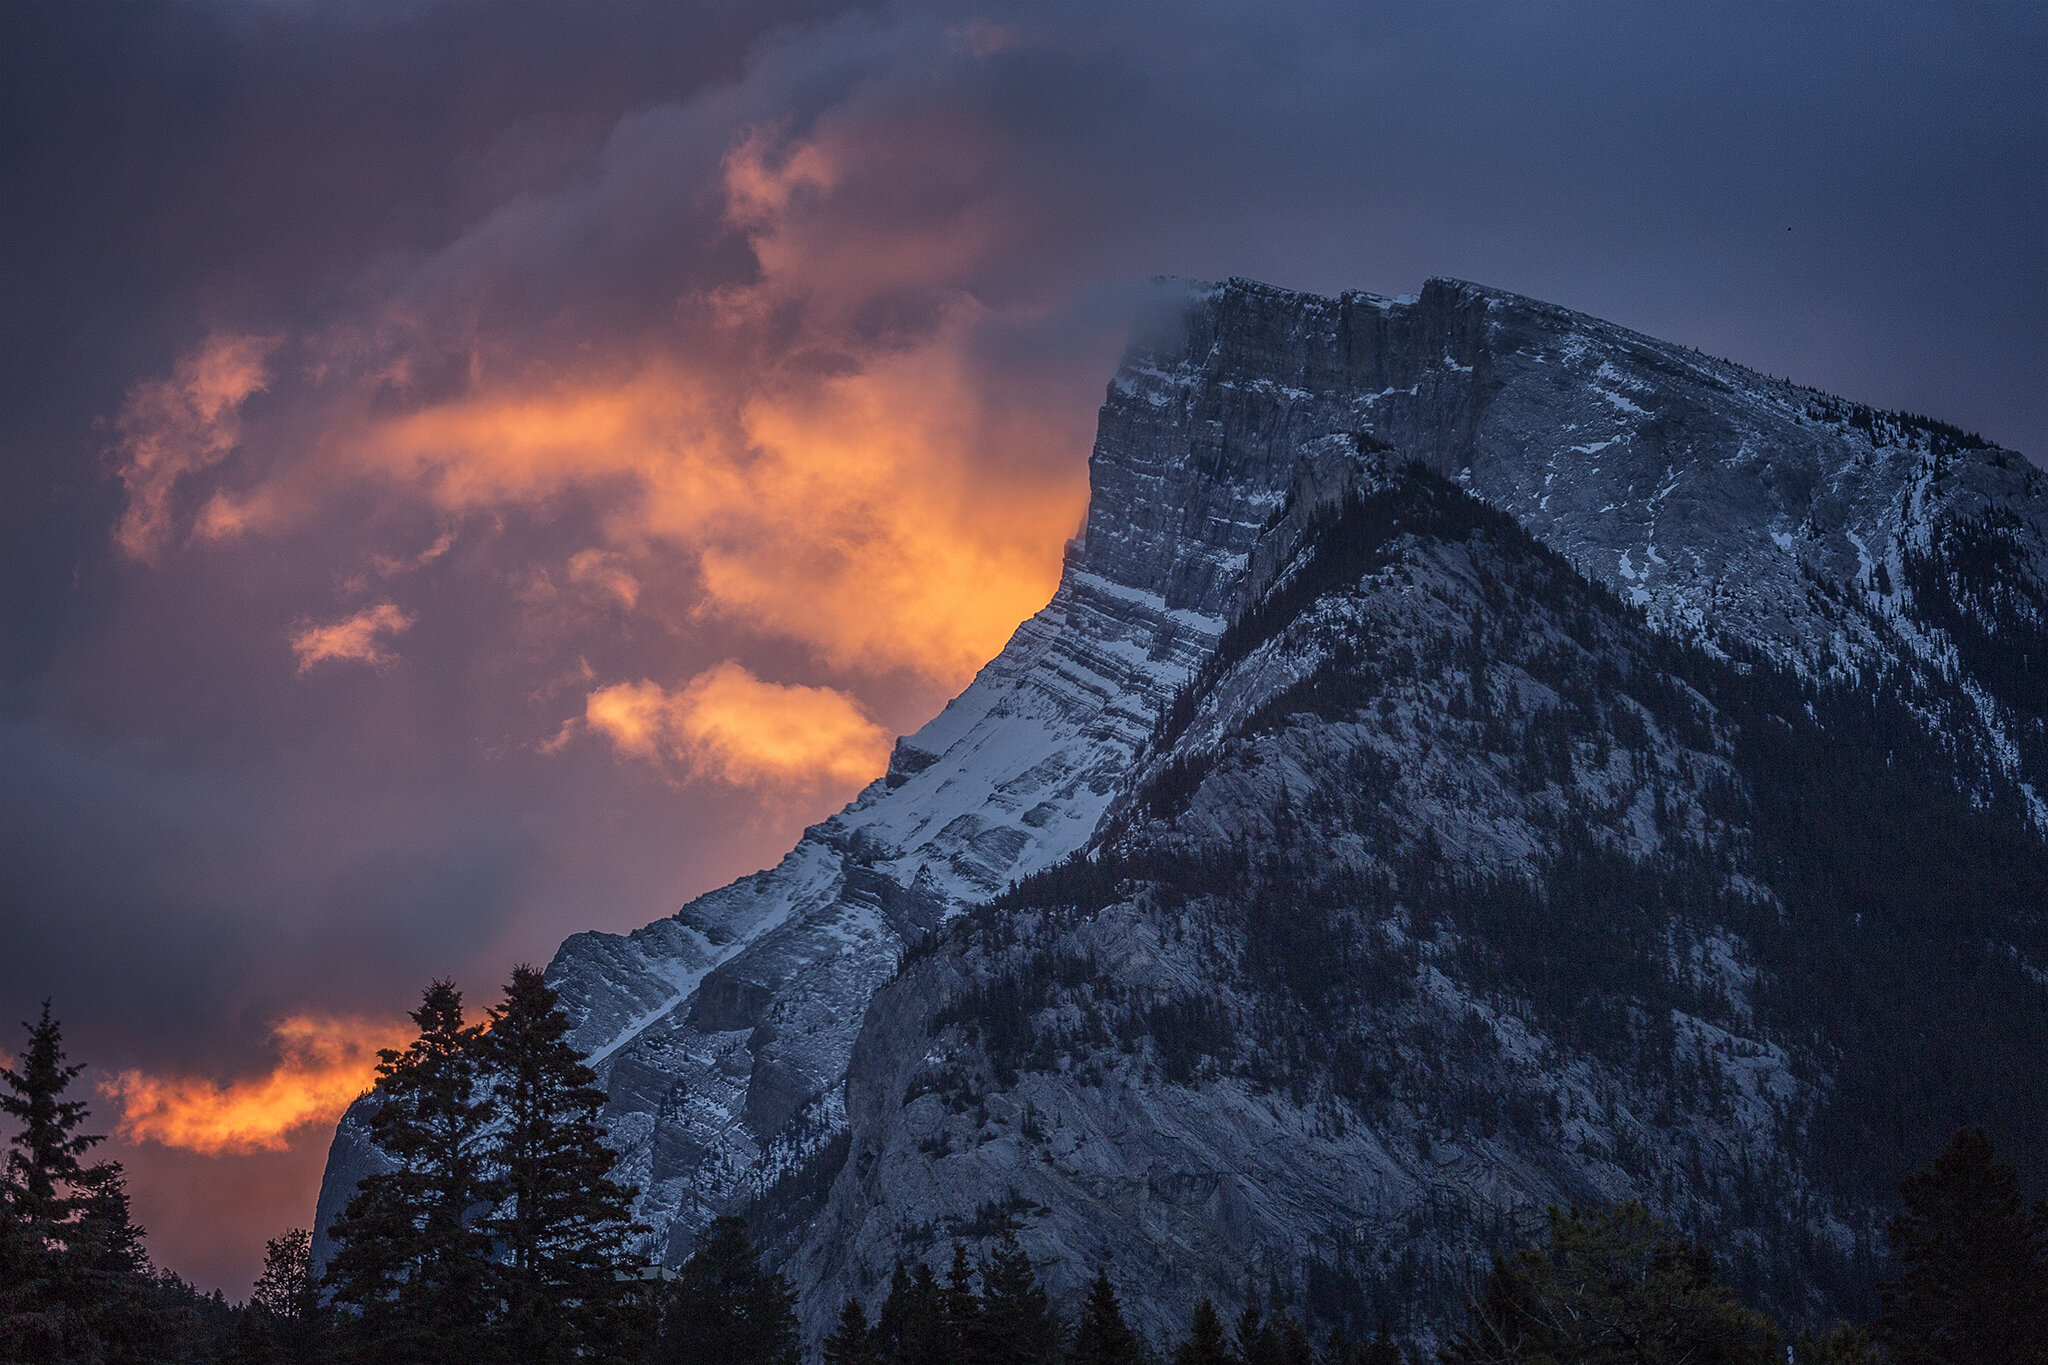
6) The Peak of Mount Rundle
Banff's second most famous mountain is visible from all over town and there are lots of locations to photograph it from. The peak has a distinctive shape to it and I was once told it’s one of the most tattooed mountains in the world! If you’re lucky enough you might be able to see this peak from your hotel balcony, if not you’ll be able to get a good view of it with a short walk from wherever you are as long as you’re staying locally. The clouds have a habit of photogenically peeling off of the top of the often snow covered peak. If you have a long lens and a bit of patience there are always some moody, dramatic shots to be had. This photo below was taken from the balcony of the flat I was living in at the time.
7) Tunnel Mountain
Now this location is a bit more of a walk than a lot of the others on this list but is more than achievable for people of all abilities. The Tunnel Mountain trail is approximately 4.5 km return with 266 metres of elevation gain, the trail starts on St Julien Road. There’s a car park at the bottom of the trail but as this is about walkable spots you can also easily walk to the trailhead. Starting from the centre of town walking to the trail head will add about 1km each way to your hike so make sure to account for that if you are planning to shoot for sunrise or sunset.
The trail is wide, well defined and well maintained with a steady incline. If hiking in winter I’d recommend taking some cleats as the path can get slippery, if you don’t have any you can rent some from Ultimate Sports where the staff will also be happy to point you in the right direction. Most people complete this hike at some point during their visit to Banff so why not take your camera and go for sunset and get some incredible views over the town below?

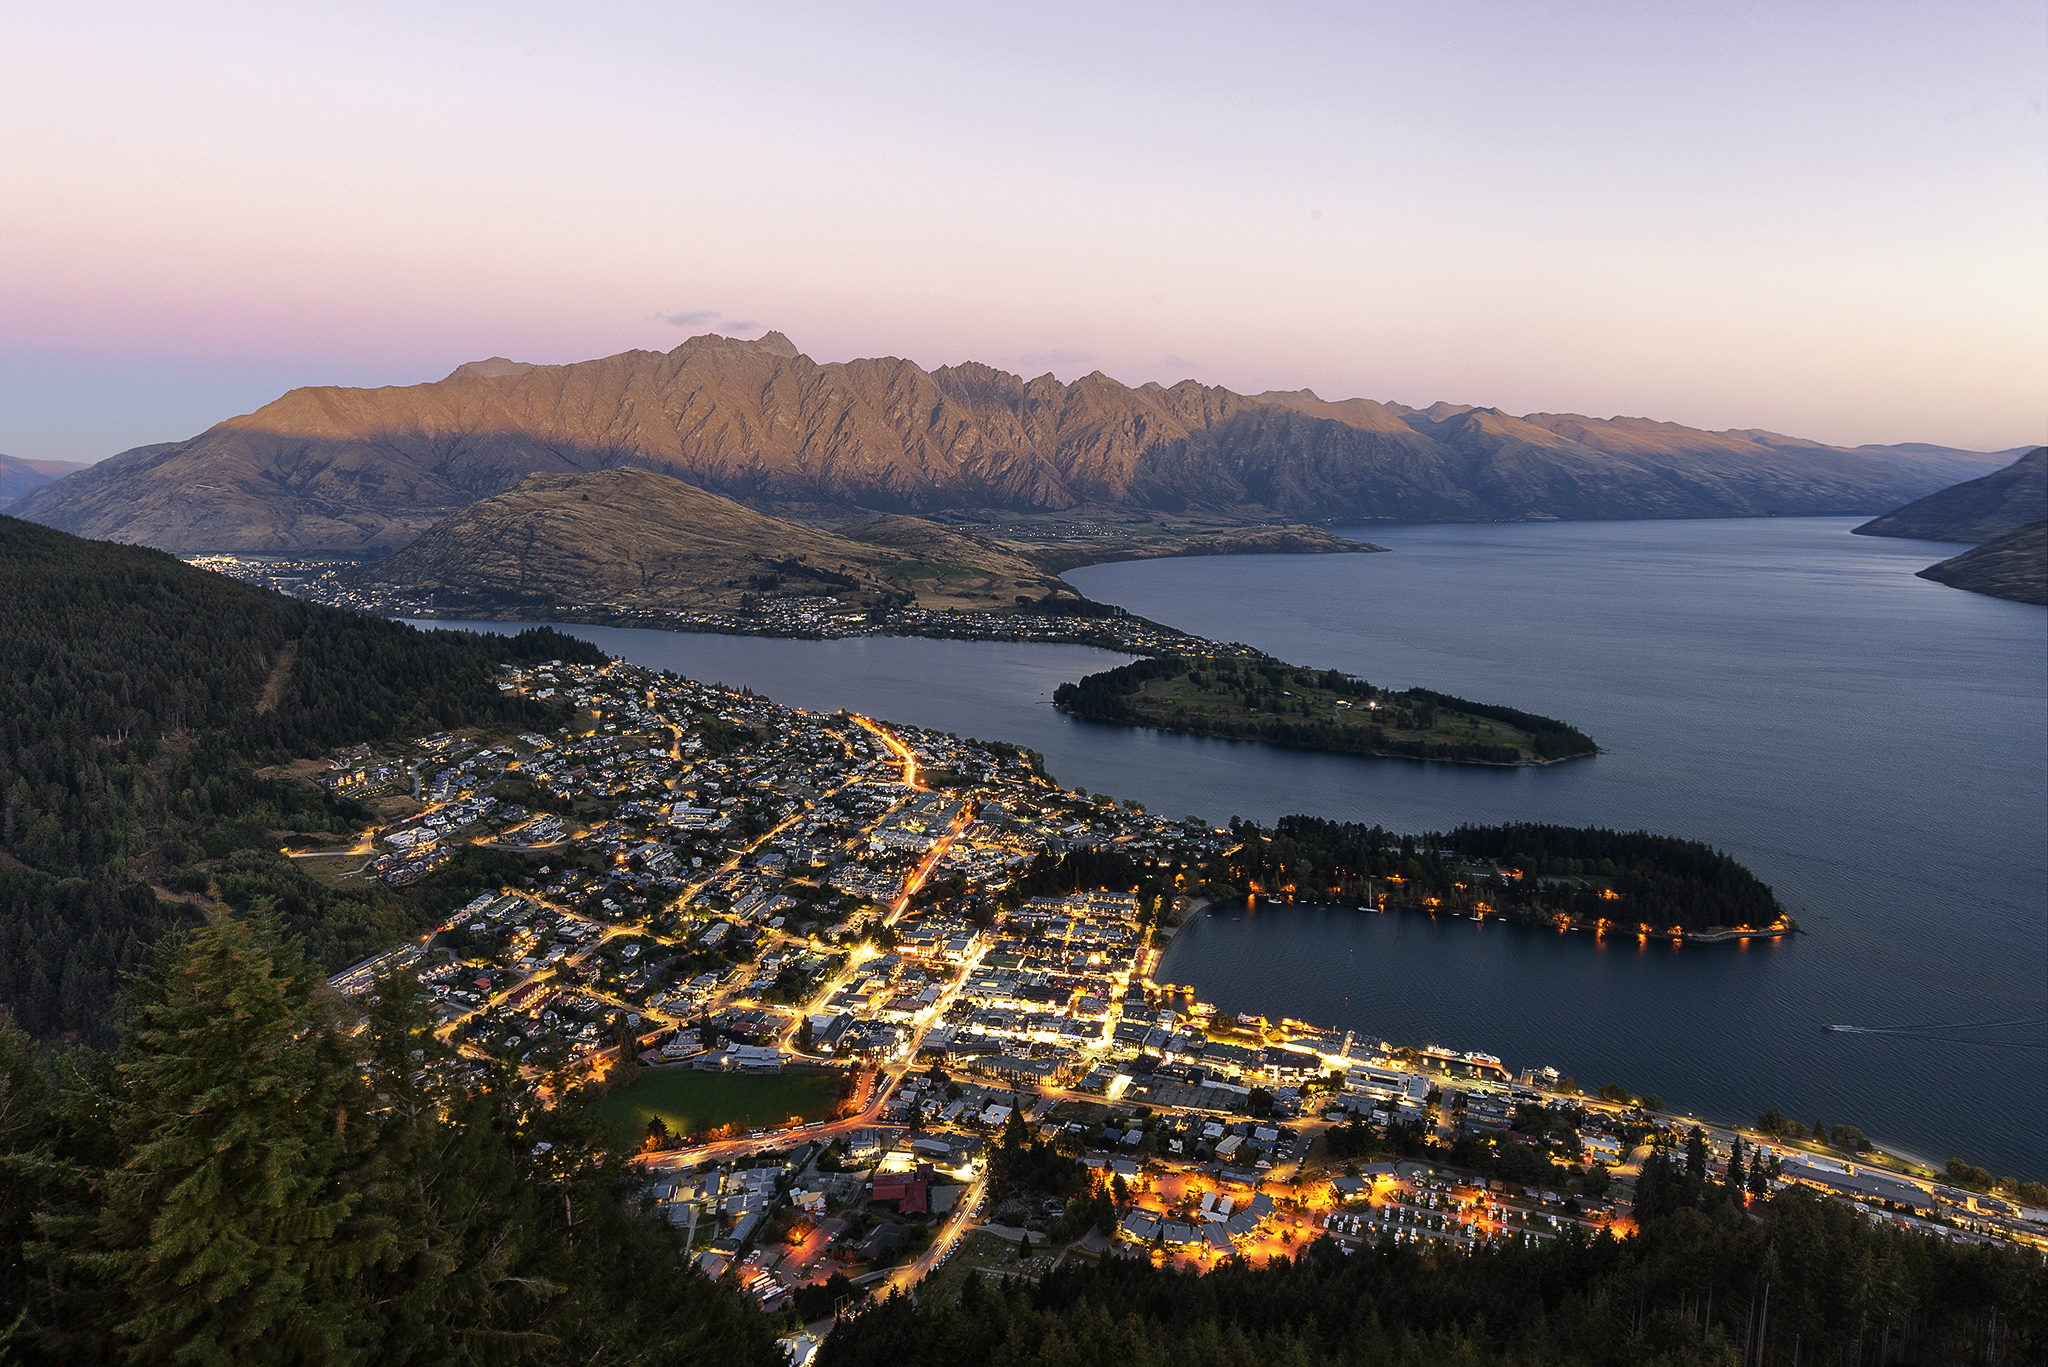
The town of Banff shot from Tunnel Mountain at sunset.
8) Vermilion Lakes
I couldn’t not include this location in this list! These lakes are about a 30 minute walk from the town centre but the walk is almost completely flat and along paved side walks making it a nice, easy stroll for most people. When I first moved to the town I often walked here from the other side of the bridge and it would take close to an hour however it was always more than worth it!
You’ll most likely bump in to a few other photographers whilst here due to the endless composition possibilities. During summer you’ll have great reflections of Mount Rundle and in winter the constant stream of warm water from the nearby thermal spring leaves an ever changing section of open water.

Vermilion Lakes before winter sets in. This was one of the first images I ever took in Banff and was one of the best sunrises I experienced.

During the winter months the shape of the open water always changes meaning no matter when you visit there are always unique compositions to be had.
Hopefully this list gives you enough insight in to what is possible within Banff by just using your legs to get around. Once you are able to travel further afield the possibilities really are endless, I’d suggest starting off by reading my other posts about my Top 5 Winter Photo Spots Near Banff and my recommendations of the Best Photo Spots On The Icefields Parkway.
Over 100 Photography locations in Banff, Lake Louise, Moraine Lake, Canmore and Icefields Parkway in easy to use guides, download today: DOWNLOAD HERE