The Berg Lake Trail, Mount Robson - All You Need to Know
The Berg Lake Trail in Mount Robson Provincial park reopened in the summer of 2025 after some pretty major trail renovations and should be added to your bucket list if it isn’t there already! This hike offers some of the best views and best photography of any multi-day hike in the Canadian Rockies. You’ll pass turquoise lakes with perfect reflections, impressive thundering waterfalls and hike under the shadow of the Canadian Rockies largest peak, Mount Robson all whilst hiking along incredibly well kept and easy to navigate trail.
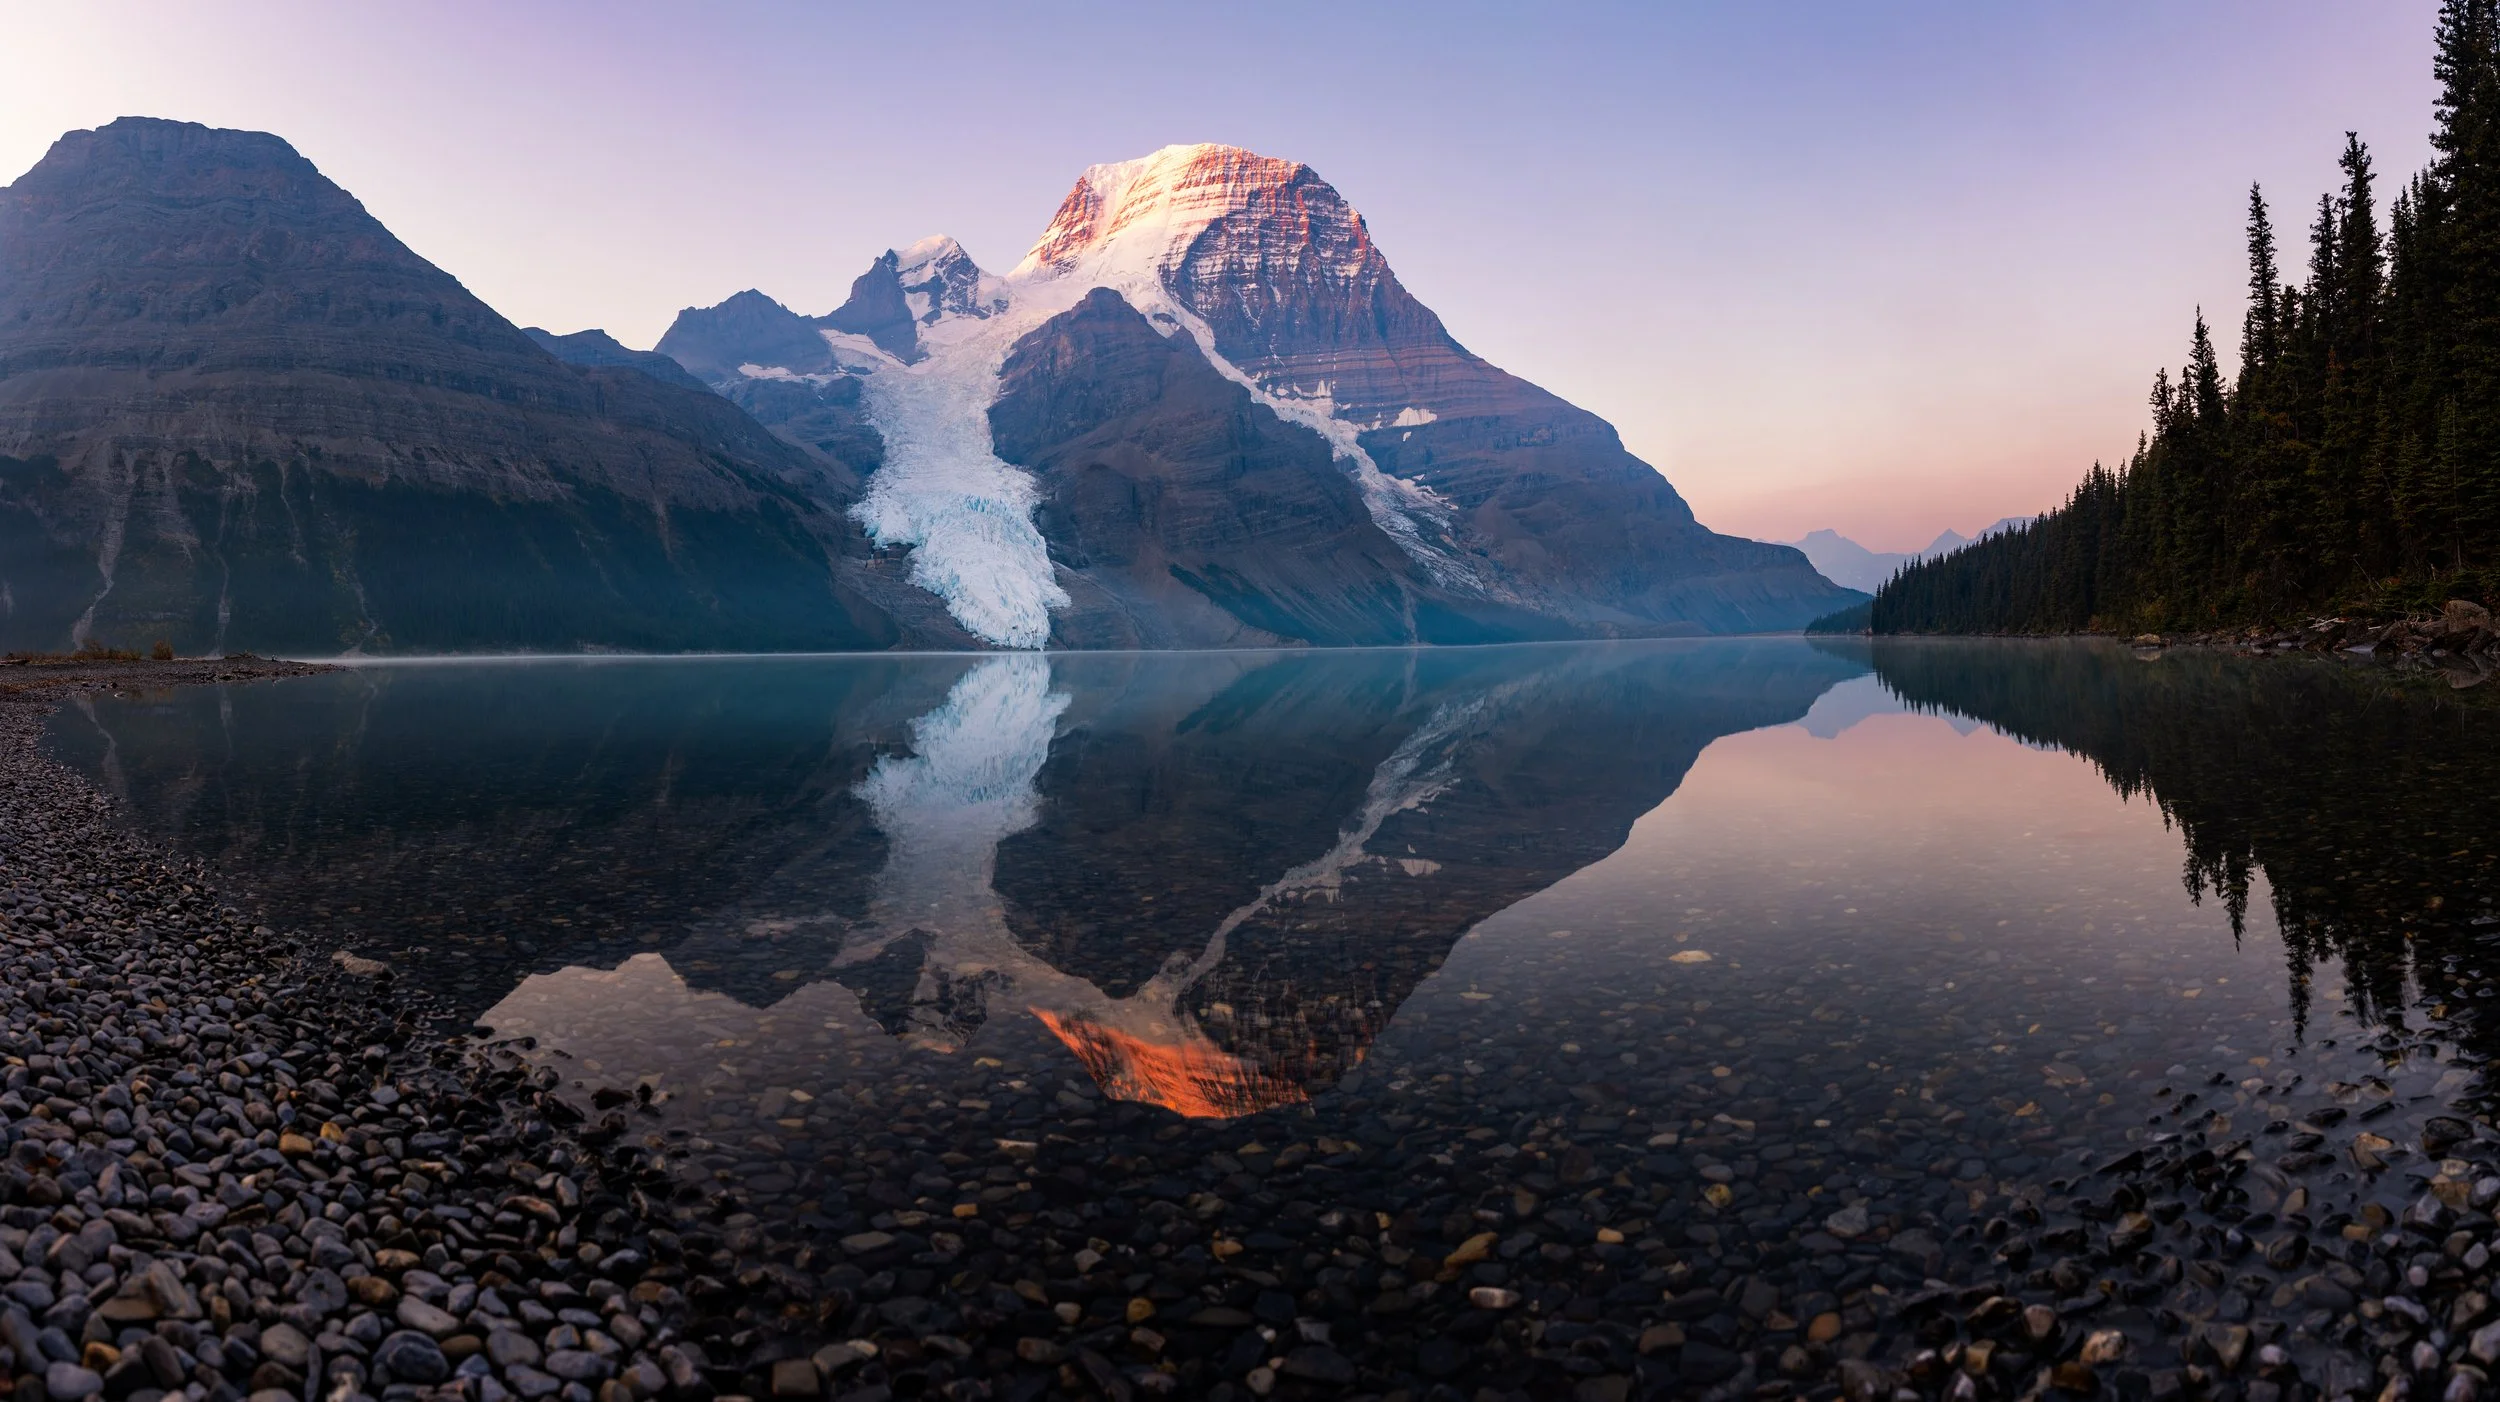
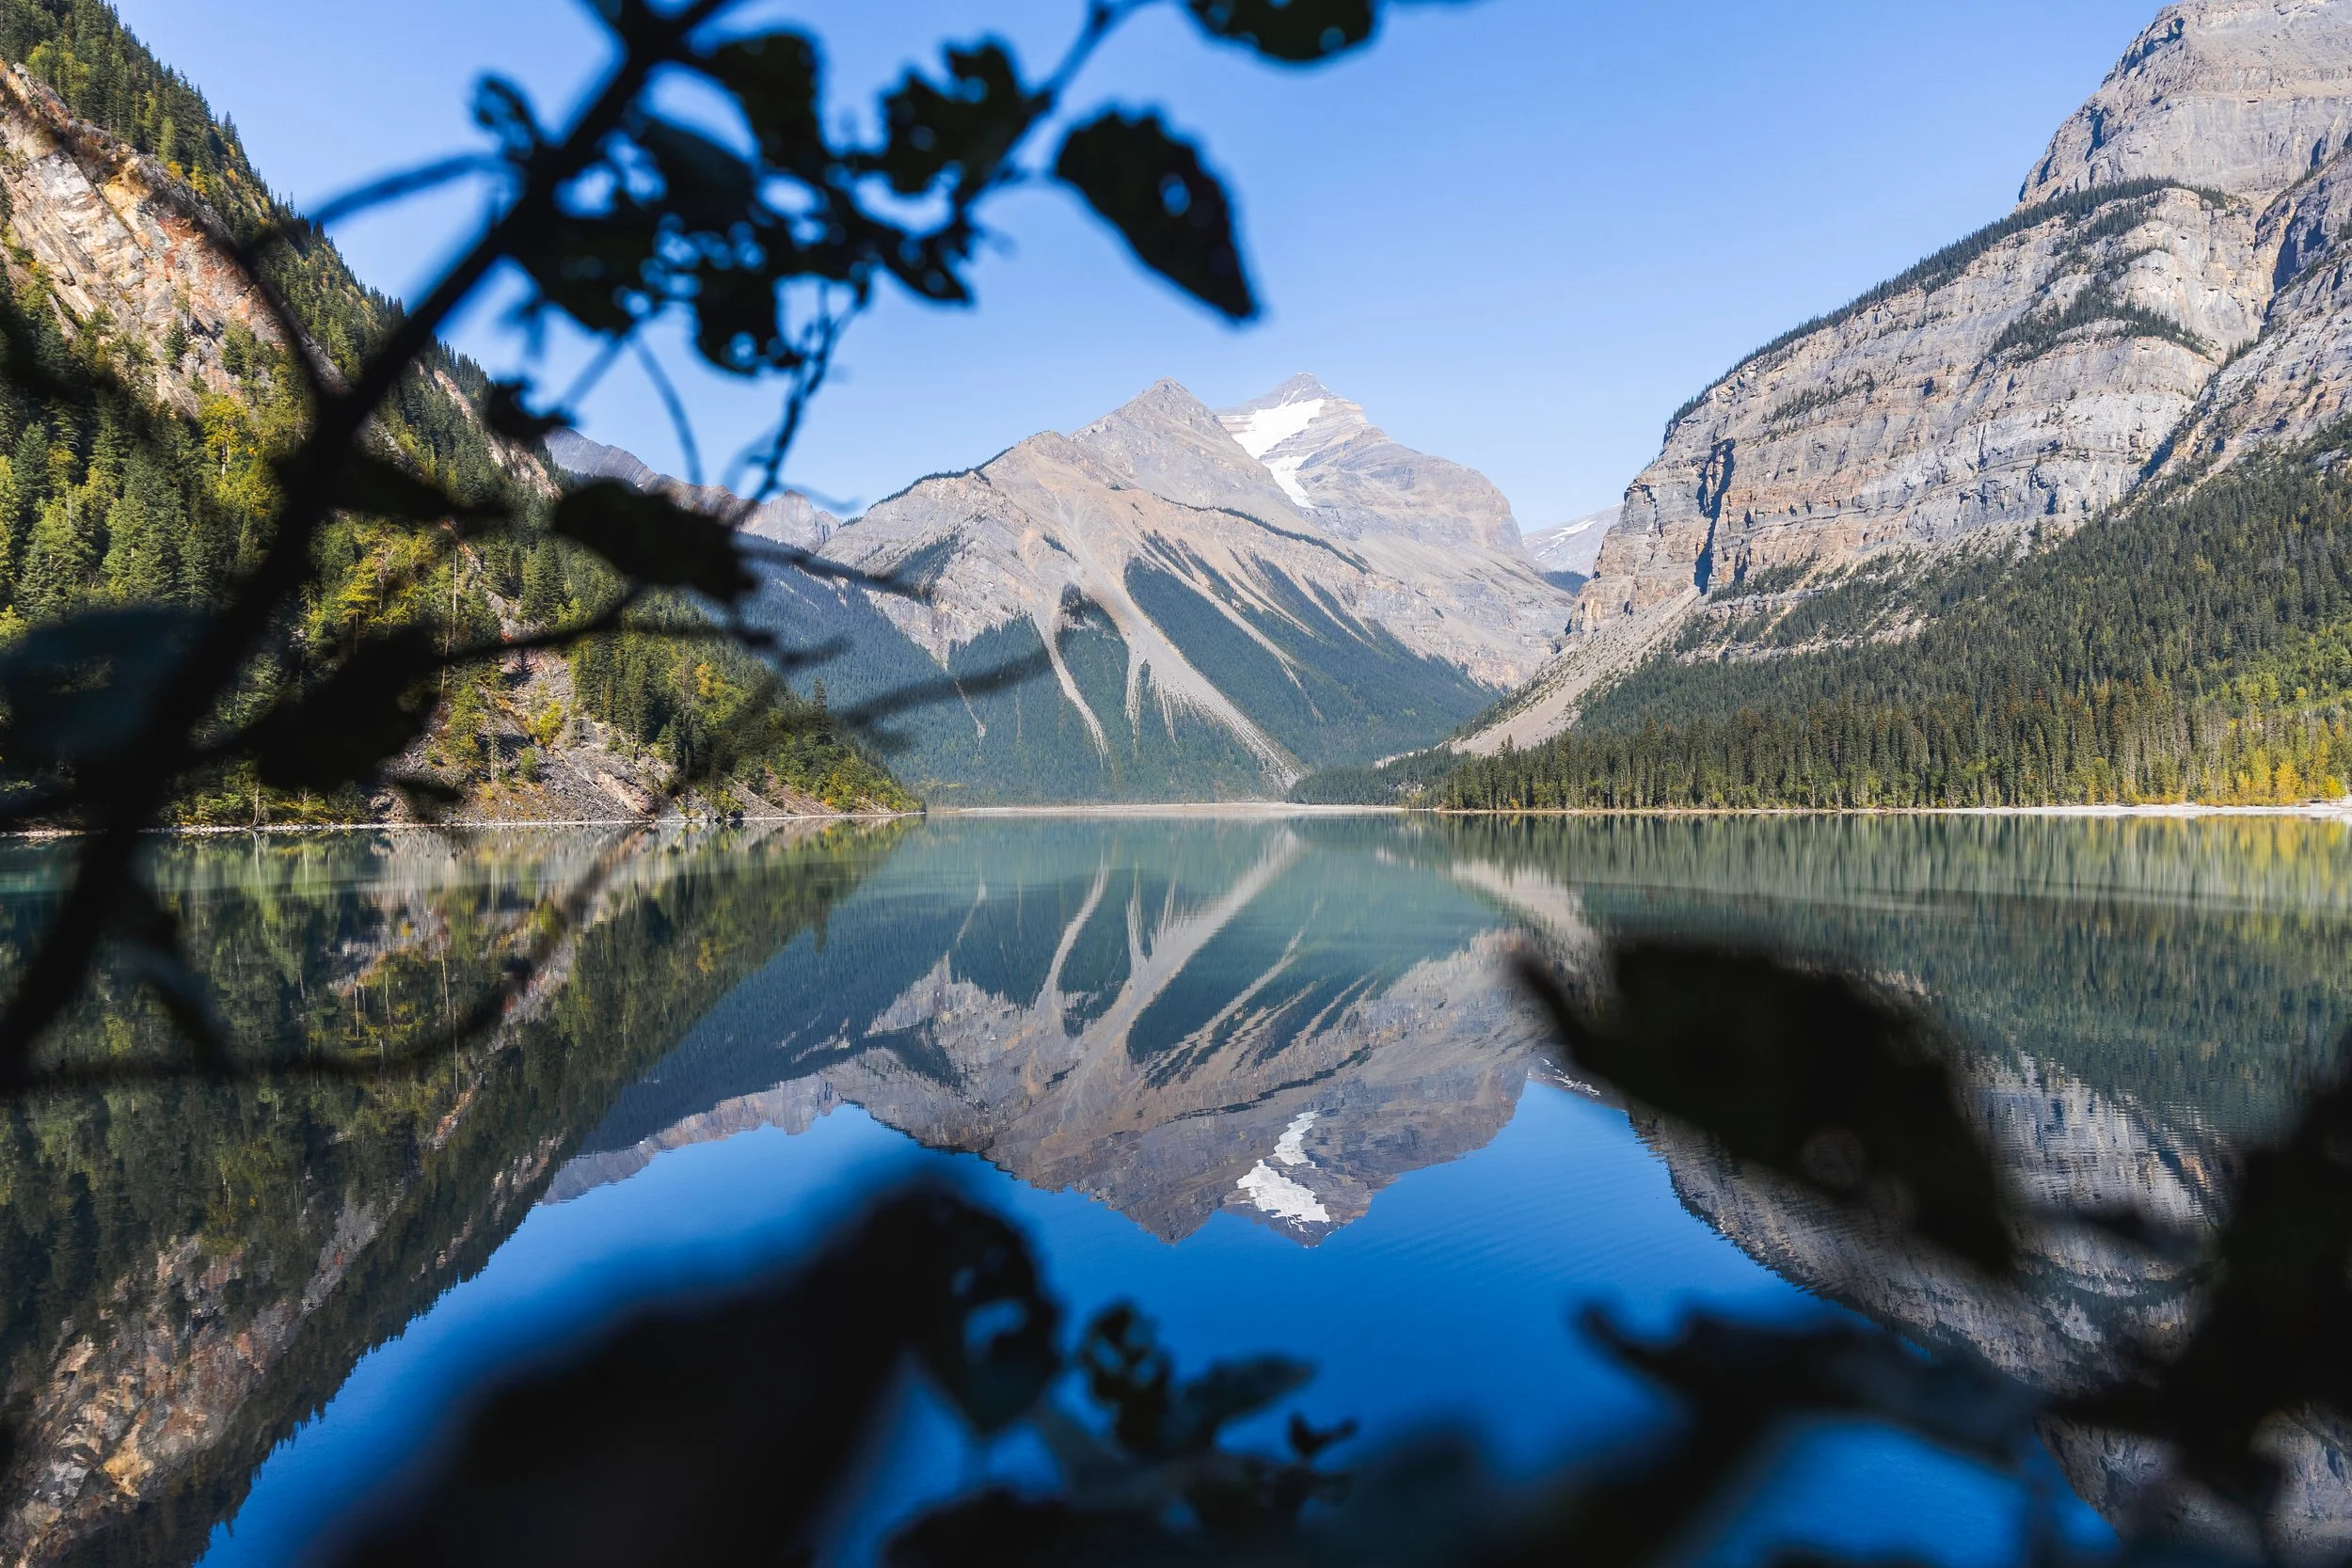
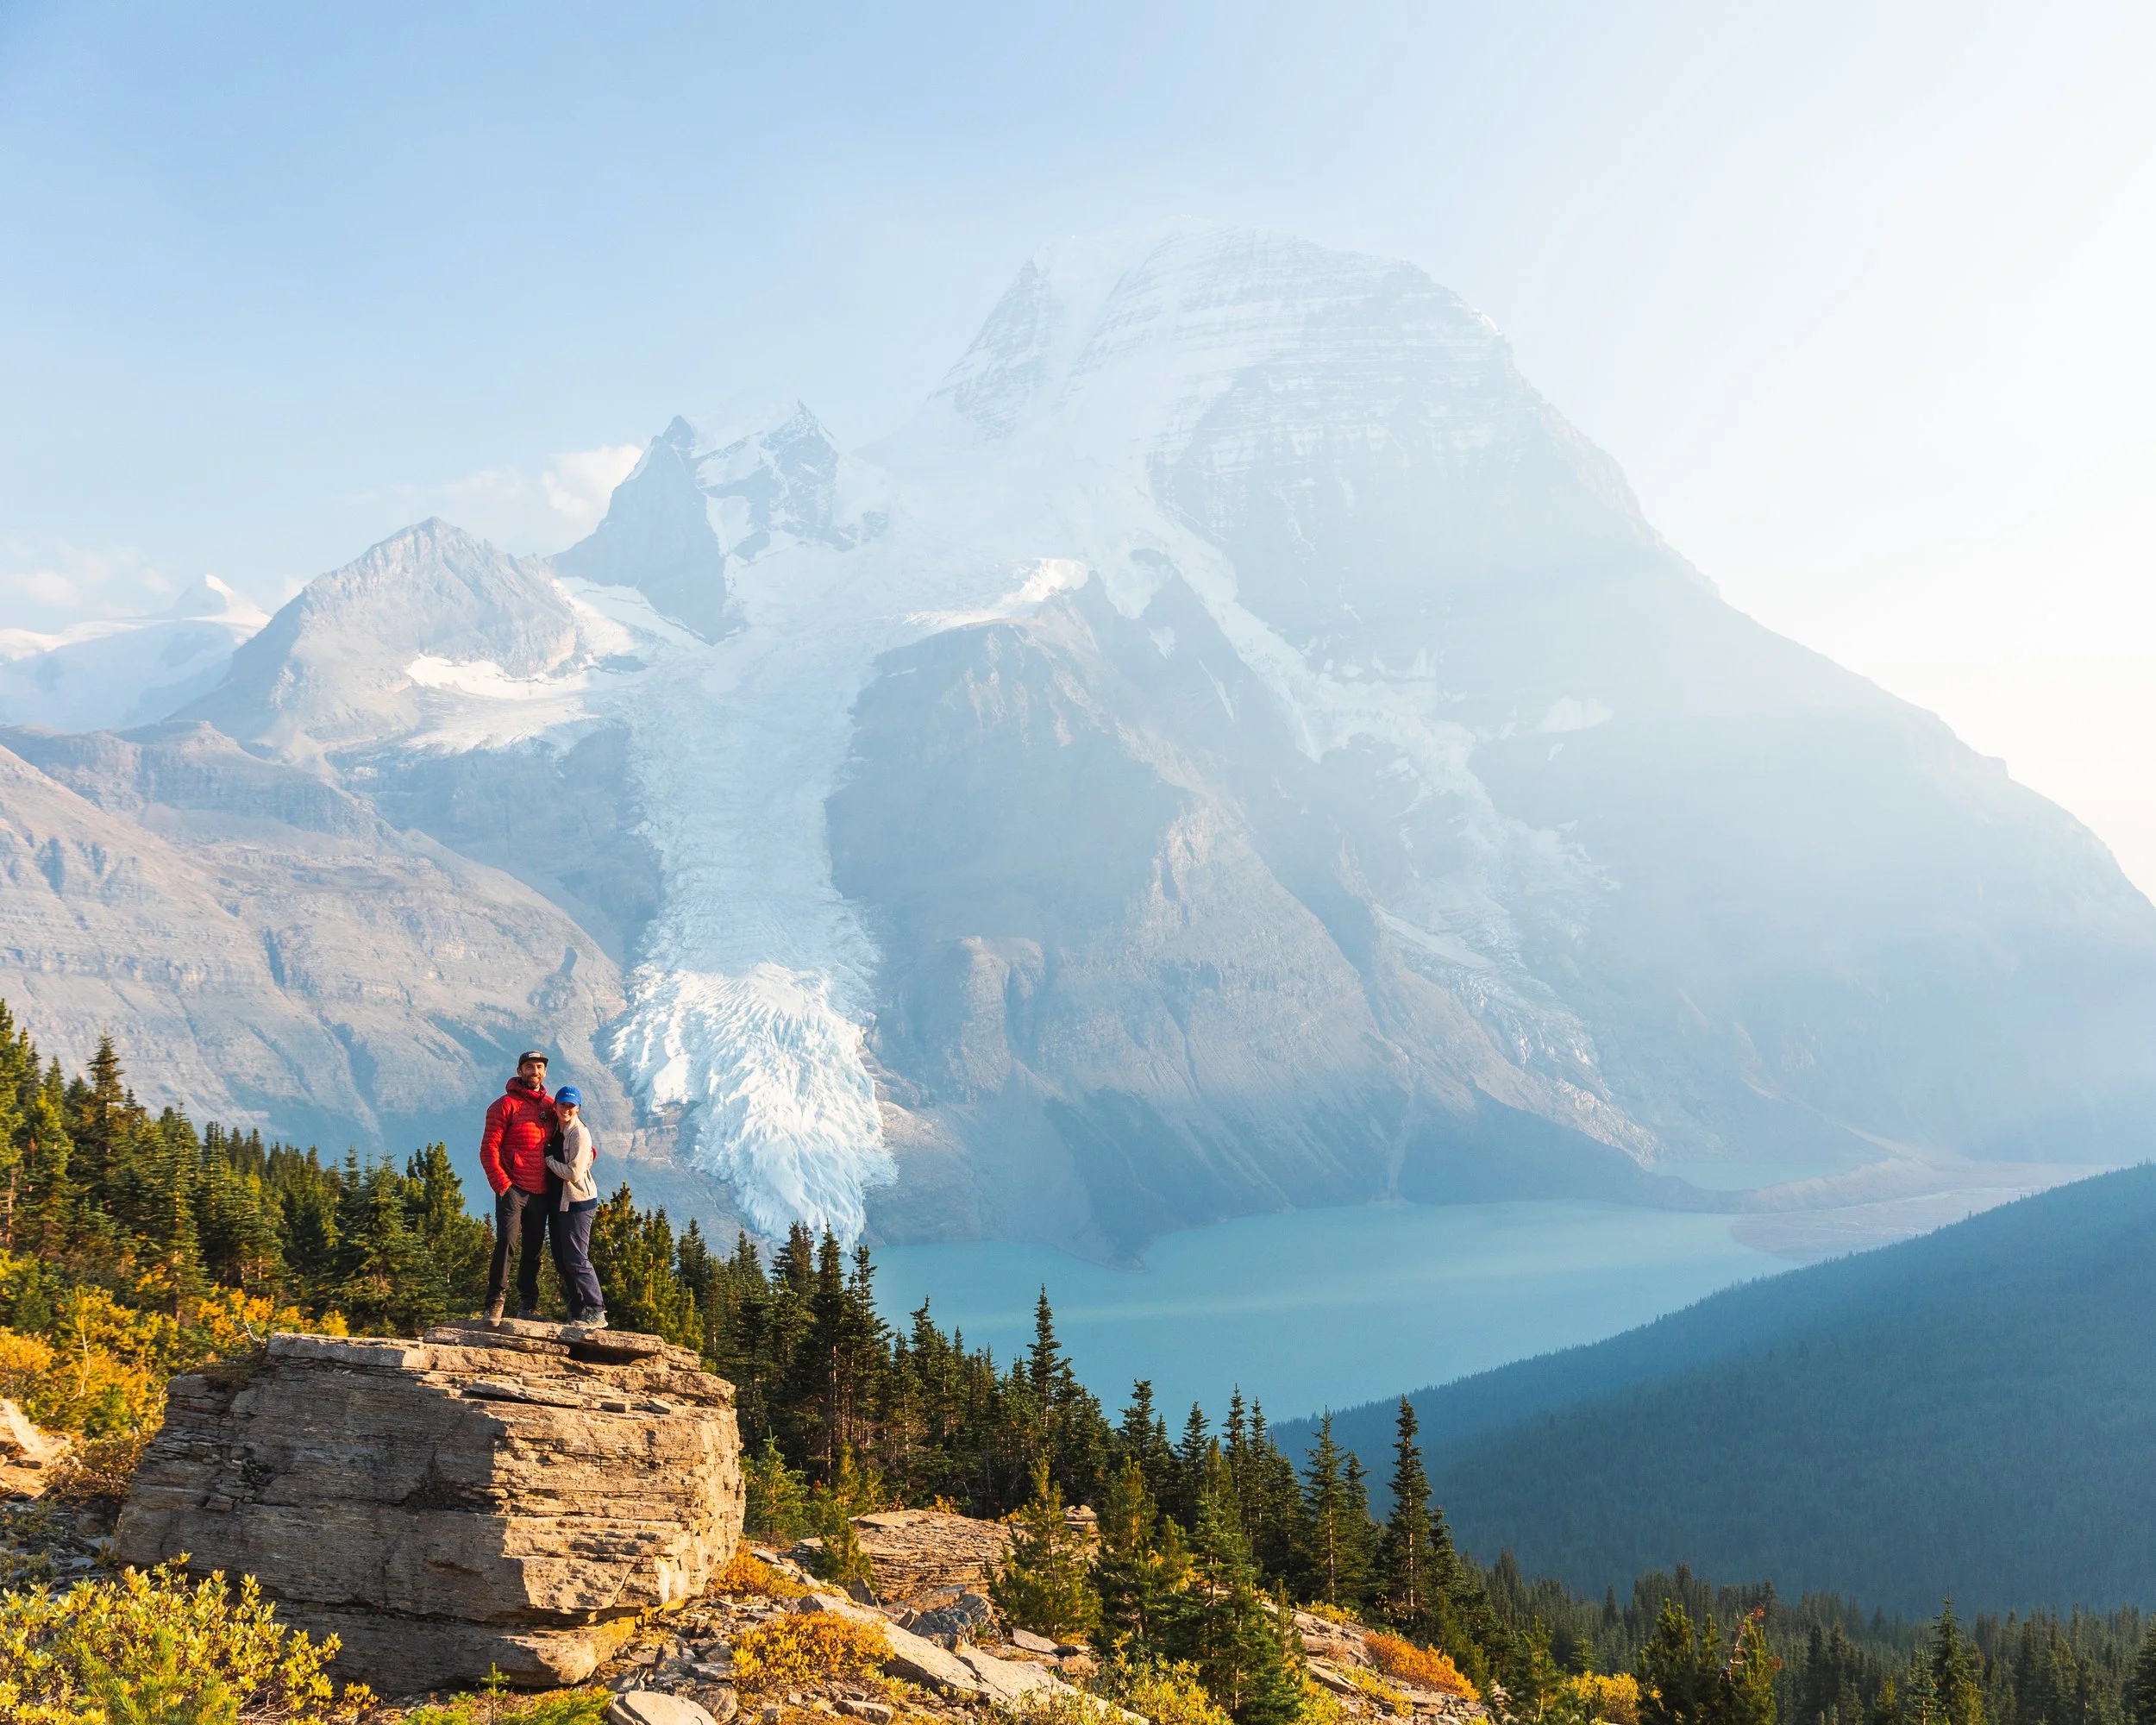
Reflections of Mount Robon in Berg Lake
The Stats
Time: Even though you could run or hike this trail in one long day I’d recommend at least 3 days and 2 nights on trail however you may want to add a 3rd night so your days aren’t so big and you’ll feel more rested to do extra side hikes. This will get you the most out of the trip especially if you plan on doing some photography on the way.
Distance: The return hike to Berg Lake and back is around 42 km return however you’ll want to account for up to 20 - 30 km more depending on how many view points and side hikes you also want to do. That’s the reason why you might want to add a 3rd night!
Elevation Gain: 1100 m for the main trail to Berg Lake but from there you can really add as much extra as you like!
Getting a Camping Spot and Logistics For Berg Lake Trail
Now realistically this is probably going to be the hardest part of hiking Berg Lake for most people!
Reservations for the Berg Lake trail open at the start of December (December 2nd for 2026 bookings) so you’ll need to be on the ball! The exact date will change a little as the years go on so keep an eye on the Mount Robson website here for the announcement. You can then reserve a campsite here. The most popular campgrounds on this trail will book out really fast and the less popular ones not long after, especially for peak summer and at weekends so save that date in your calendar and be waiting at your computer first thing in the morning at 7am!
But what Campsites to book?
Now there are a lot of campsites to choose from and which ones you book will be based on your hiking ability, where you’re traveling from and what else you want to do whilst out at Berg Lake but here’s a quick run dowm.
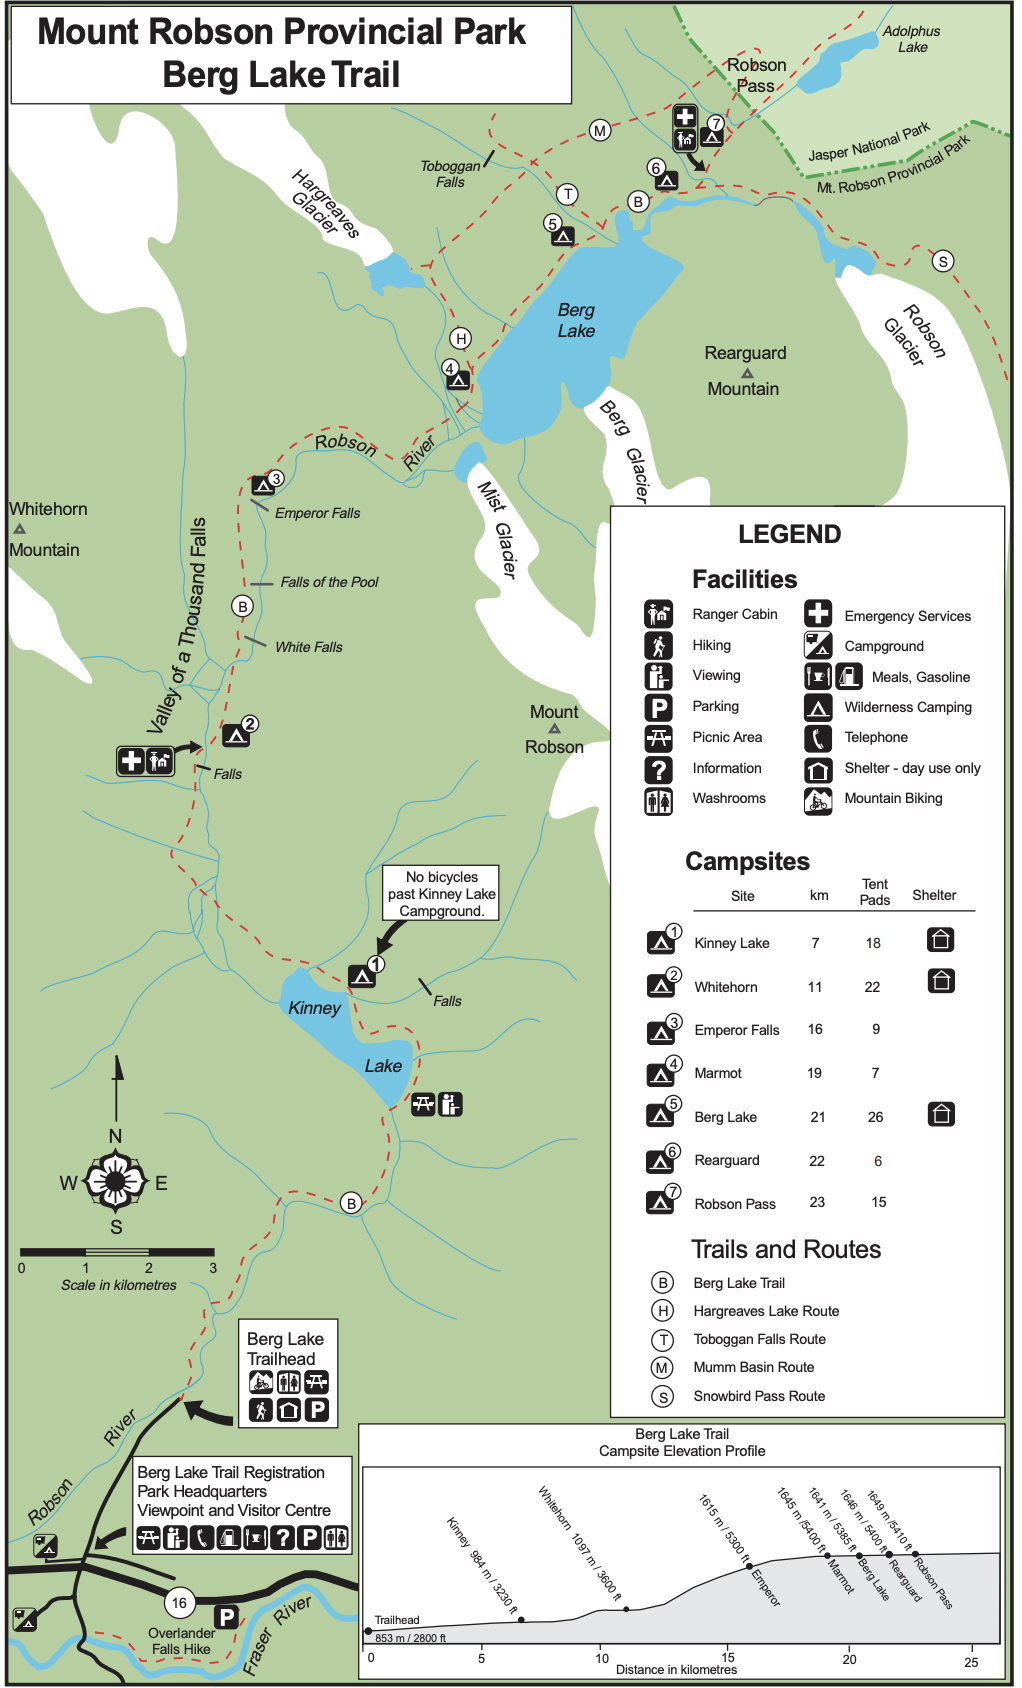
Kinney Lake - 7 km from trailhead
Whitehorn - 11 km from trailhead
Emperor Falls - 16 km from trailhead
Marmot - 19 km from trailhead
Berg Lake - 21 km from trailhead
Rearguard - 22 km from trailhead
Robson Pass - 23 km from trailhead
Kinney Lake, Whitehorn and Berg Lake all have cook shelters.
My Itinerary Preferences
If you’re heading out to do some photography or hike further side trails my go to is to always book as many nights at Berg Lake itself as you can, this is really where everyone wants to be. This way you’ll have lots of opportunity to wake up at sunrise and sunset by the lakeside to shoot and you’re set up at a good base camp for other hikes like Snowbird Pass, Toboggan falls and Mumm Basin.
Booking just Berg Lake as a campground does mean you’ll be doing a pretty long day in and out hiking the whole 21 km and 1100 m of gain on the first day so keep that in mind.
Shorter days and alternative Campgrounds
If you aren’t so keen on doing the whole 21 km stretch on the first day or you have a long drive to get to Mount Robson and the trailhead I’d recommend staying at Kinney Lake campground for your first night and then booking campsites closer to Berg for your sequential nights. This will give you a really easy first day and shave 7 km off of the big push to Berg Lake the next morning. Kinney Lake is also one of the most scenic campgrounds with some great photography near by so is a fantastic place to wake up for sunrise. On top of that it also has a cook shelter so if you are caught out in the rain you’ll have somewhere dry to cook and eat dinner.
Whitehorn campground is also another great option and again provides a cook shelter and some great views. If you aren’t able to bag Berg Lake after one of these I’d recommend getting as close as possible and staying either at Marmot or Robson Pass. However all the campgrounds are fantastic and the scenery is incredible throughout the trail so you won’t be disappointed but as a rule of thumb go for as many nights as you can as close to Berg Lake as you can get!
Getting to the trail head
The trailhead to the Berg Lake trail starts just down the road from the Mount Robson visitors centre.
However all hikers will need to check in at the visitors centre before departing on their hike, keep in mind the visitors centre only opens at 8 am so you can’t set off on your hike super early.
Mount Robson visitors centre is about 1 hour from Jasper, 4.5 hours from Banff and 5.5 hours from Calgary. And those times are based on you not being distracted by the incredible scenery along the Icefields Parkway!
If you have a long drive to get to the trailhead I’d highly recommend spending the night in Jasper before your hike. This way you get to enjoy the drive up more with no time constraints and can have a much more relaxed morning on the first day of your hike.
Once checked in you’ll be directed to drive a little further up the road to the car park at the actual trailhead. Don’t leave your car outside the visitors centre!
The Hike
Trailhead to Kinney Lake - 7 km
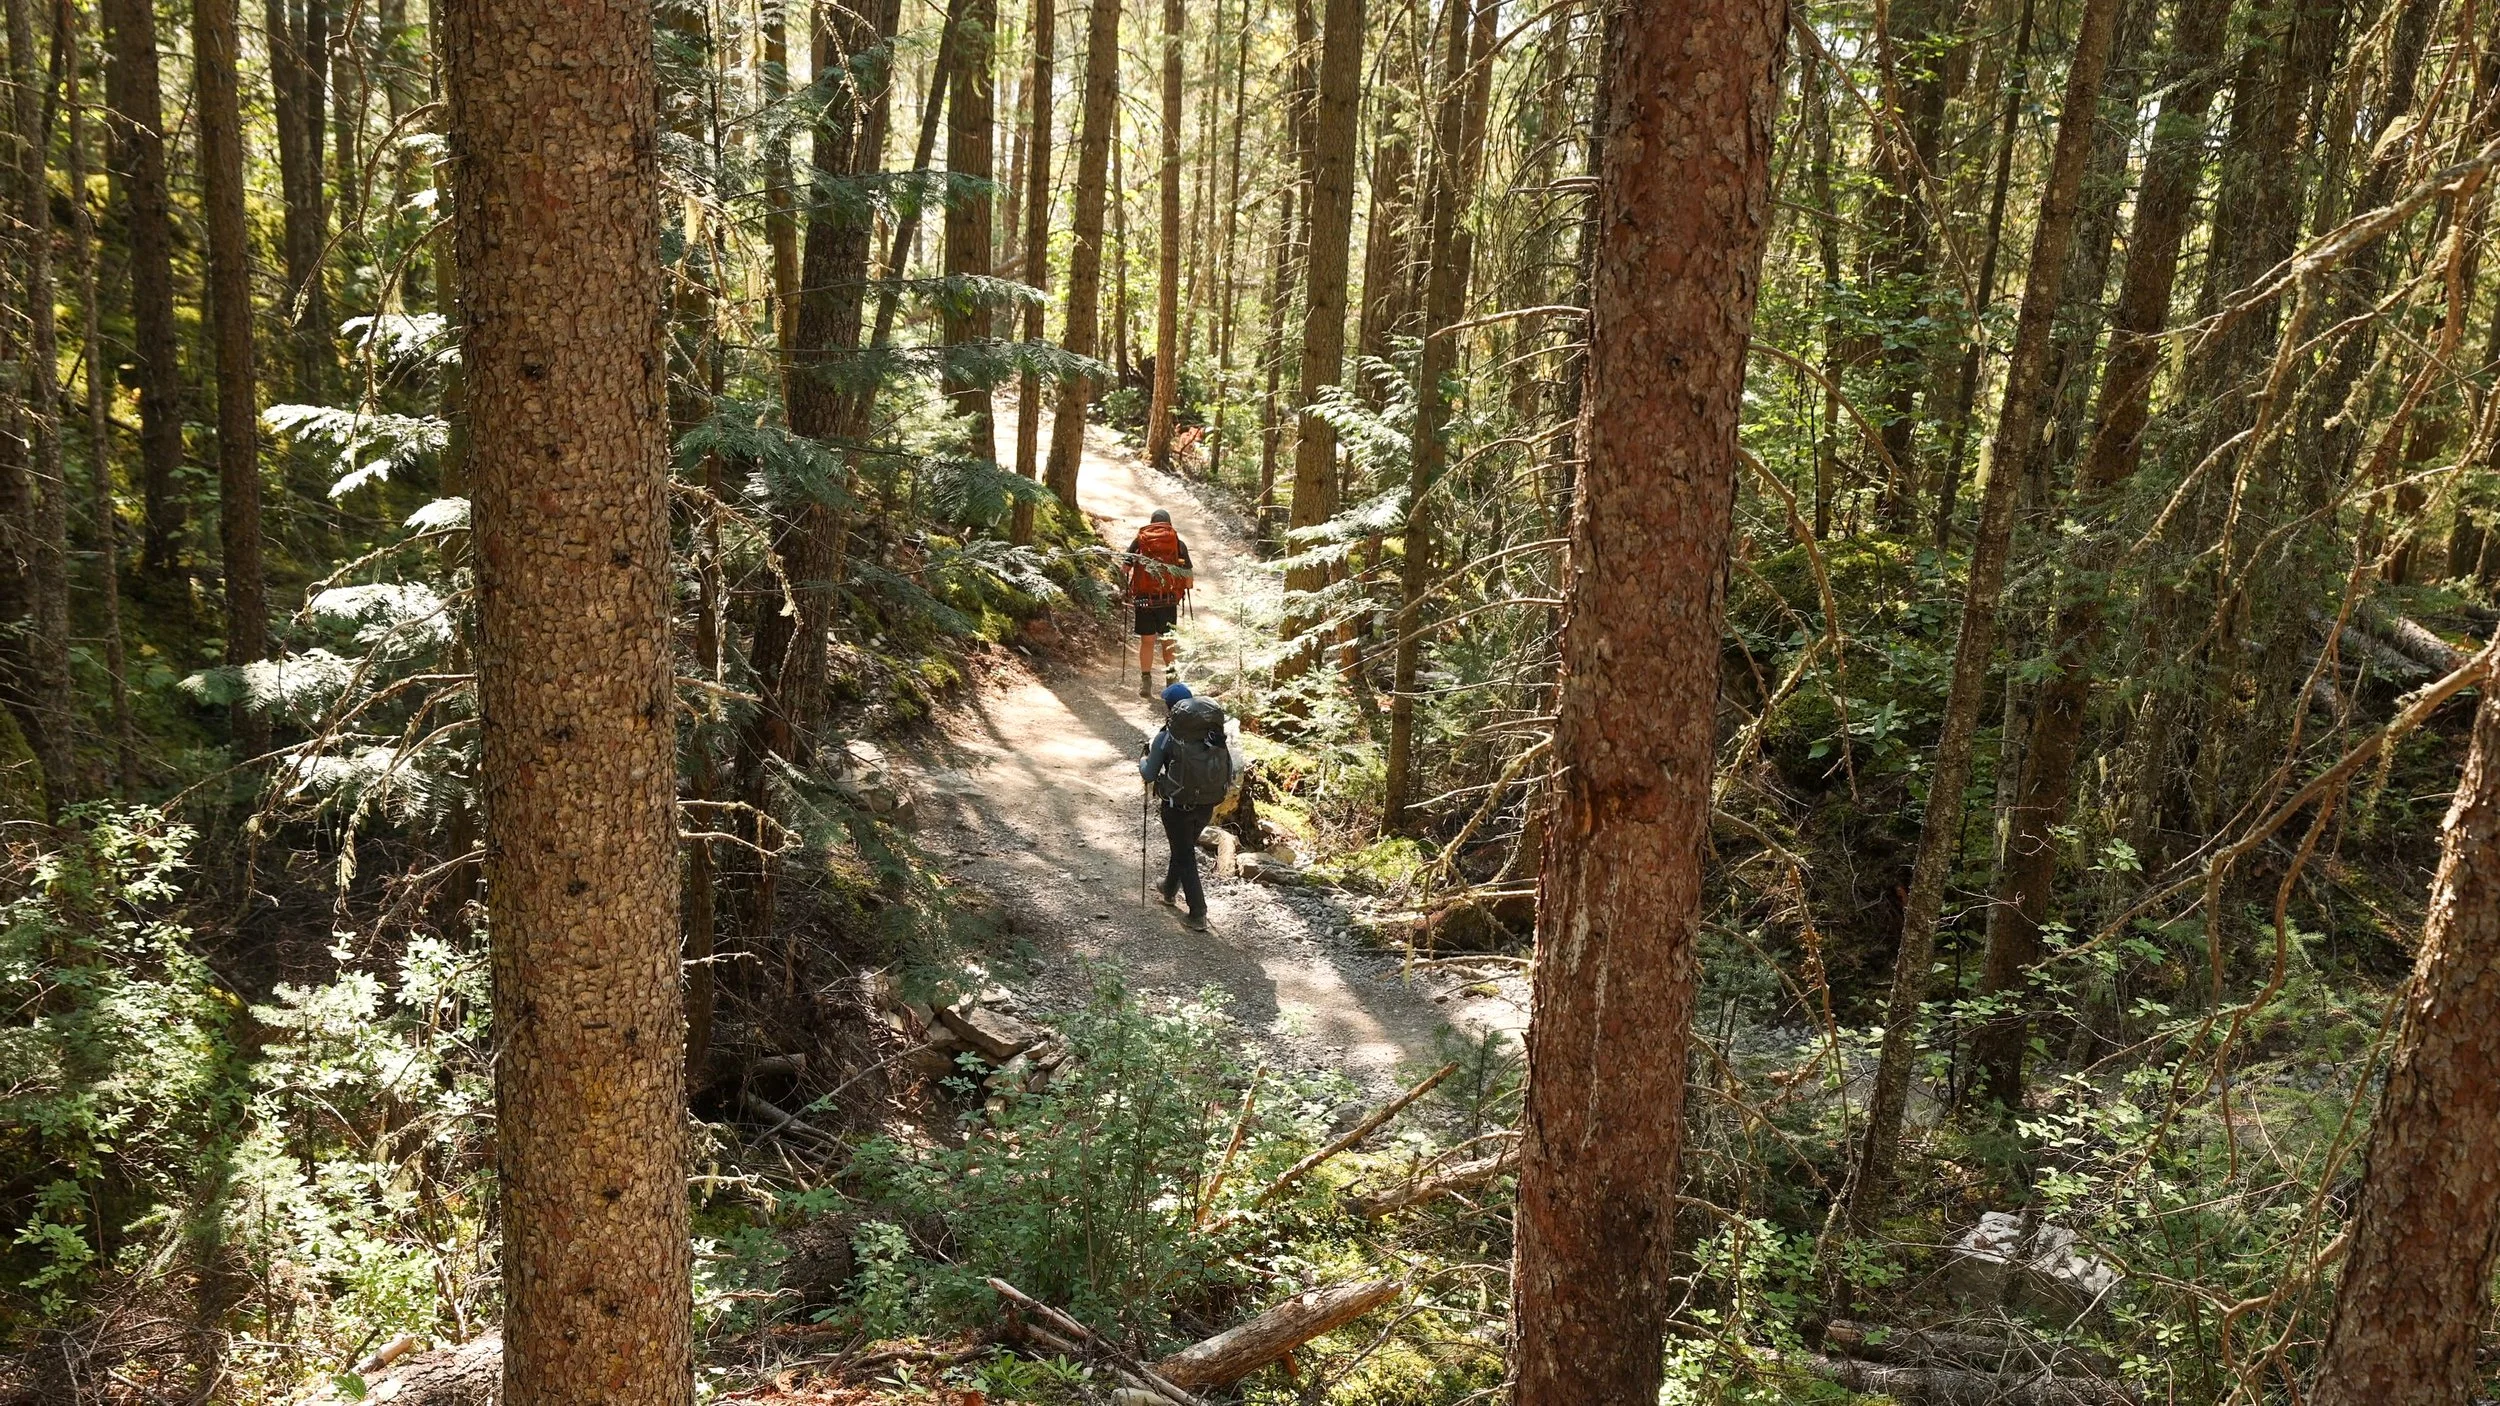
The first 7 km of this trail is pretty straight forward! Once in the car park you’ll see the obvious trailhead signs with some information about distances, backcountry etiquette and wildlife.
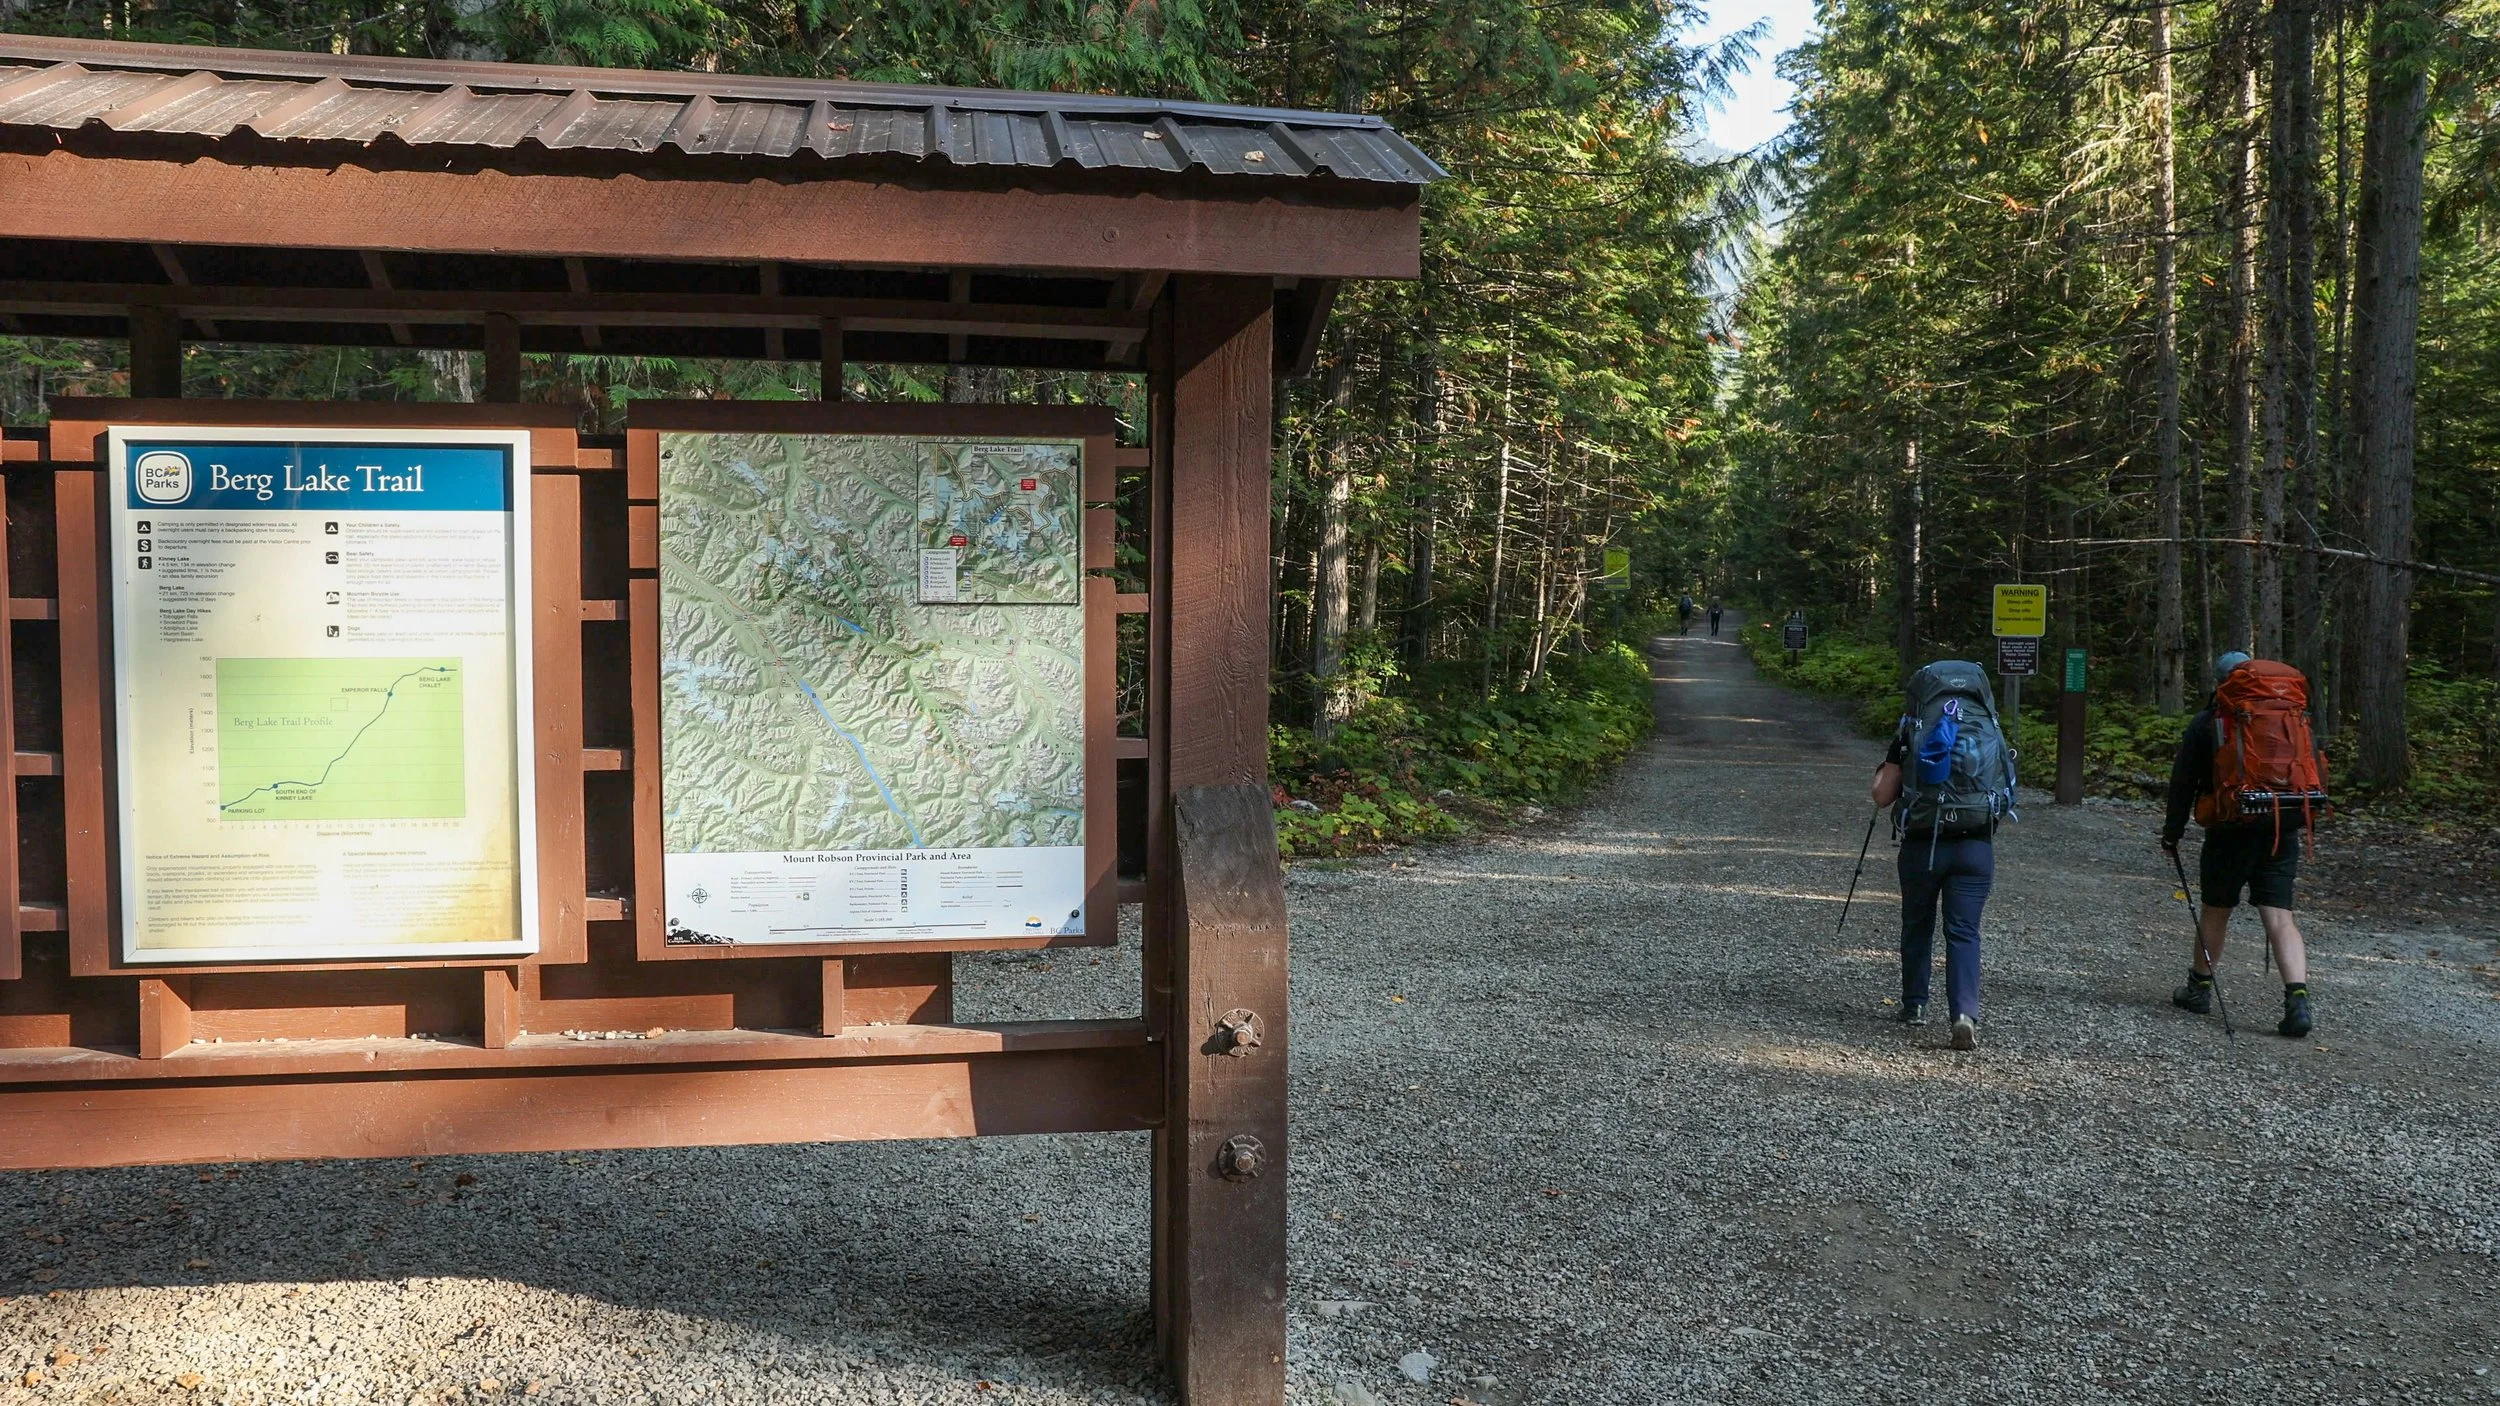
From here you’ll simply follow the wide, smooth trail through the woods and on to Kinney Lake getting the occasional glimpse of the surrounding peaks. There is little elevation gain and you can even ride a bike along this section of the trail if you choose to do so!
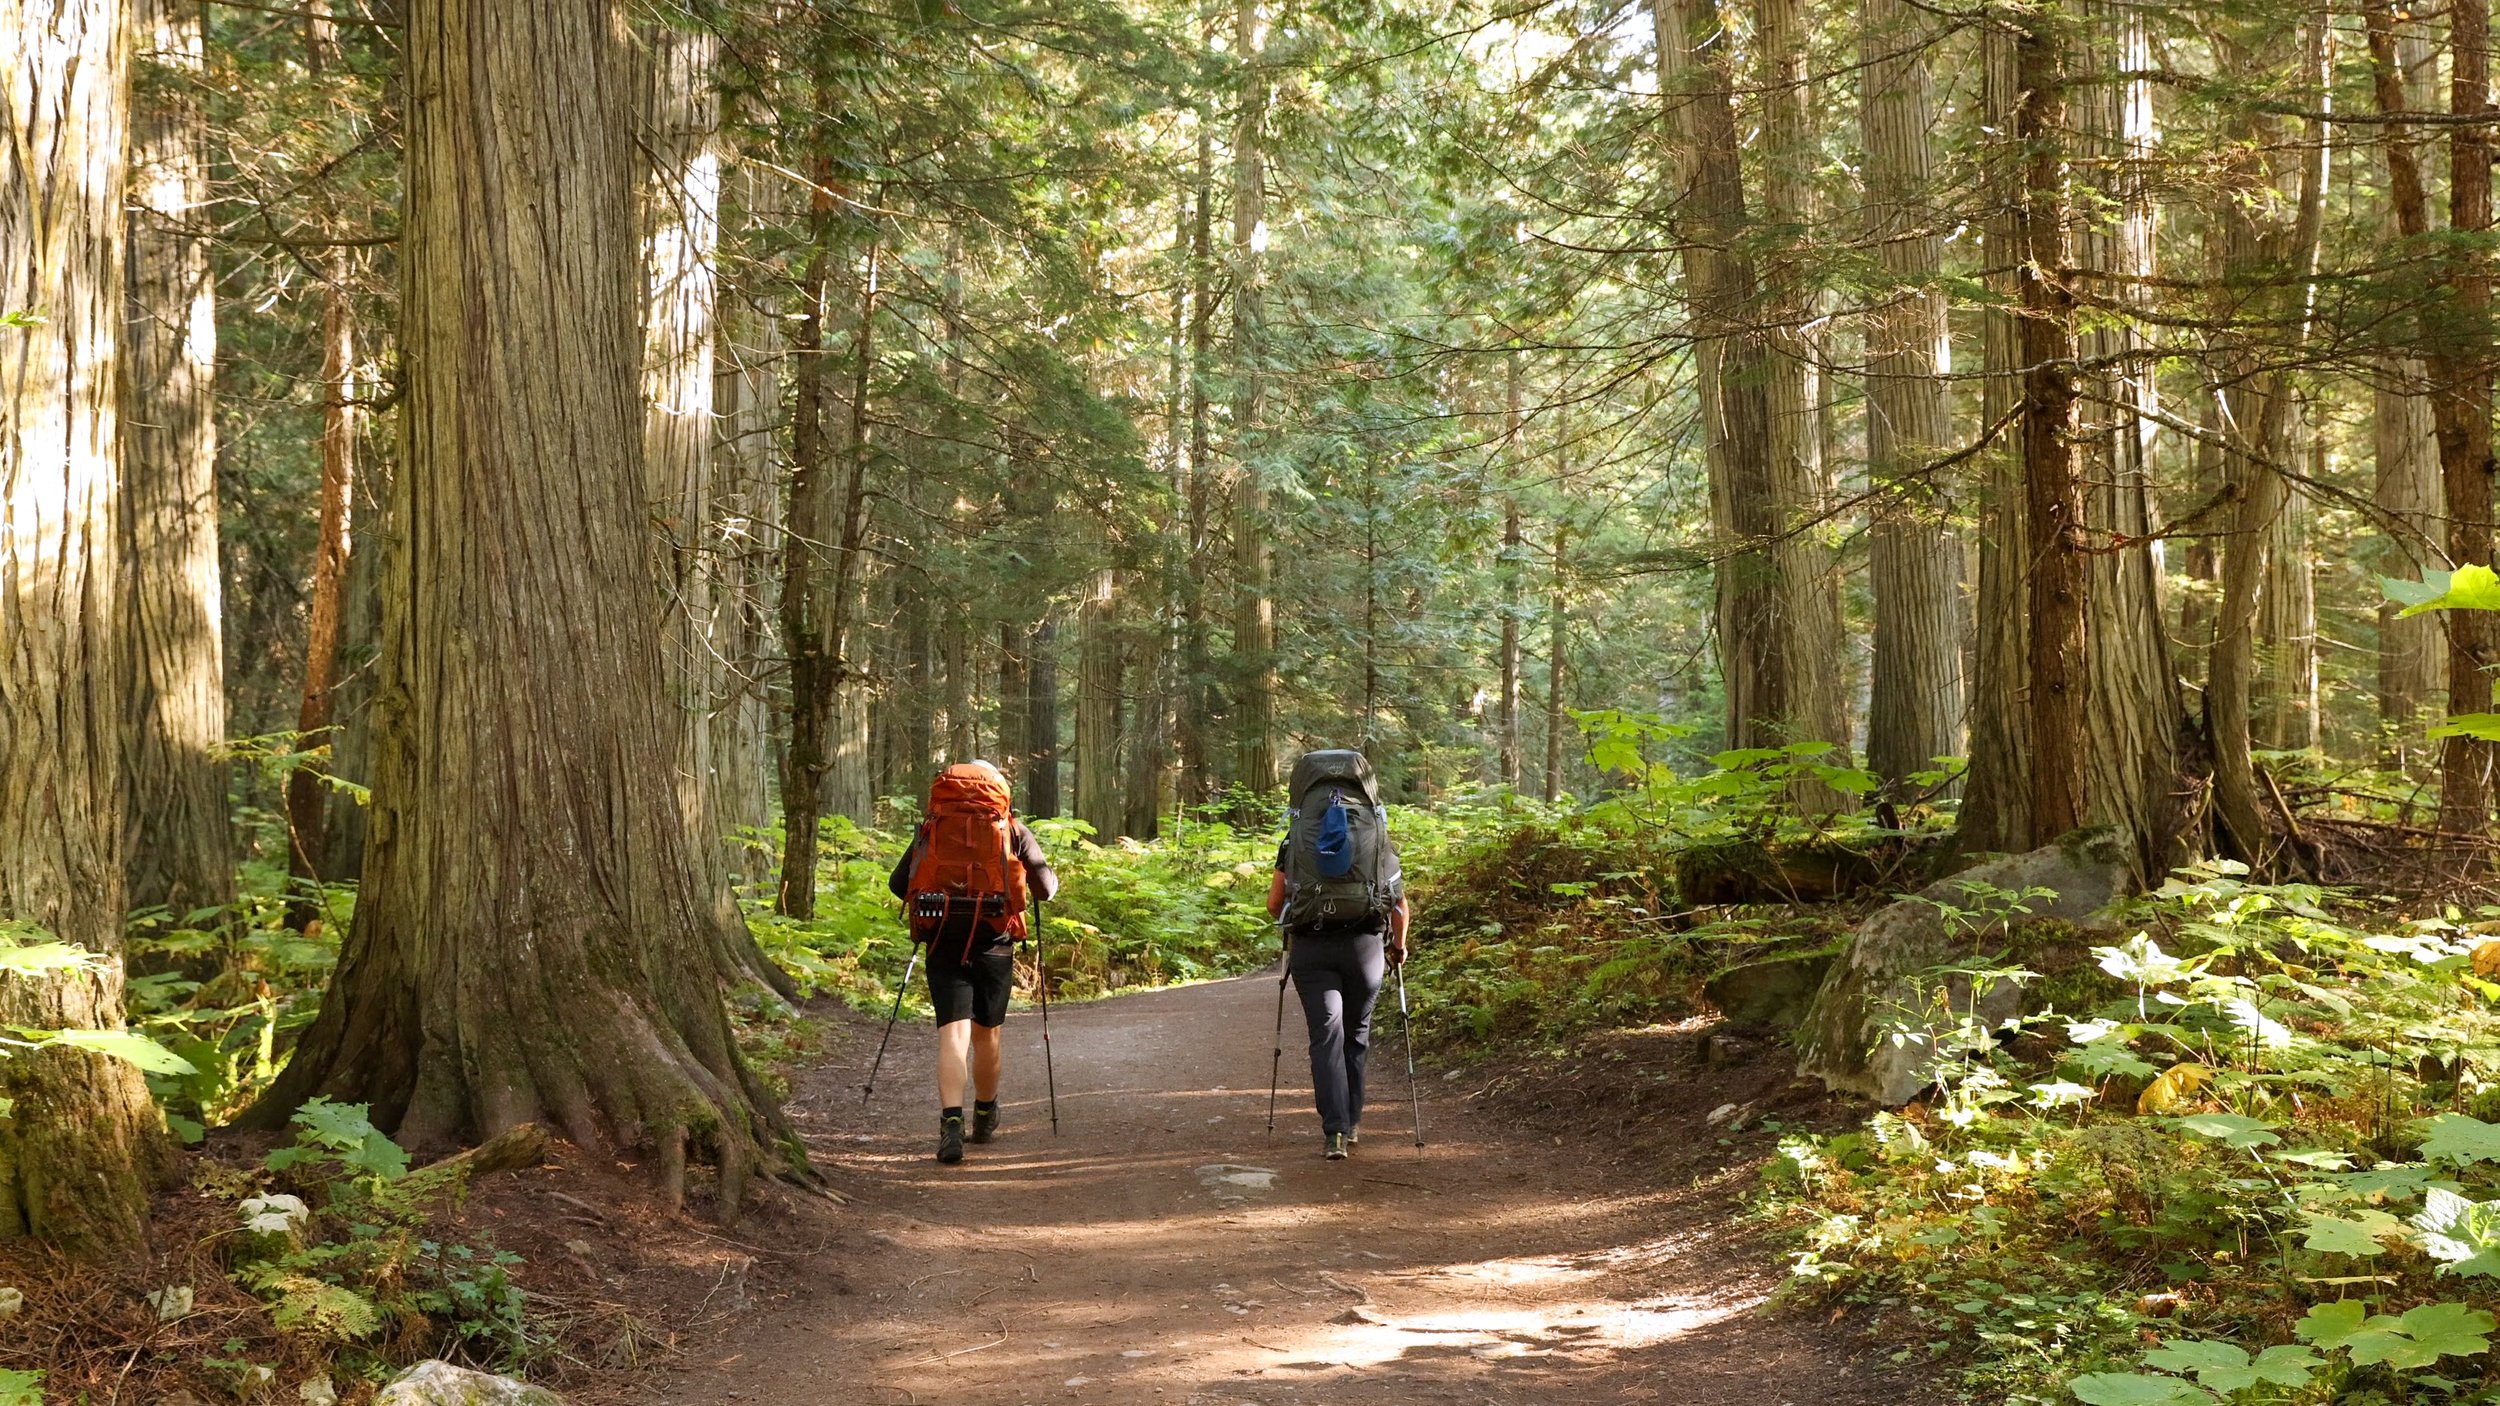
The morning light in the woodland is a pretty magical start to the hike!
Once you come across Kinney lake you’ll hopefully be met with some stunning reflections. At the initial part of the lake there are some picnic benches making it a great place to stop, take in the view and grab a snack. The campsite and shelter however are further on round the lake so if it’s wet out hike on a little to get out of the rain!
Reflections in Kinney Lake
Kinney Lake to Whitehorn Campground - 4 km
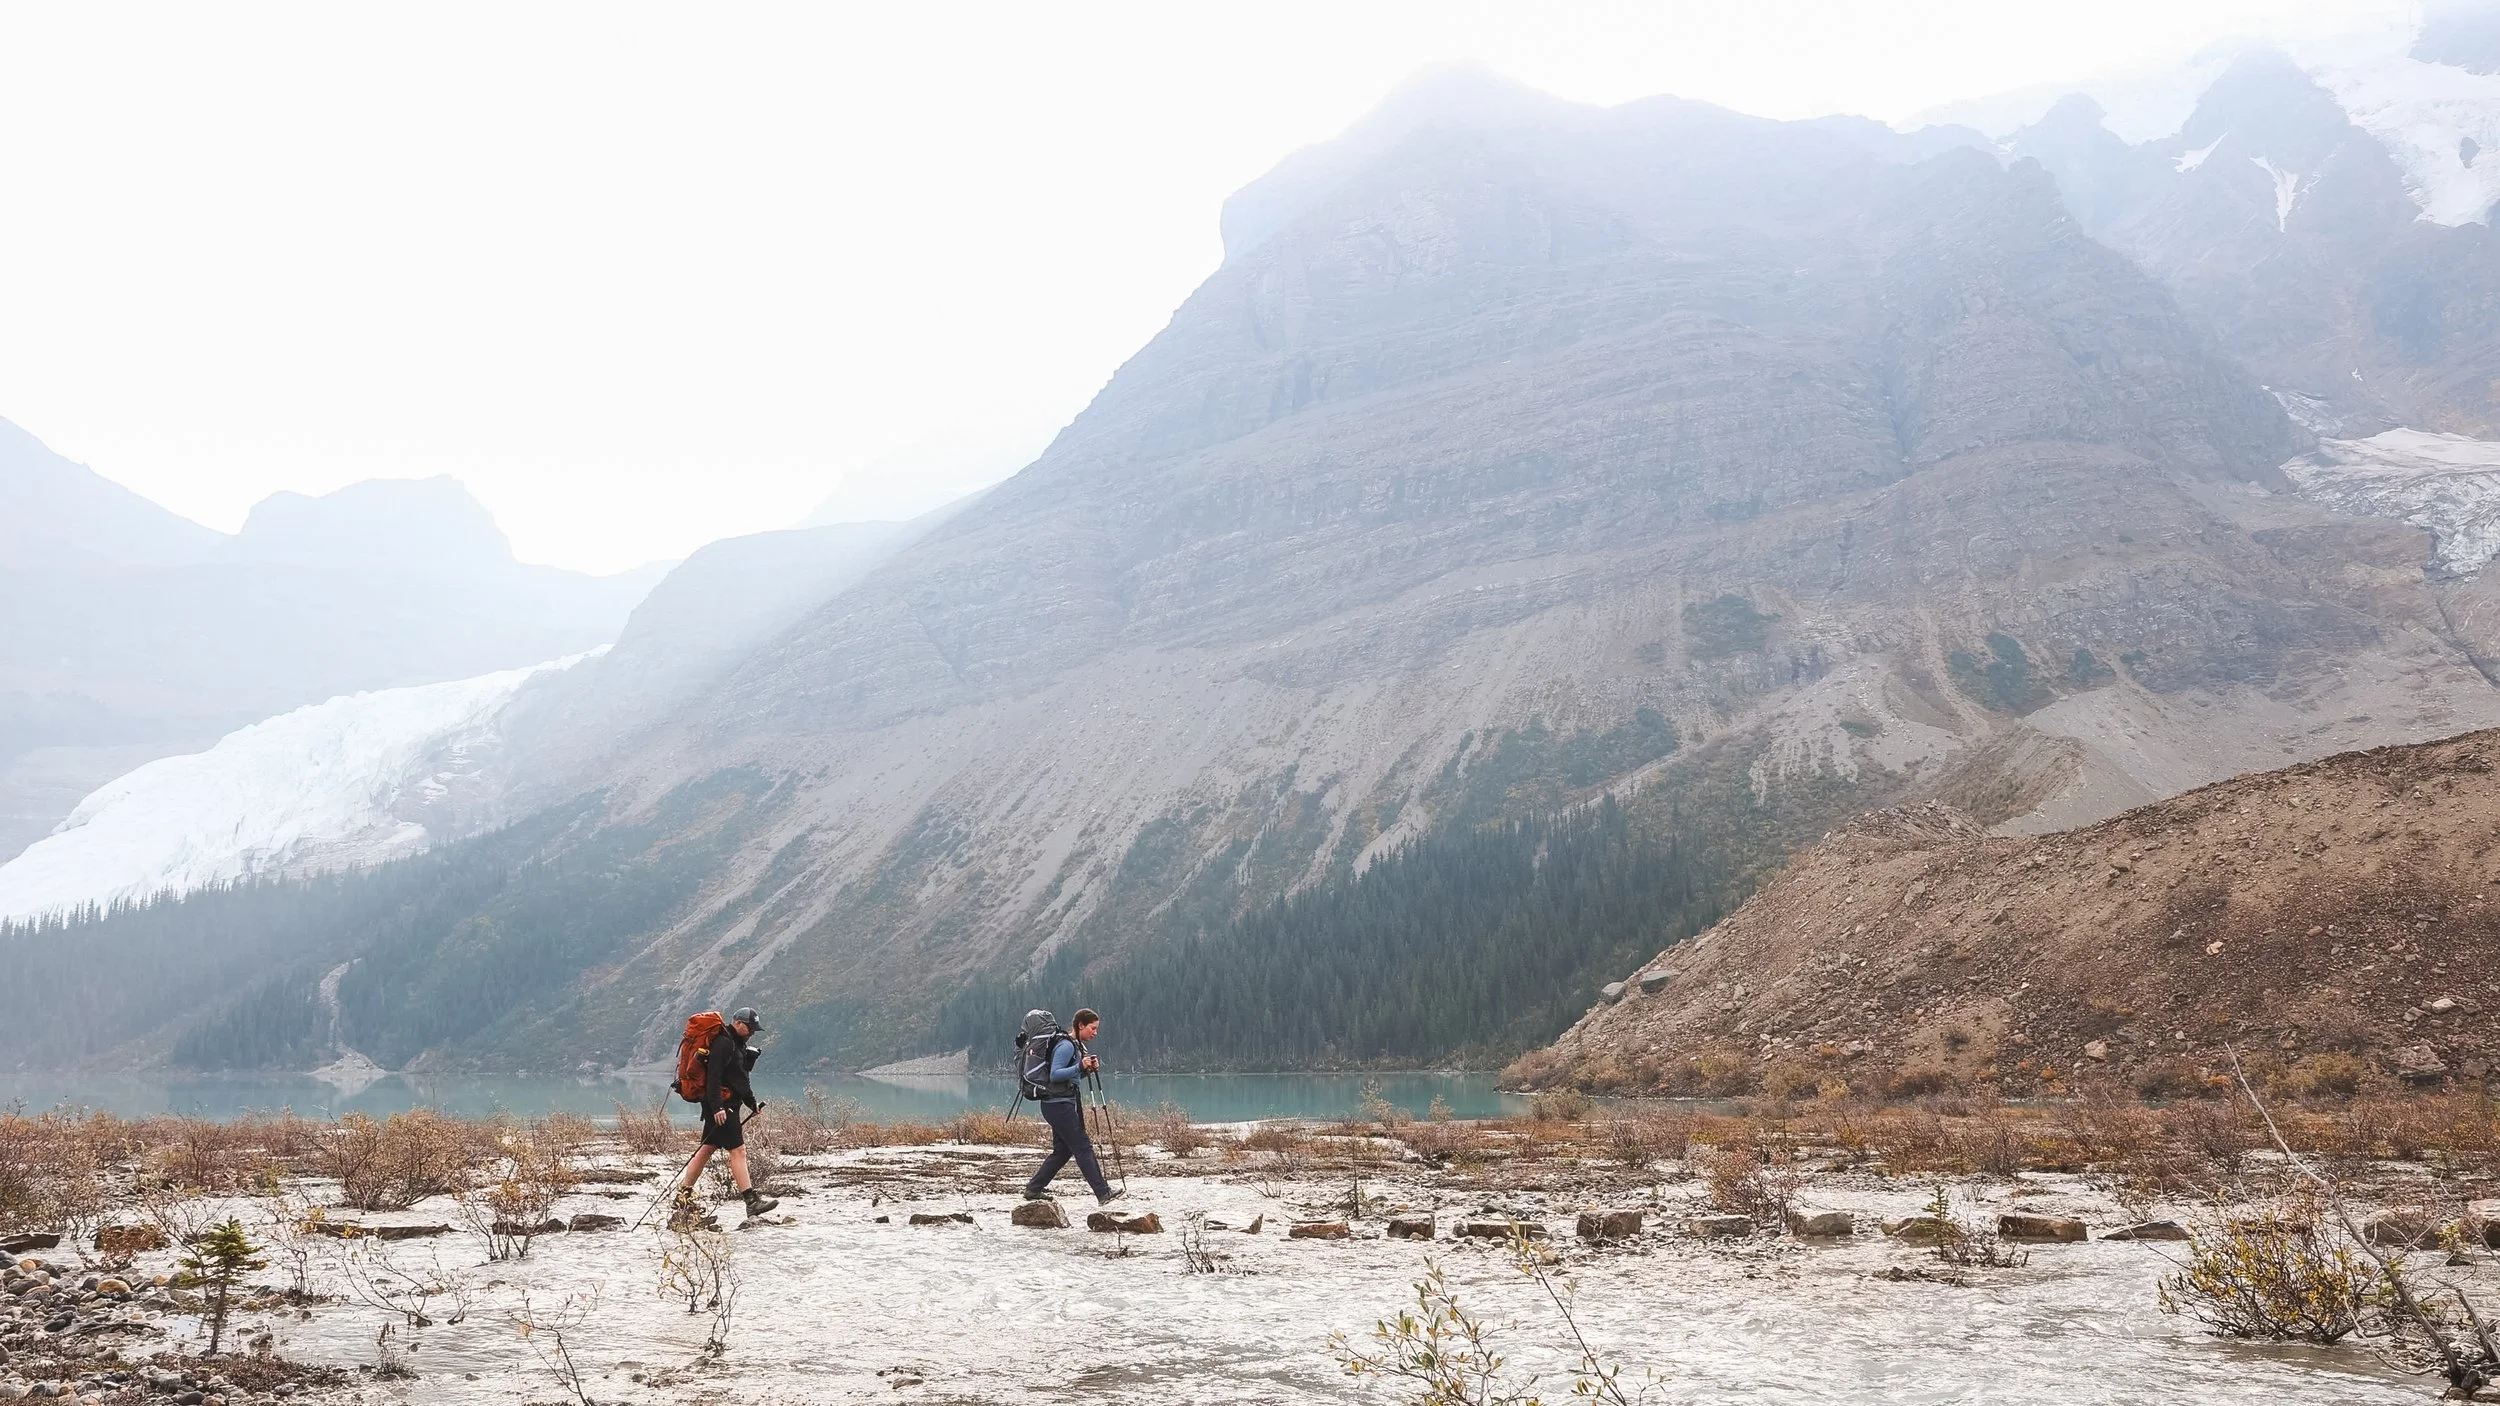
From here it’s about 4 km further up to Whitehorn campground. You’ll start off following the trail around the turquoise waters and just past Kinney Lake you’ll come across a fork in the road, if possible at this point I’d recommend taking the trail across Kinney flats. When the lake and inlets are low enough you can hike across the flats out in the open, this saves you a little bit of distance and a little elevation gain. On top of that it also means you’ll get better views as you aren’t so enclosed in the woods!
Walking across Kinney flats
From here the elevation kicks in a little more! This section of trail is one part of many that has been revamped in recent years and the effort that has gone into this trail begins to become apparent. You’ll cross over new bridges, walk on brand new trail and also negotiate a series of new switch backs all the way up to Whitehorn campground. Here there’s a cook shelter perfect for getting out of the rain or even the blaring sun whilst you have a little lunch.
The new switch backs winding themself up hill.
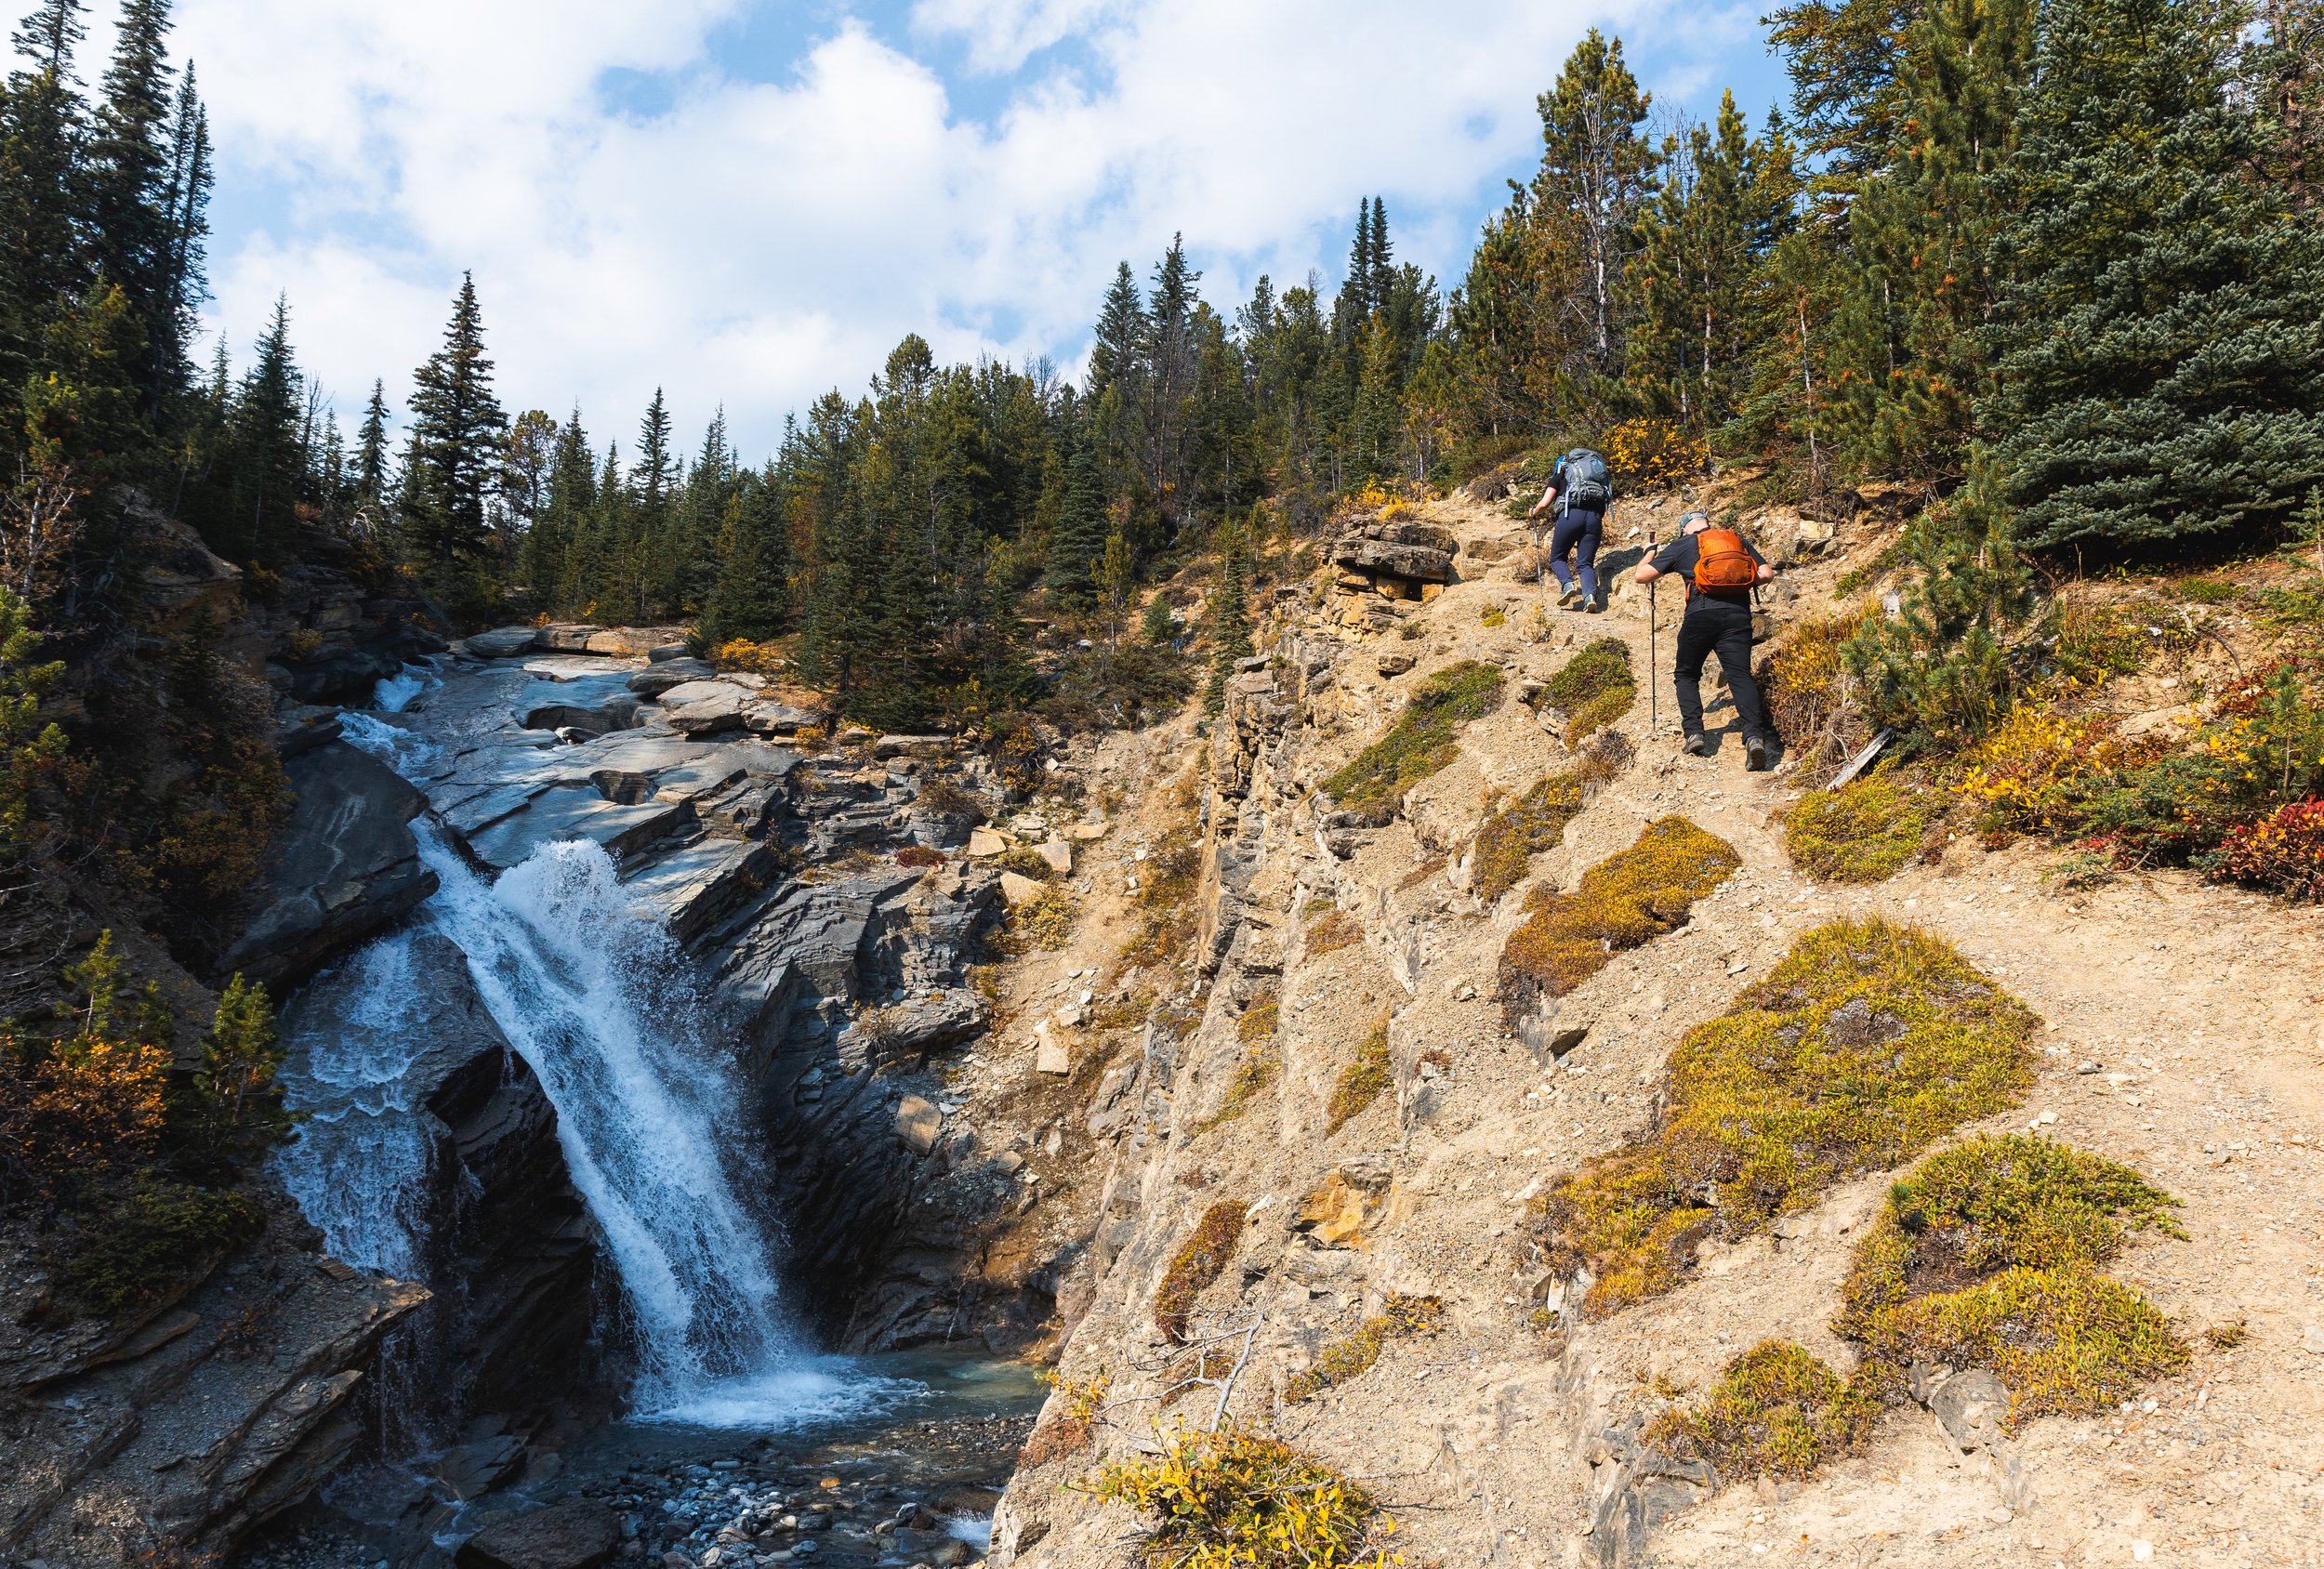
Whitehorn Campground to Emperor Falls - 5 km
Directly after leaving Whitehorn campground you’ll cross over one of the new larger bridges. Originally this arched metal bridge was more of an aesthetic rope bridge but that got washed away during some flooding a few years ago so has now been replaced with a sturdier metal version.
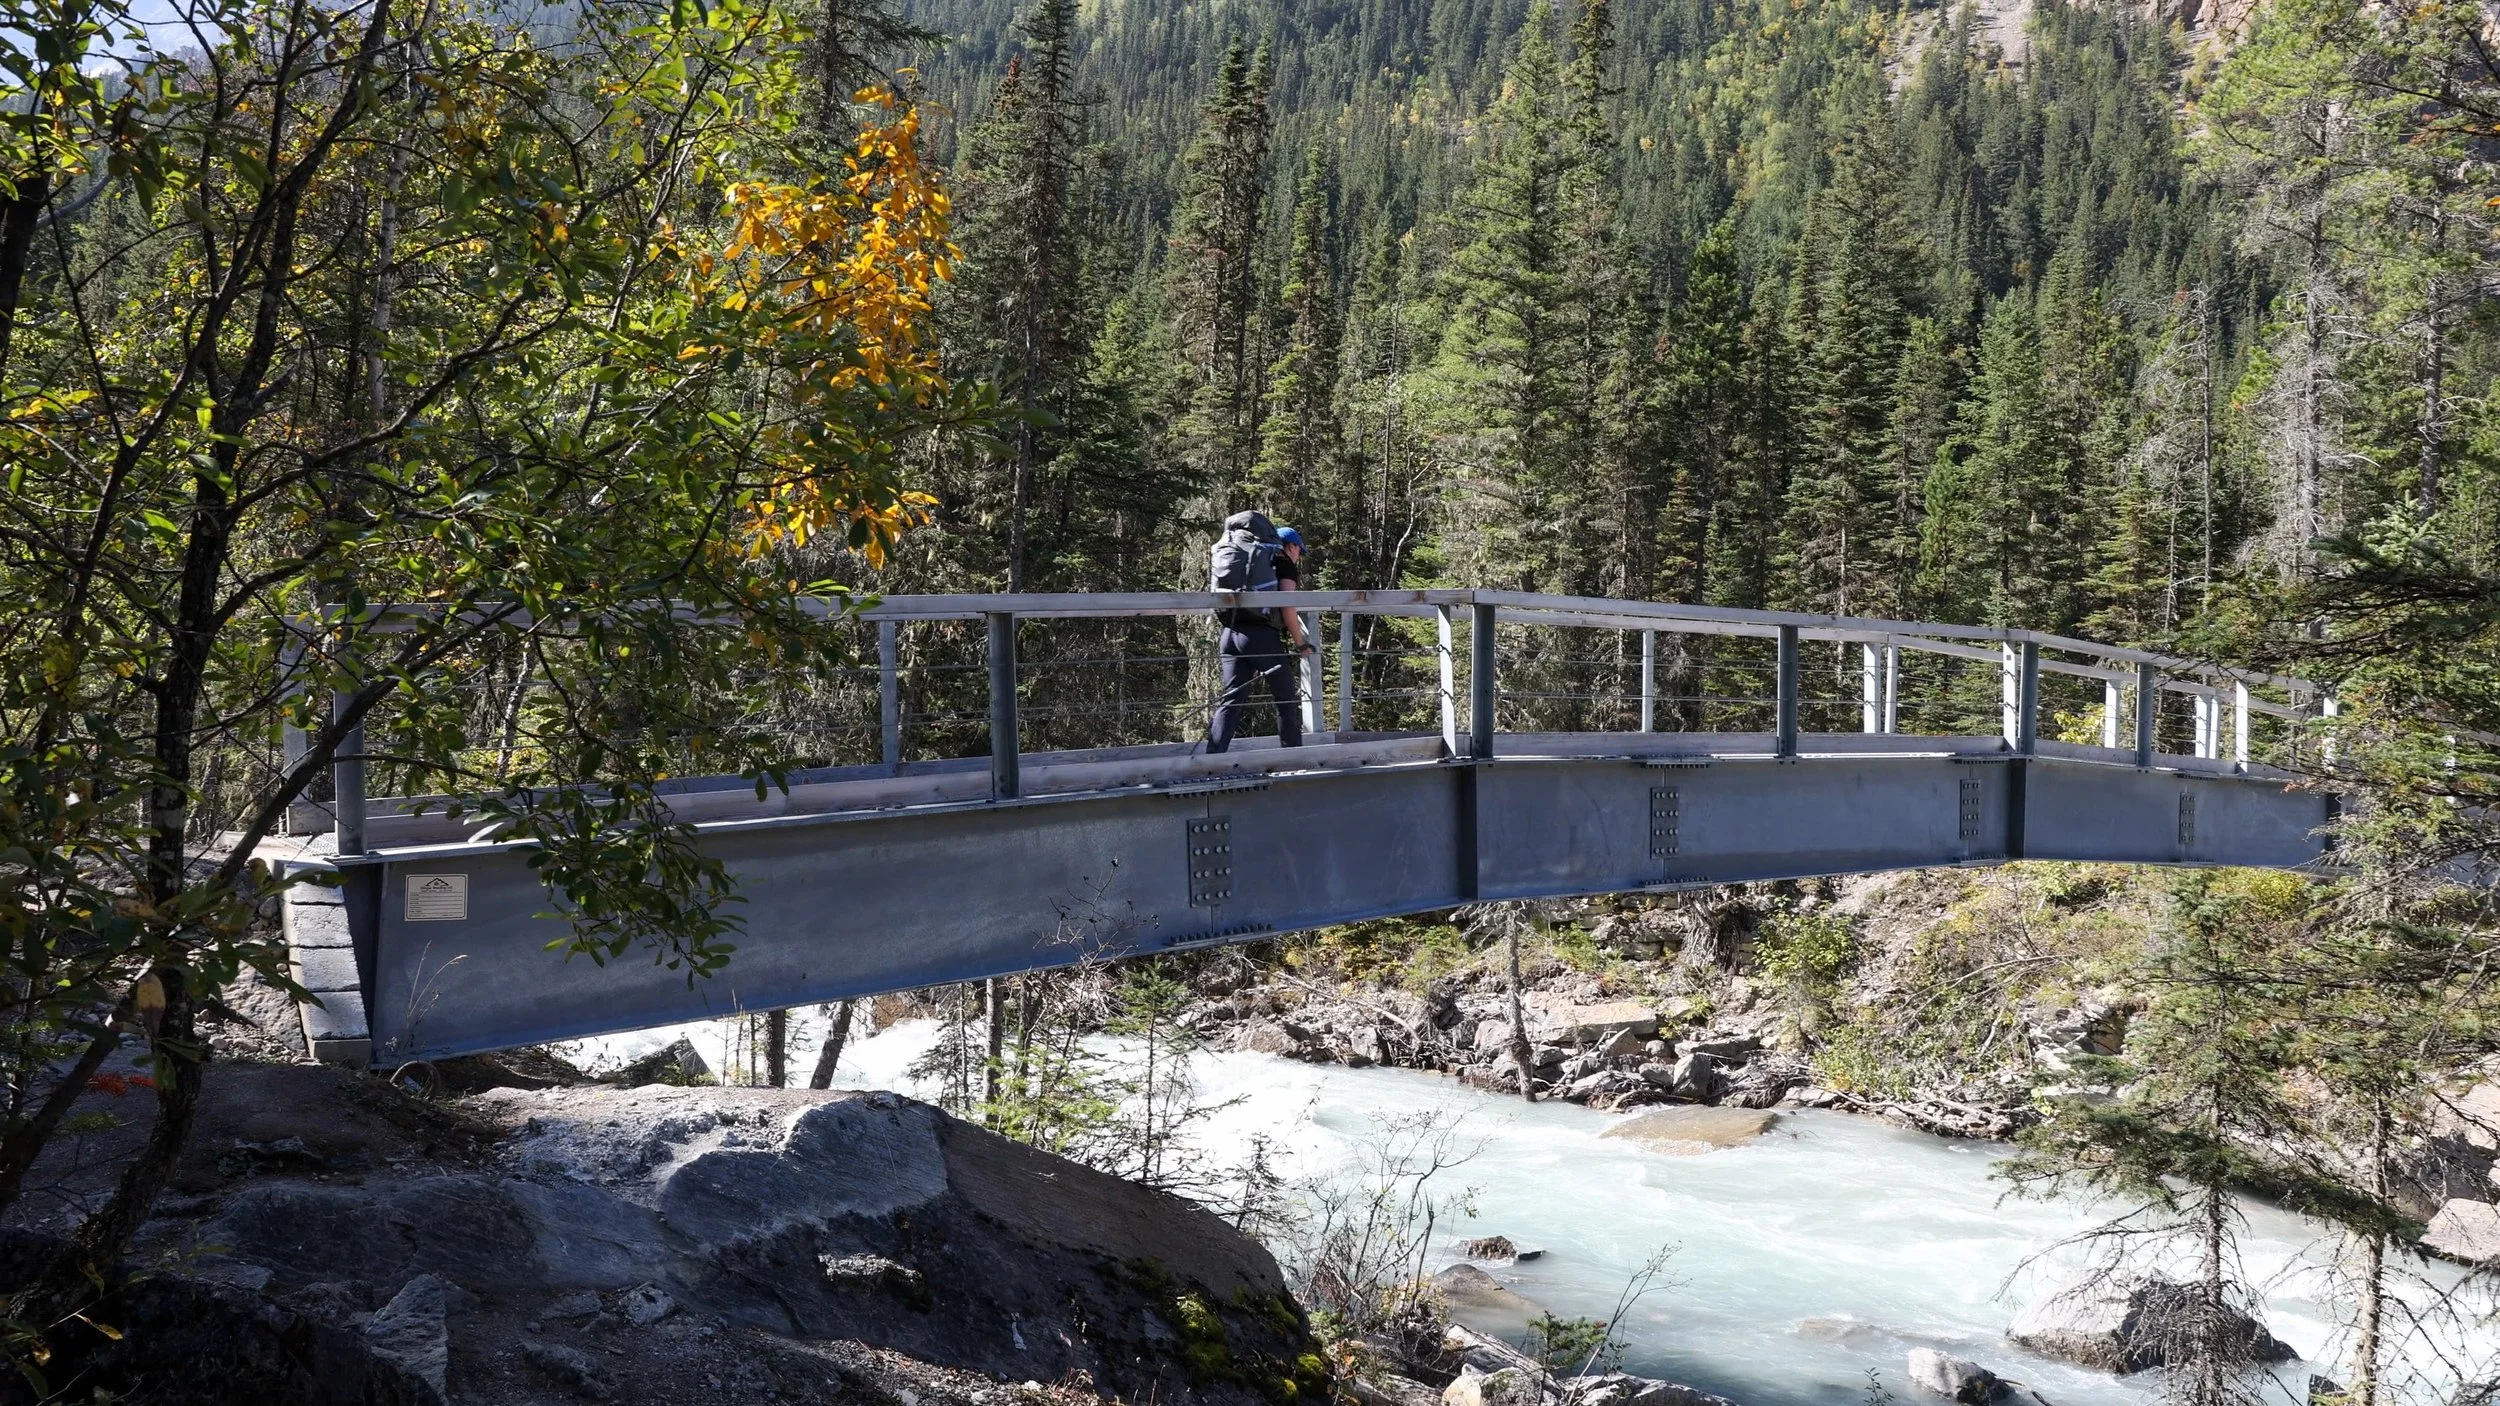
The new bridge exiting Whitehorn Campround
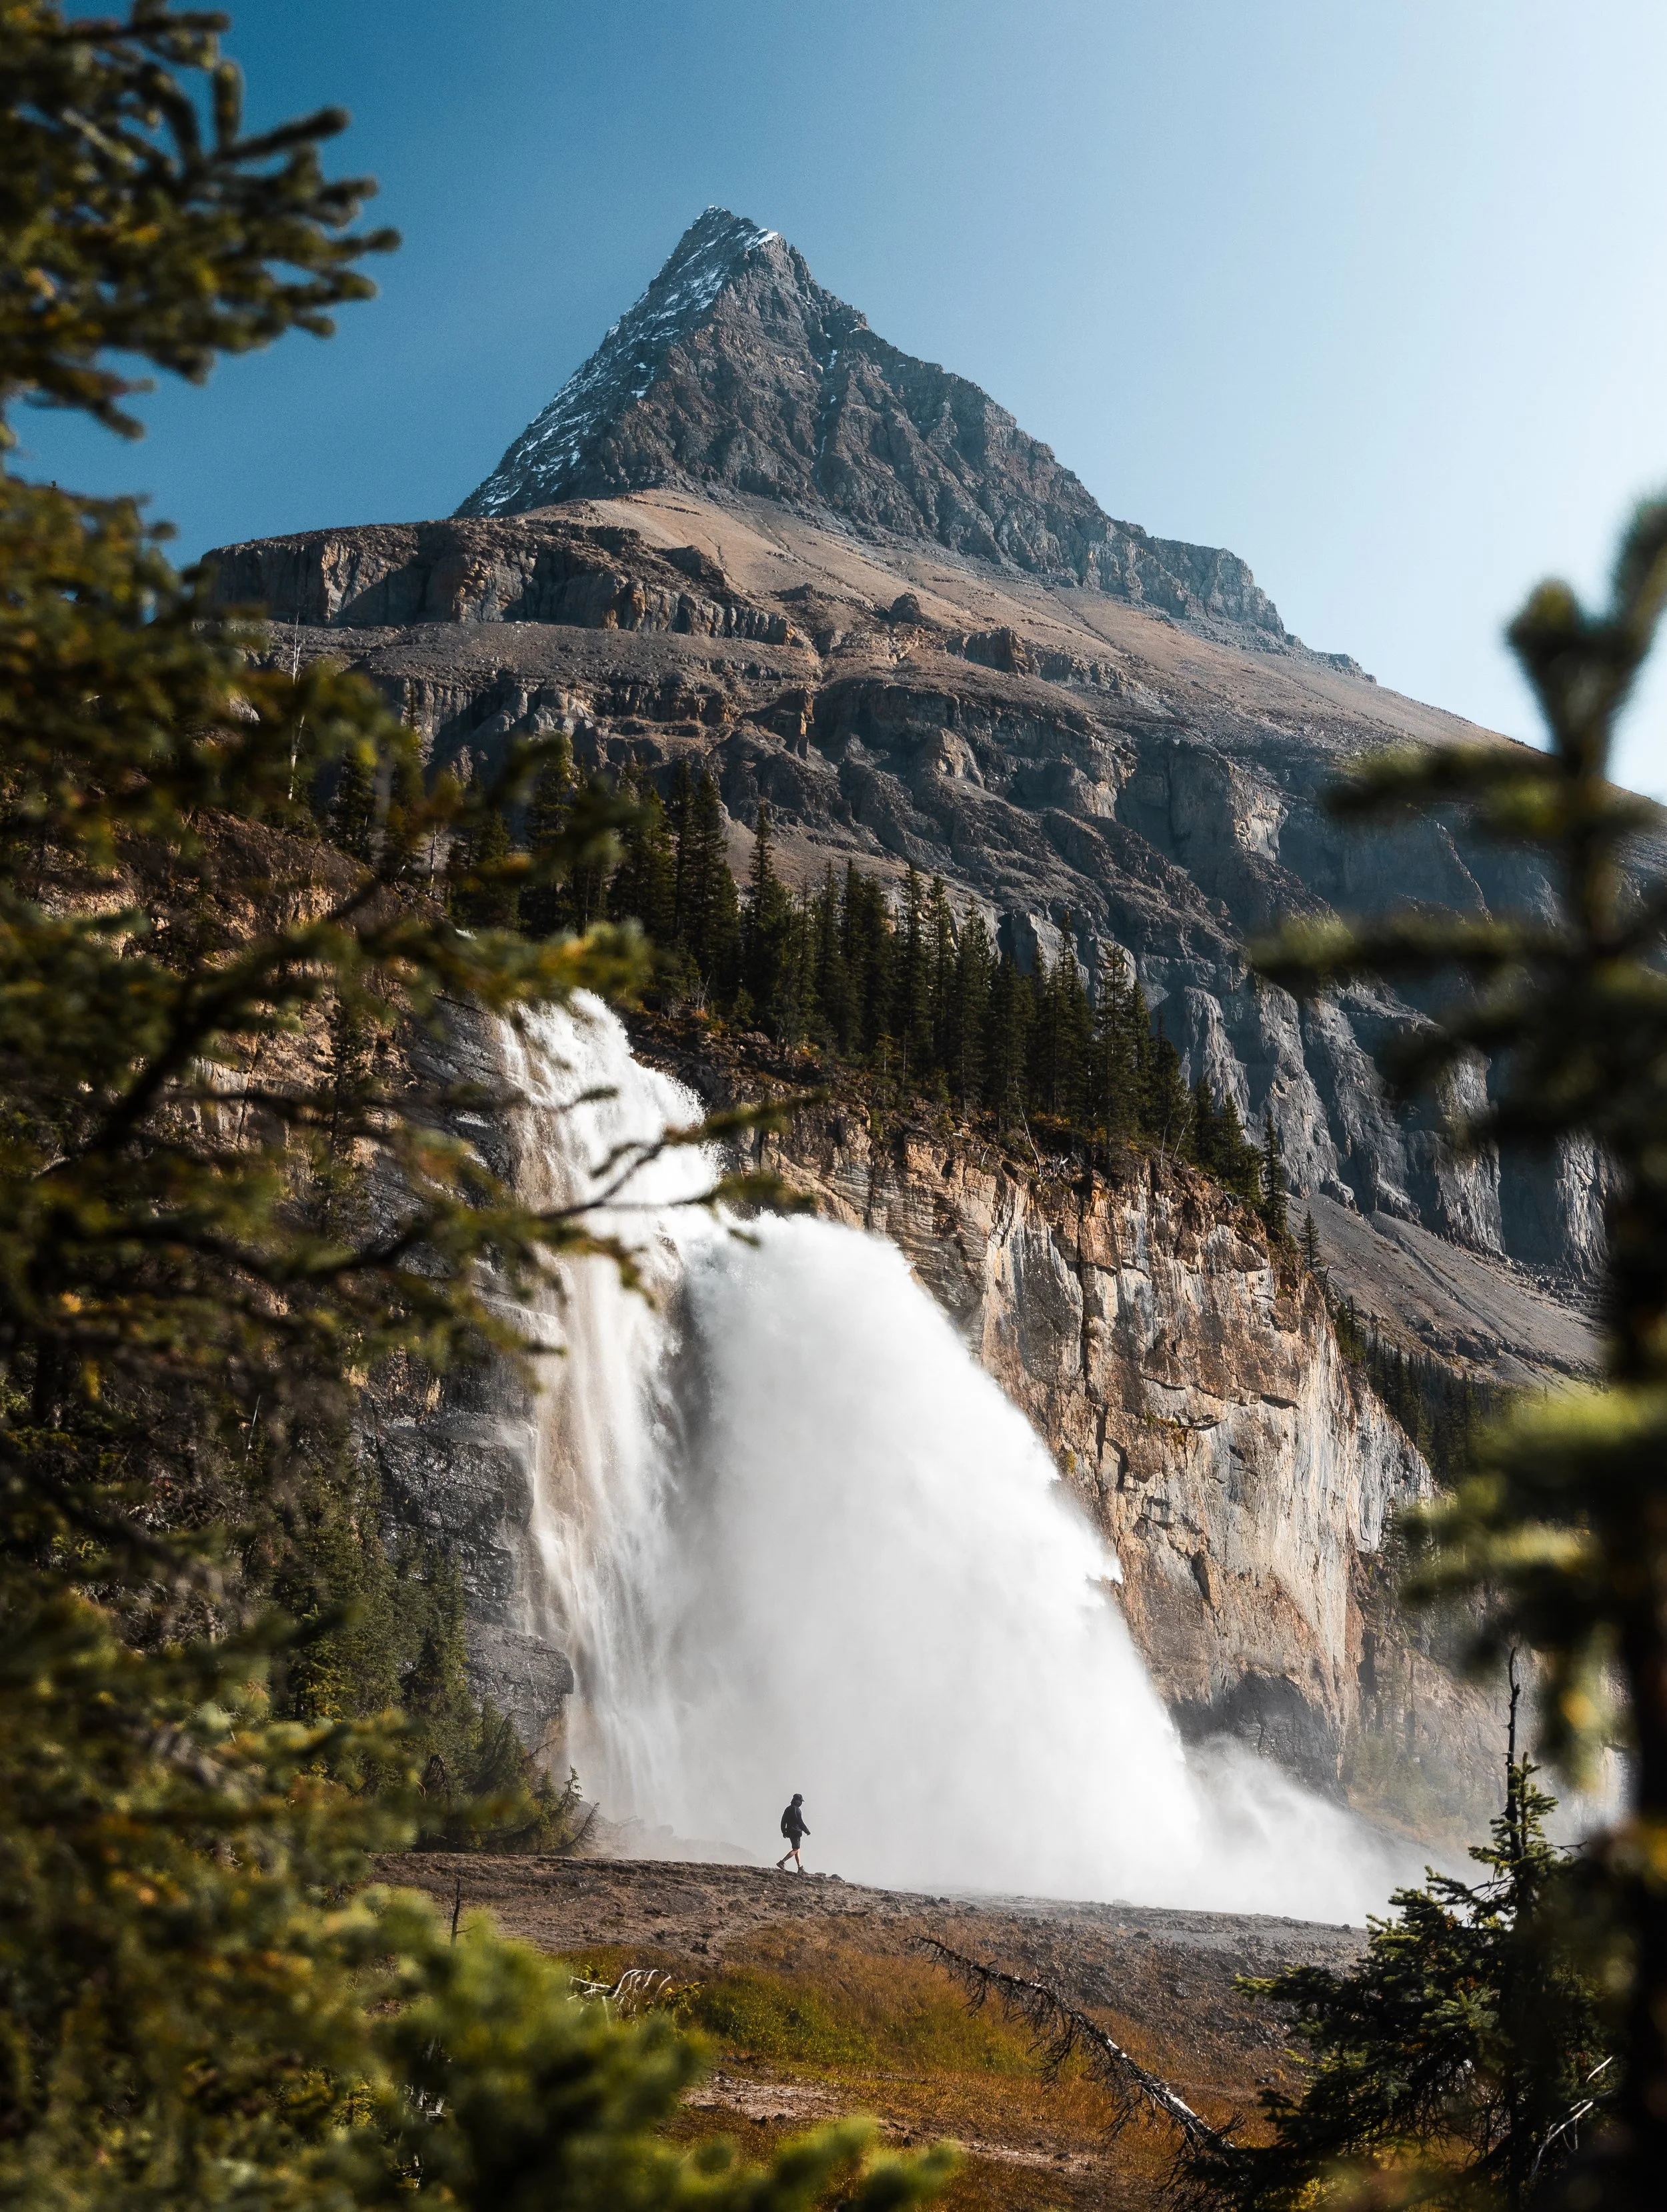
Emperor Falls
The trail then makes its way through the valley and across a large, hopefully flood proof, metal bridge spanning the river.
Once you’re back in the woods the elevation gain gets much steeper, in fact the majority of the gain is in this section between the end of the bridge and Emperor Falls.
The Emperor Falls campground lies directly on trail but the falls itself are a little detour of around 150 m from the main trail.
The falls themselves are incredibly impressive with the peak of Mount Robson sat just behind. The falls let off a lot of mist which can be super refreshing on a hot summers day after an uphill slog, if you get too close you can certainly get pretty wet, pretty fast!
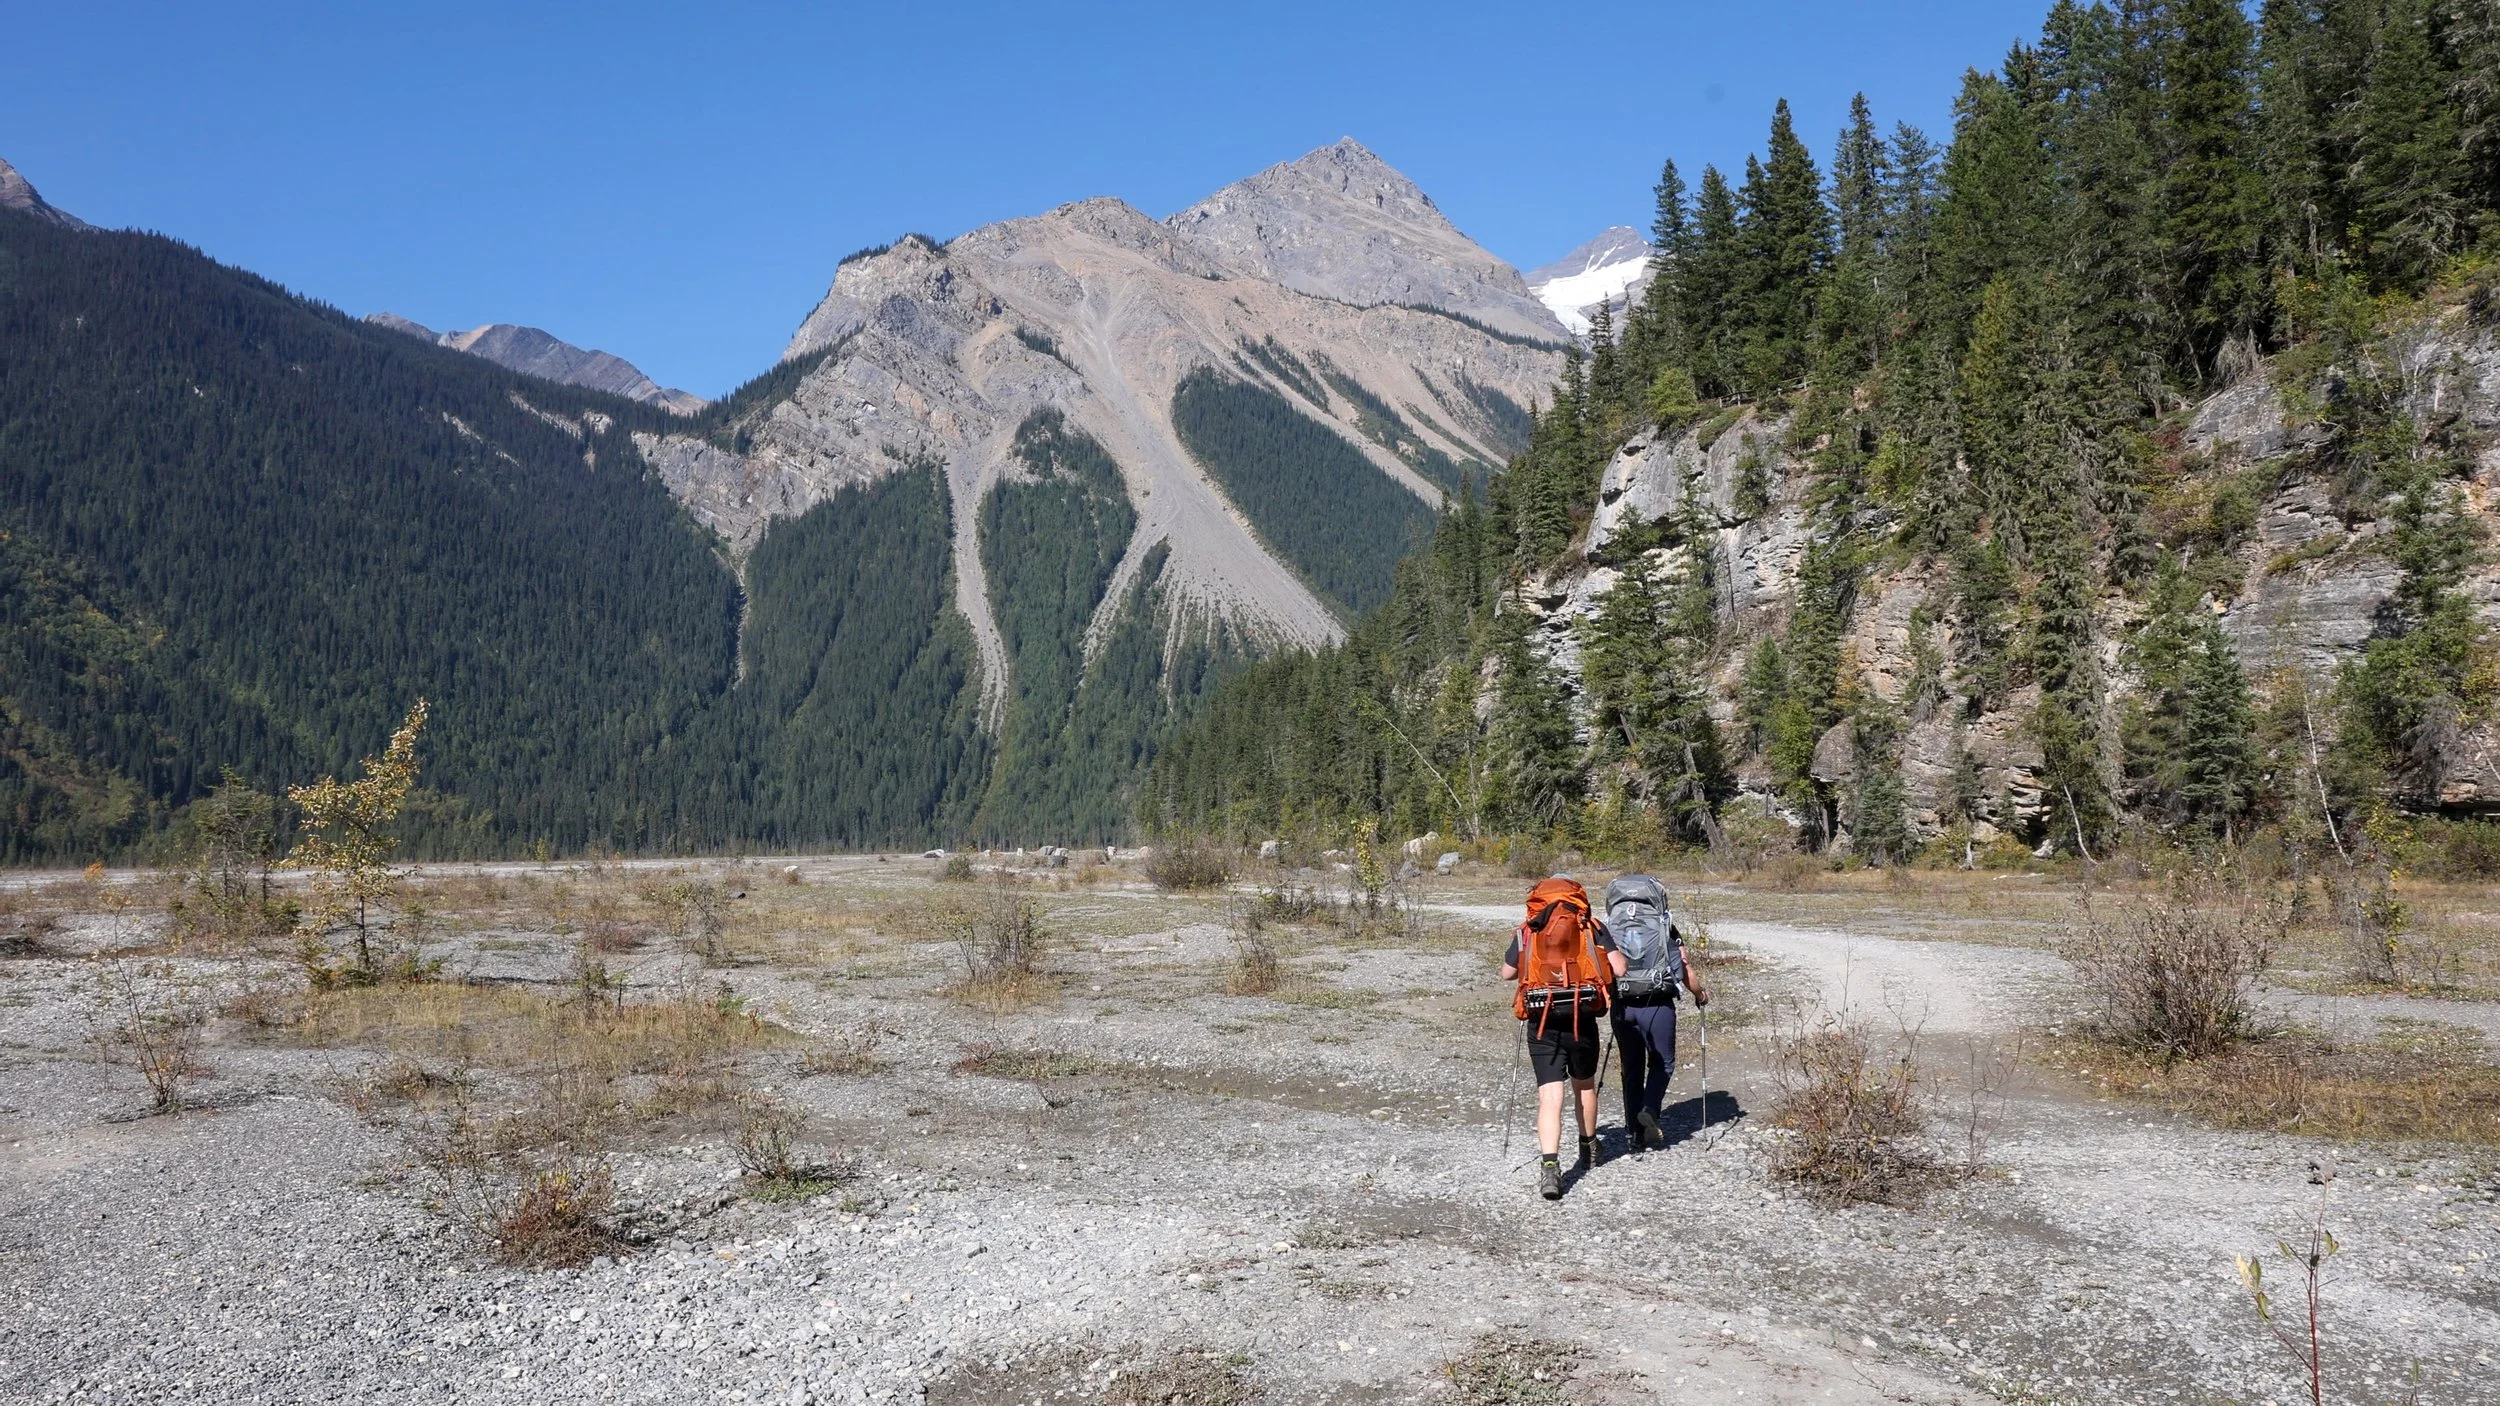
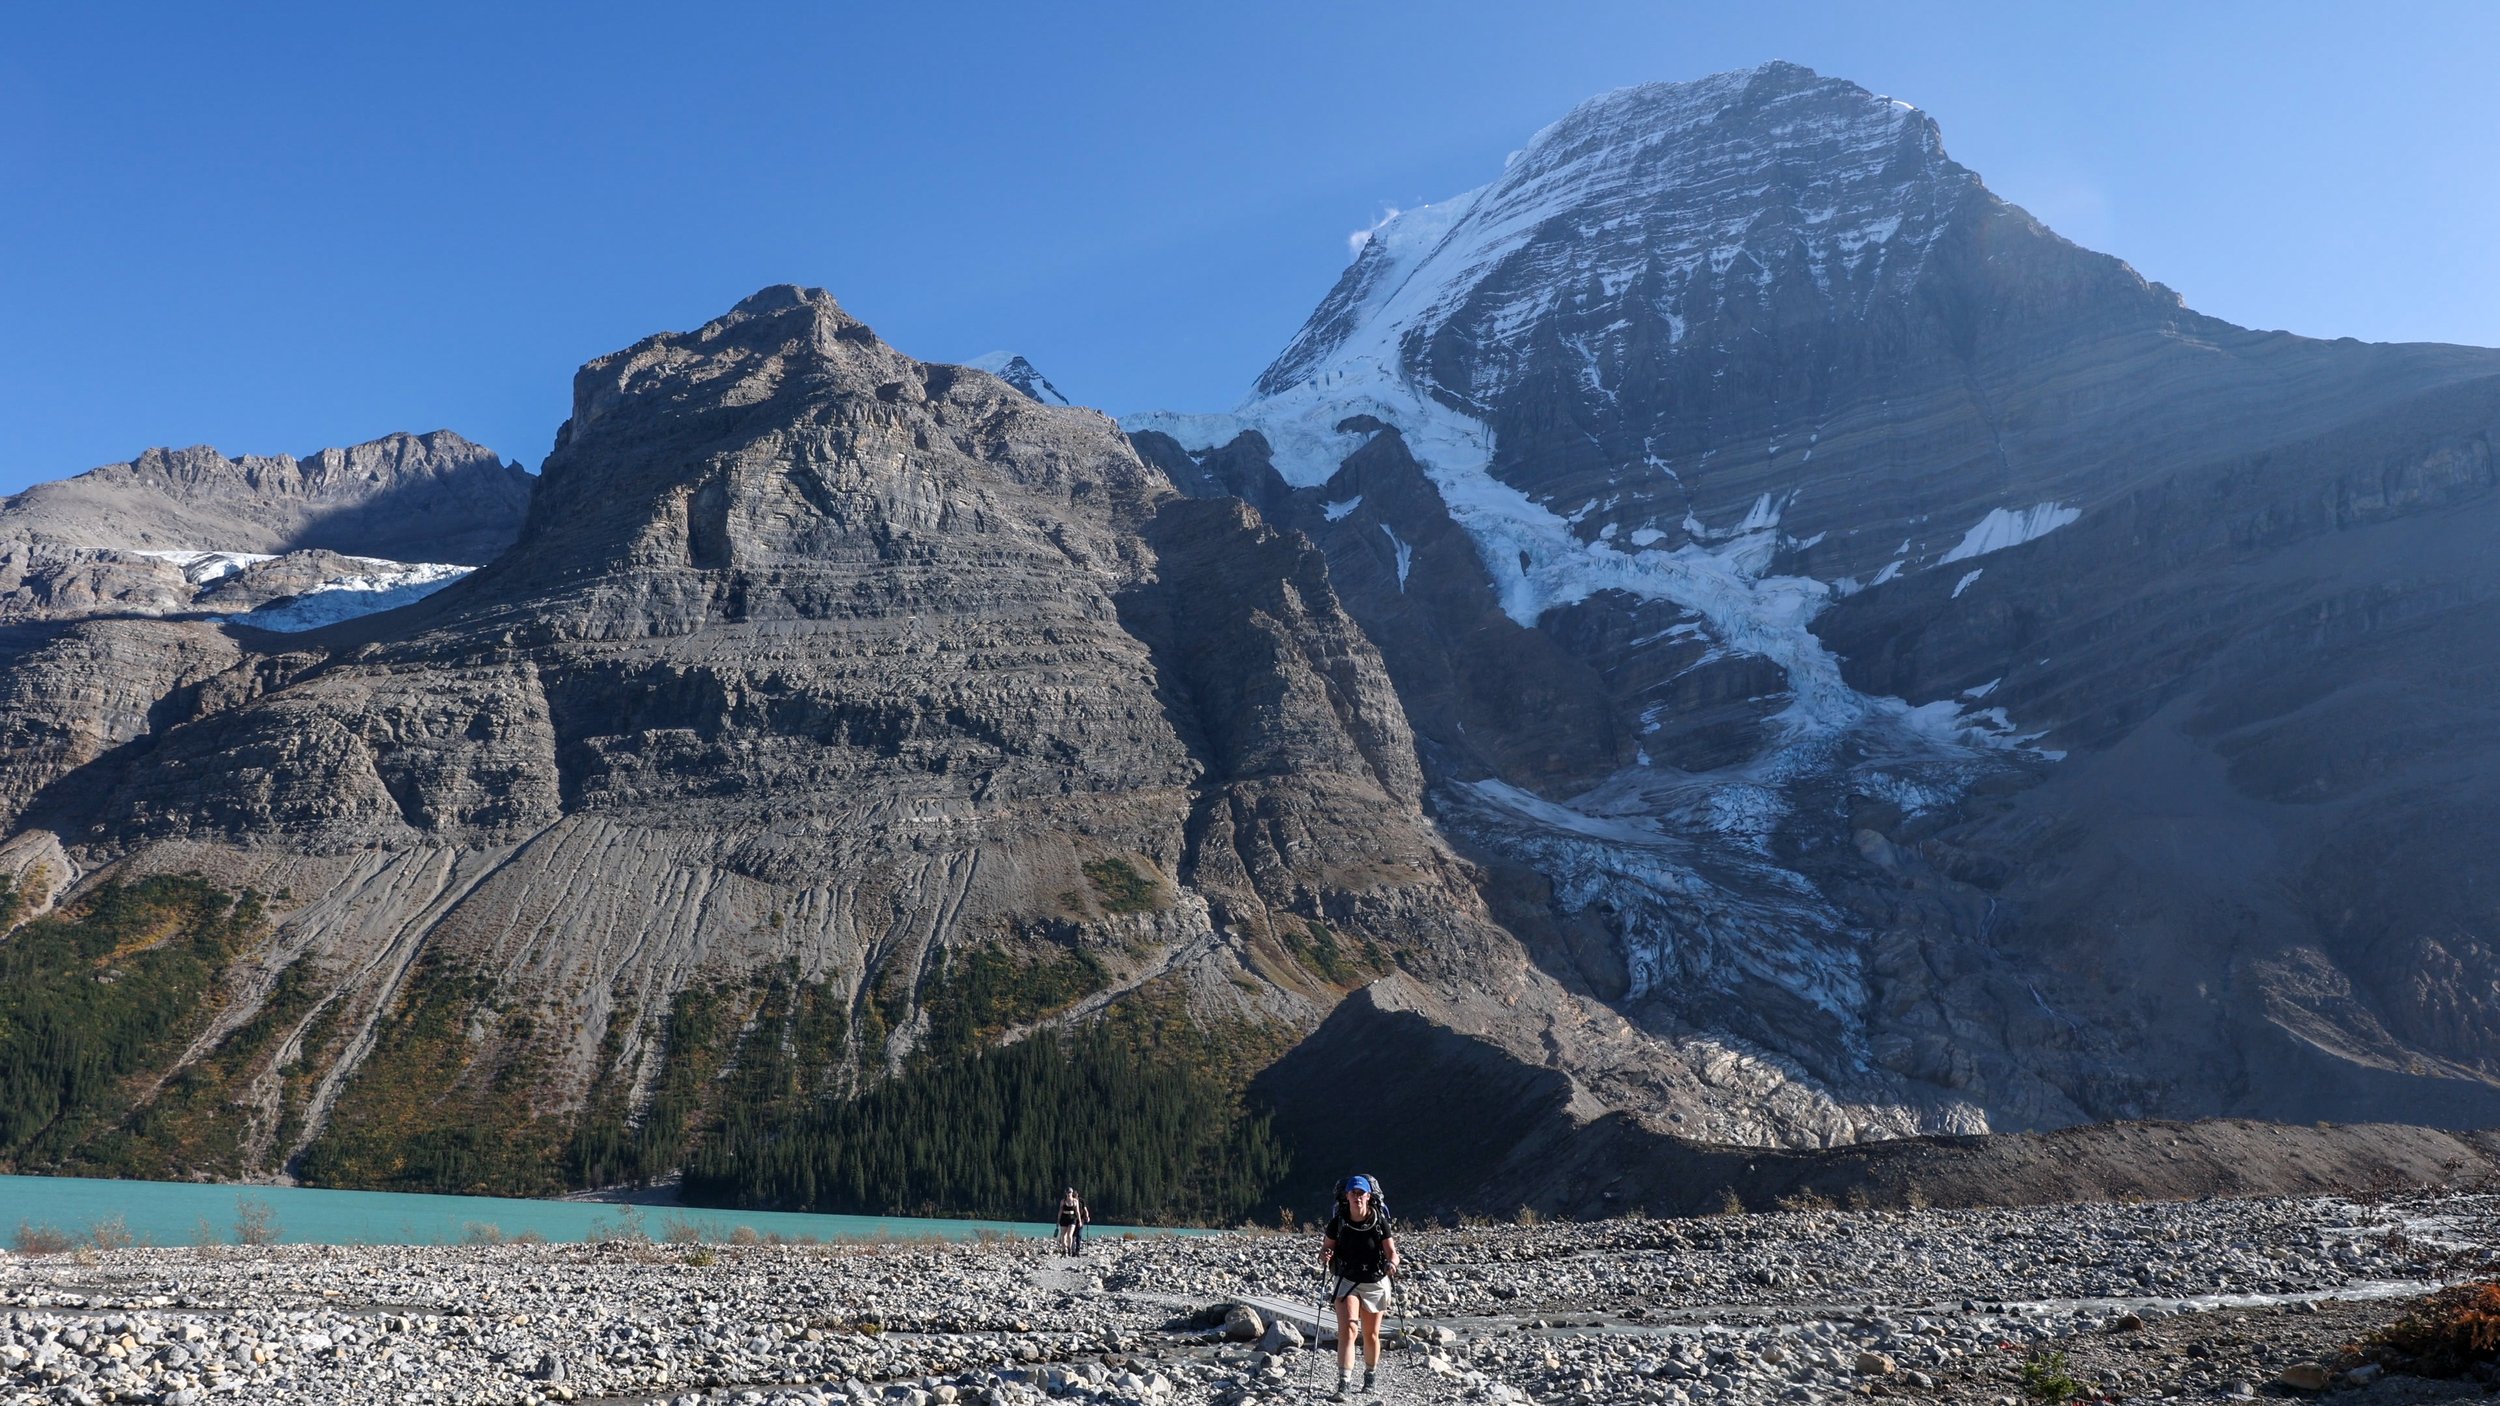
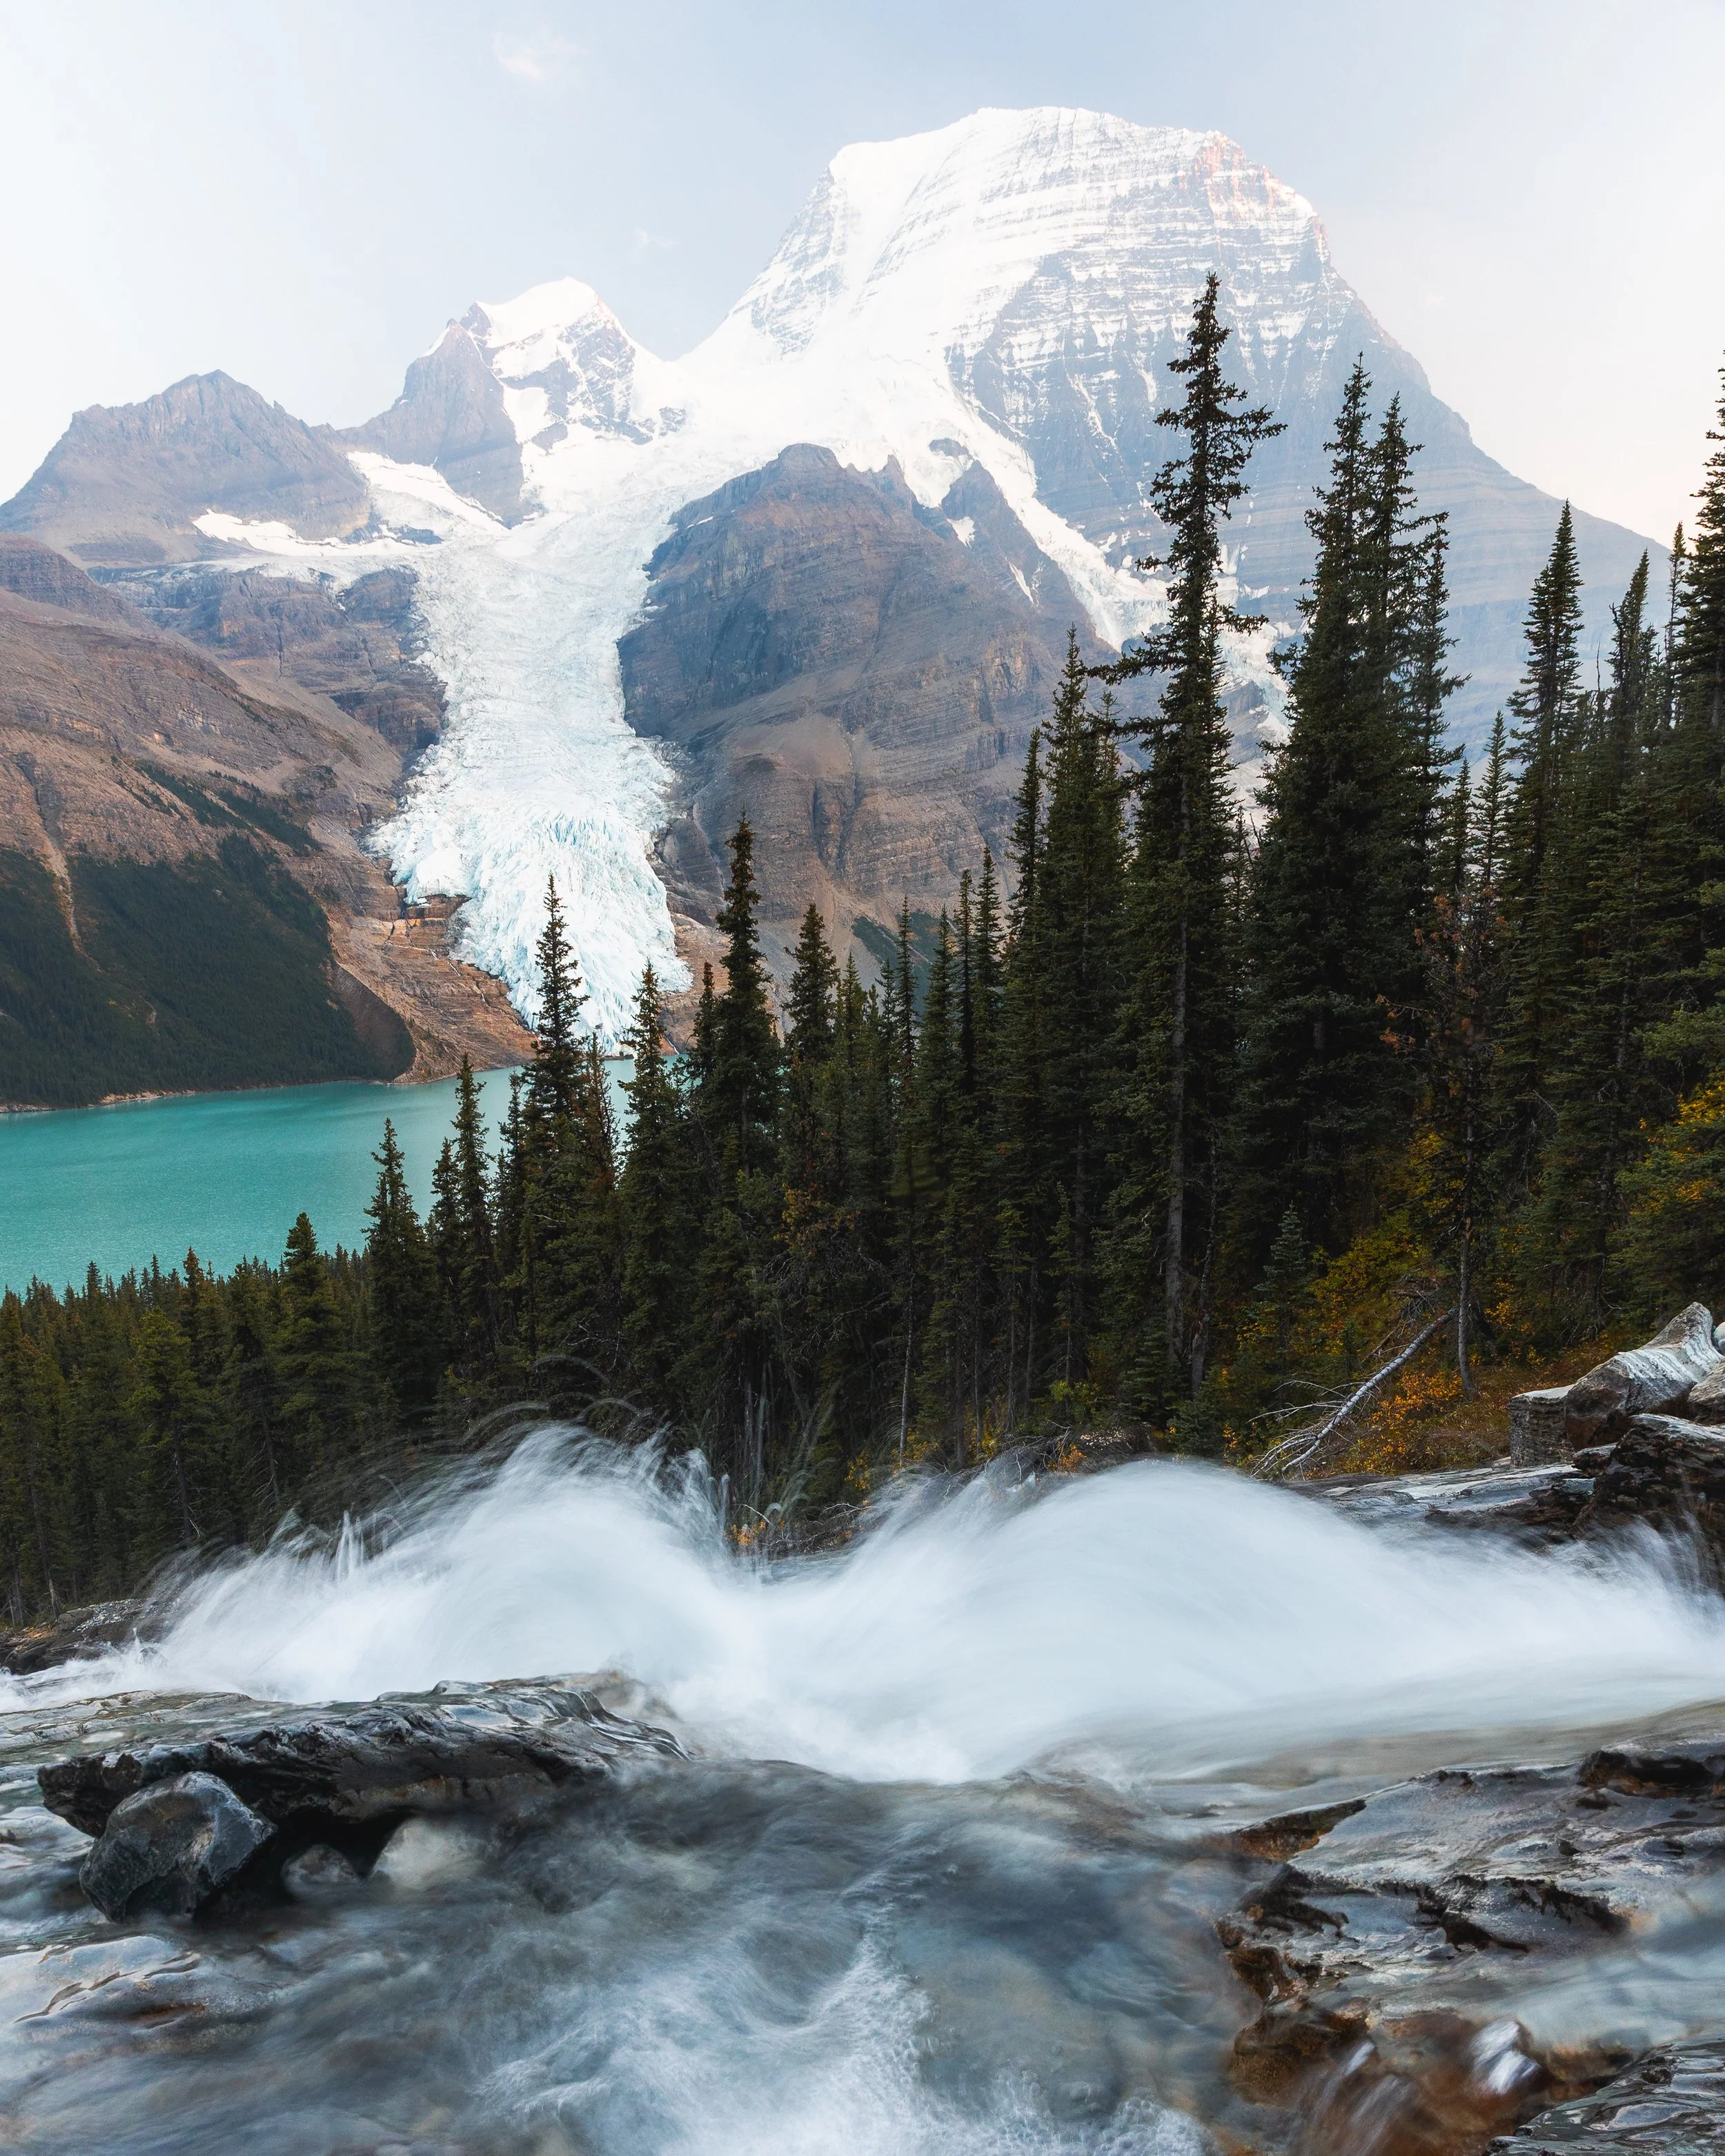
Emperor Falls to Berg Lake - 5 km
Once you’ve had your fun soaking in the spray of Emperor Falls it’s only a short 5 kms from this point to the shore front of Berg lake and it’s namesake campground.
You’ll also be pleased to know that all the elevation gain is out of the way and the last section of trail is relatively flat, easy on the legs and incredibly scenic. Where there were once small wooden bridges there are now steeping stones letting you hop and skip over some the inlets as they rush past. These can be a little slippery so hiking poles and good, waterproof boots are highly recommended!
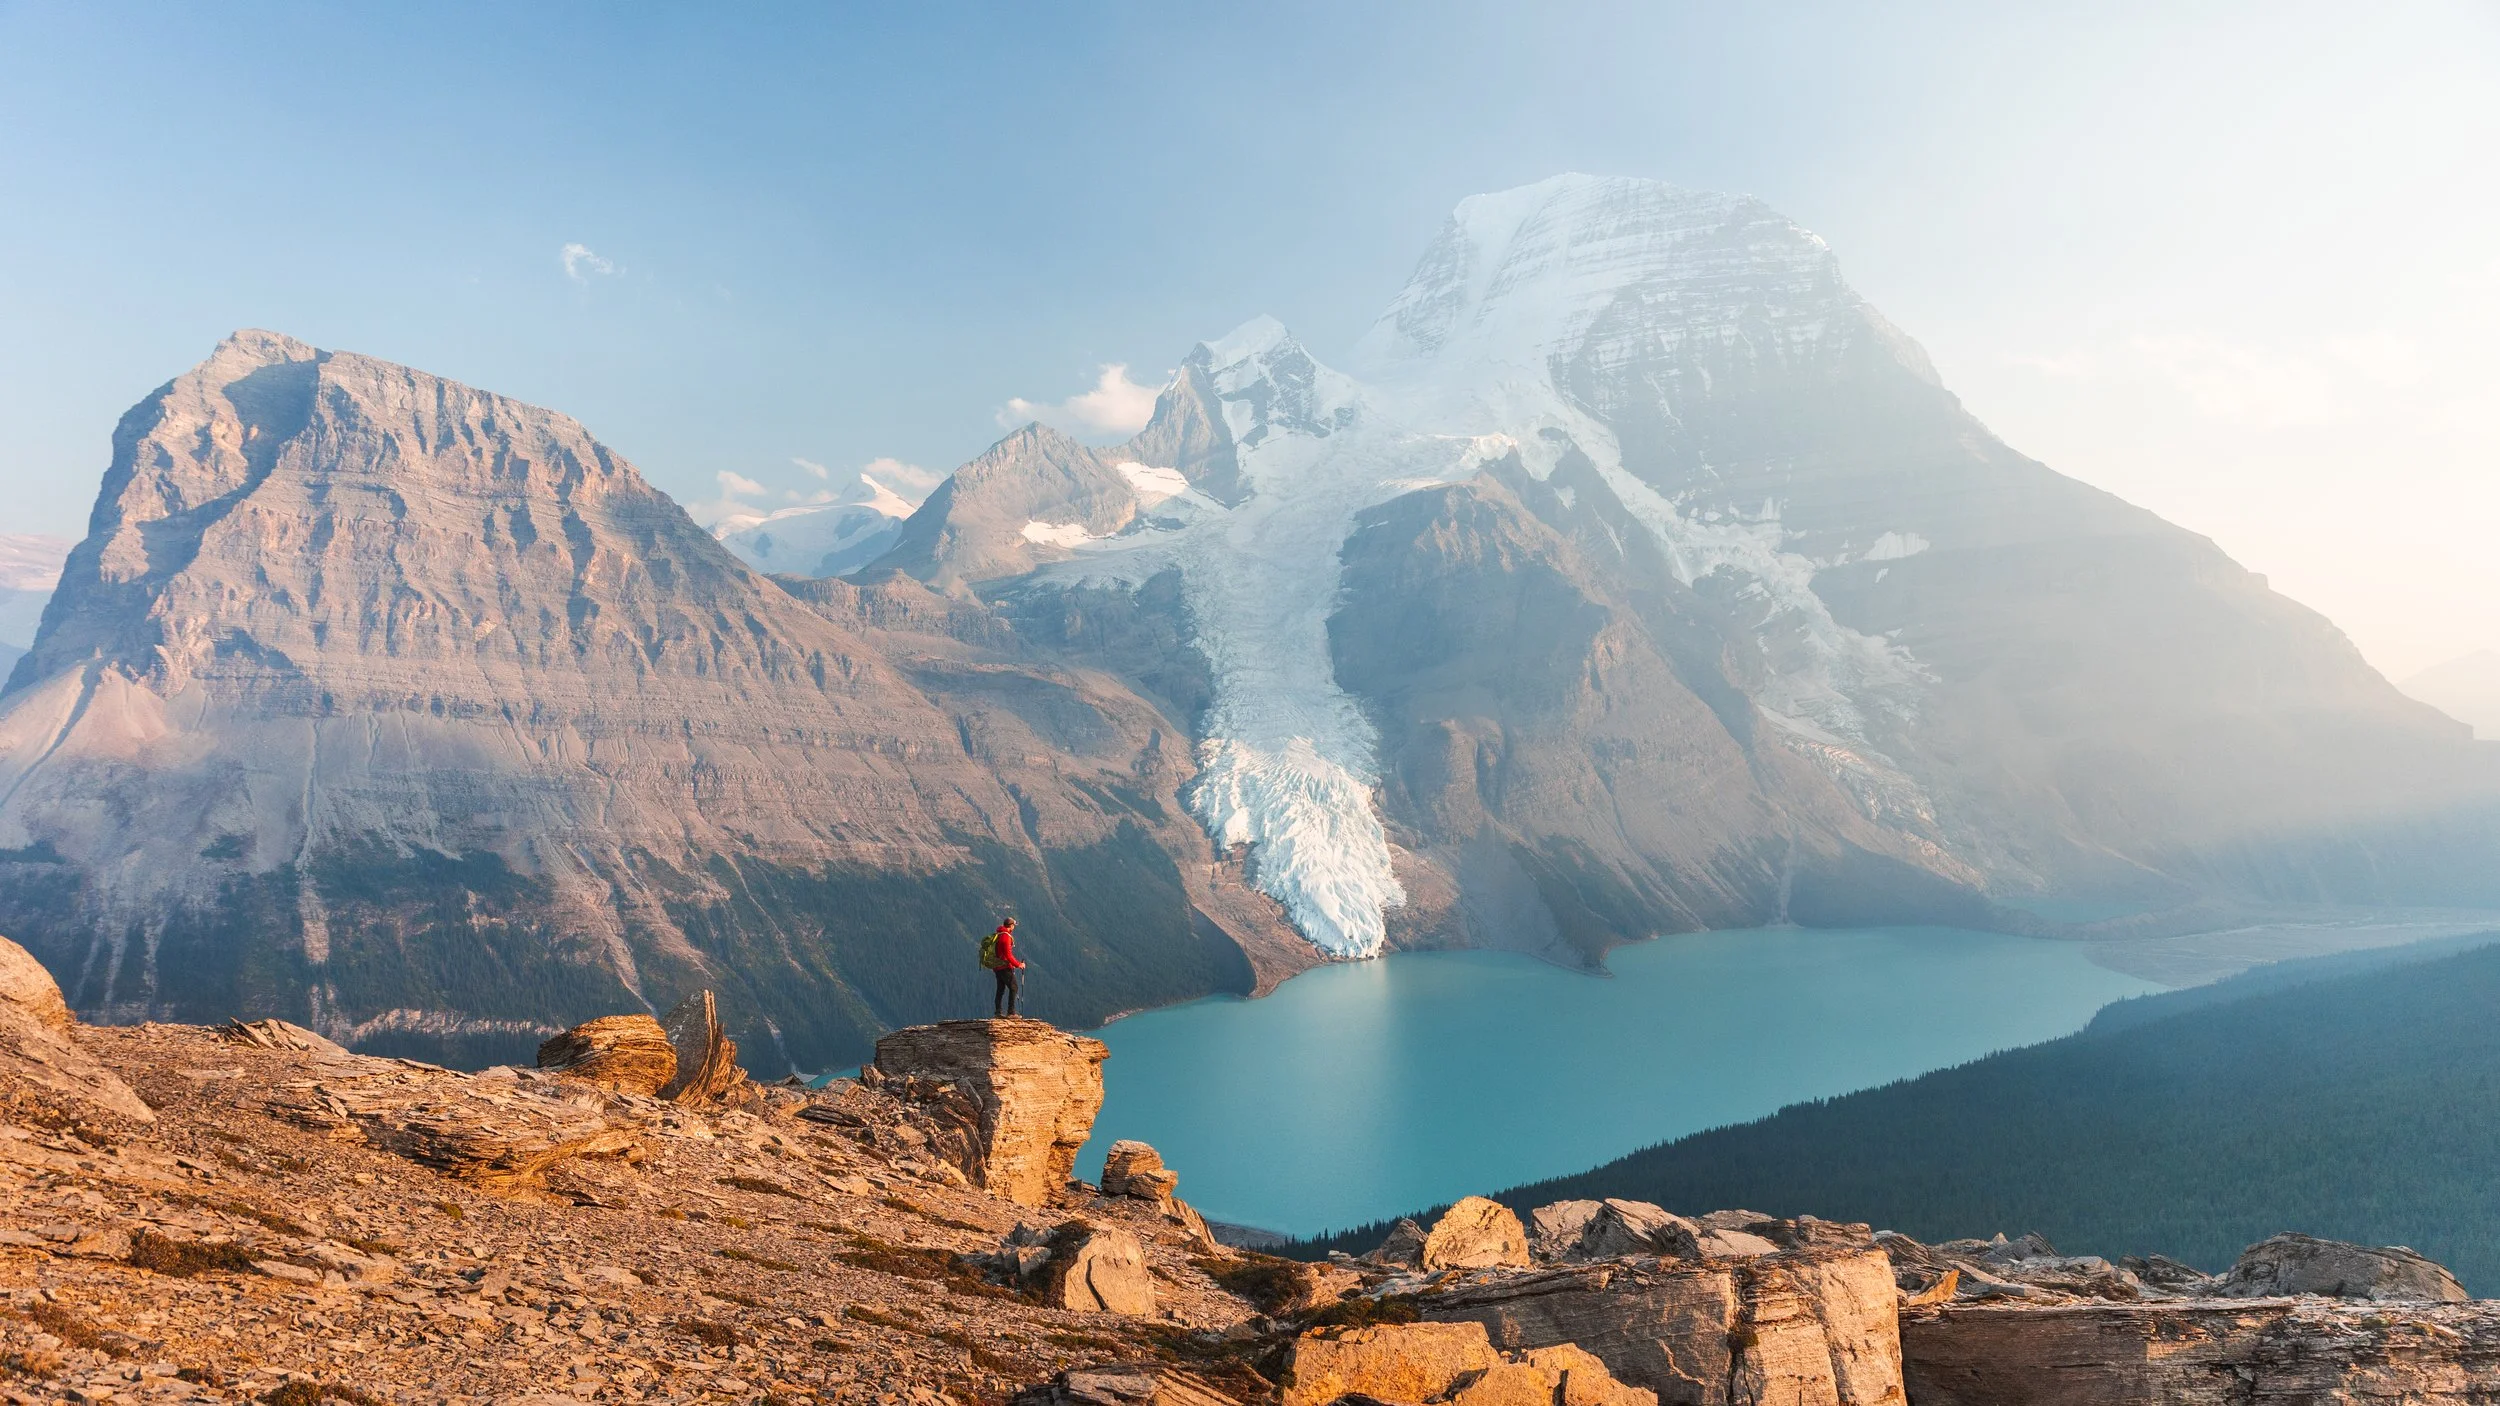
Hopping between rocks on our way back out.
A sunnier day as we hike our way in with Mount Robson in the background.
Berg Lake Campground
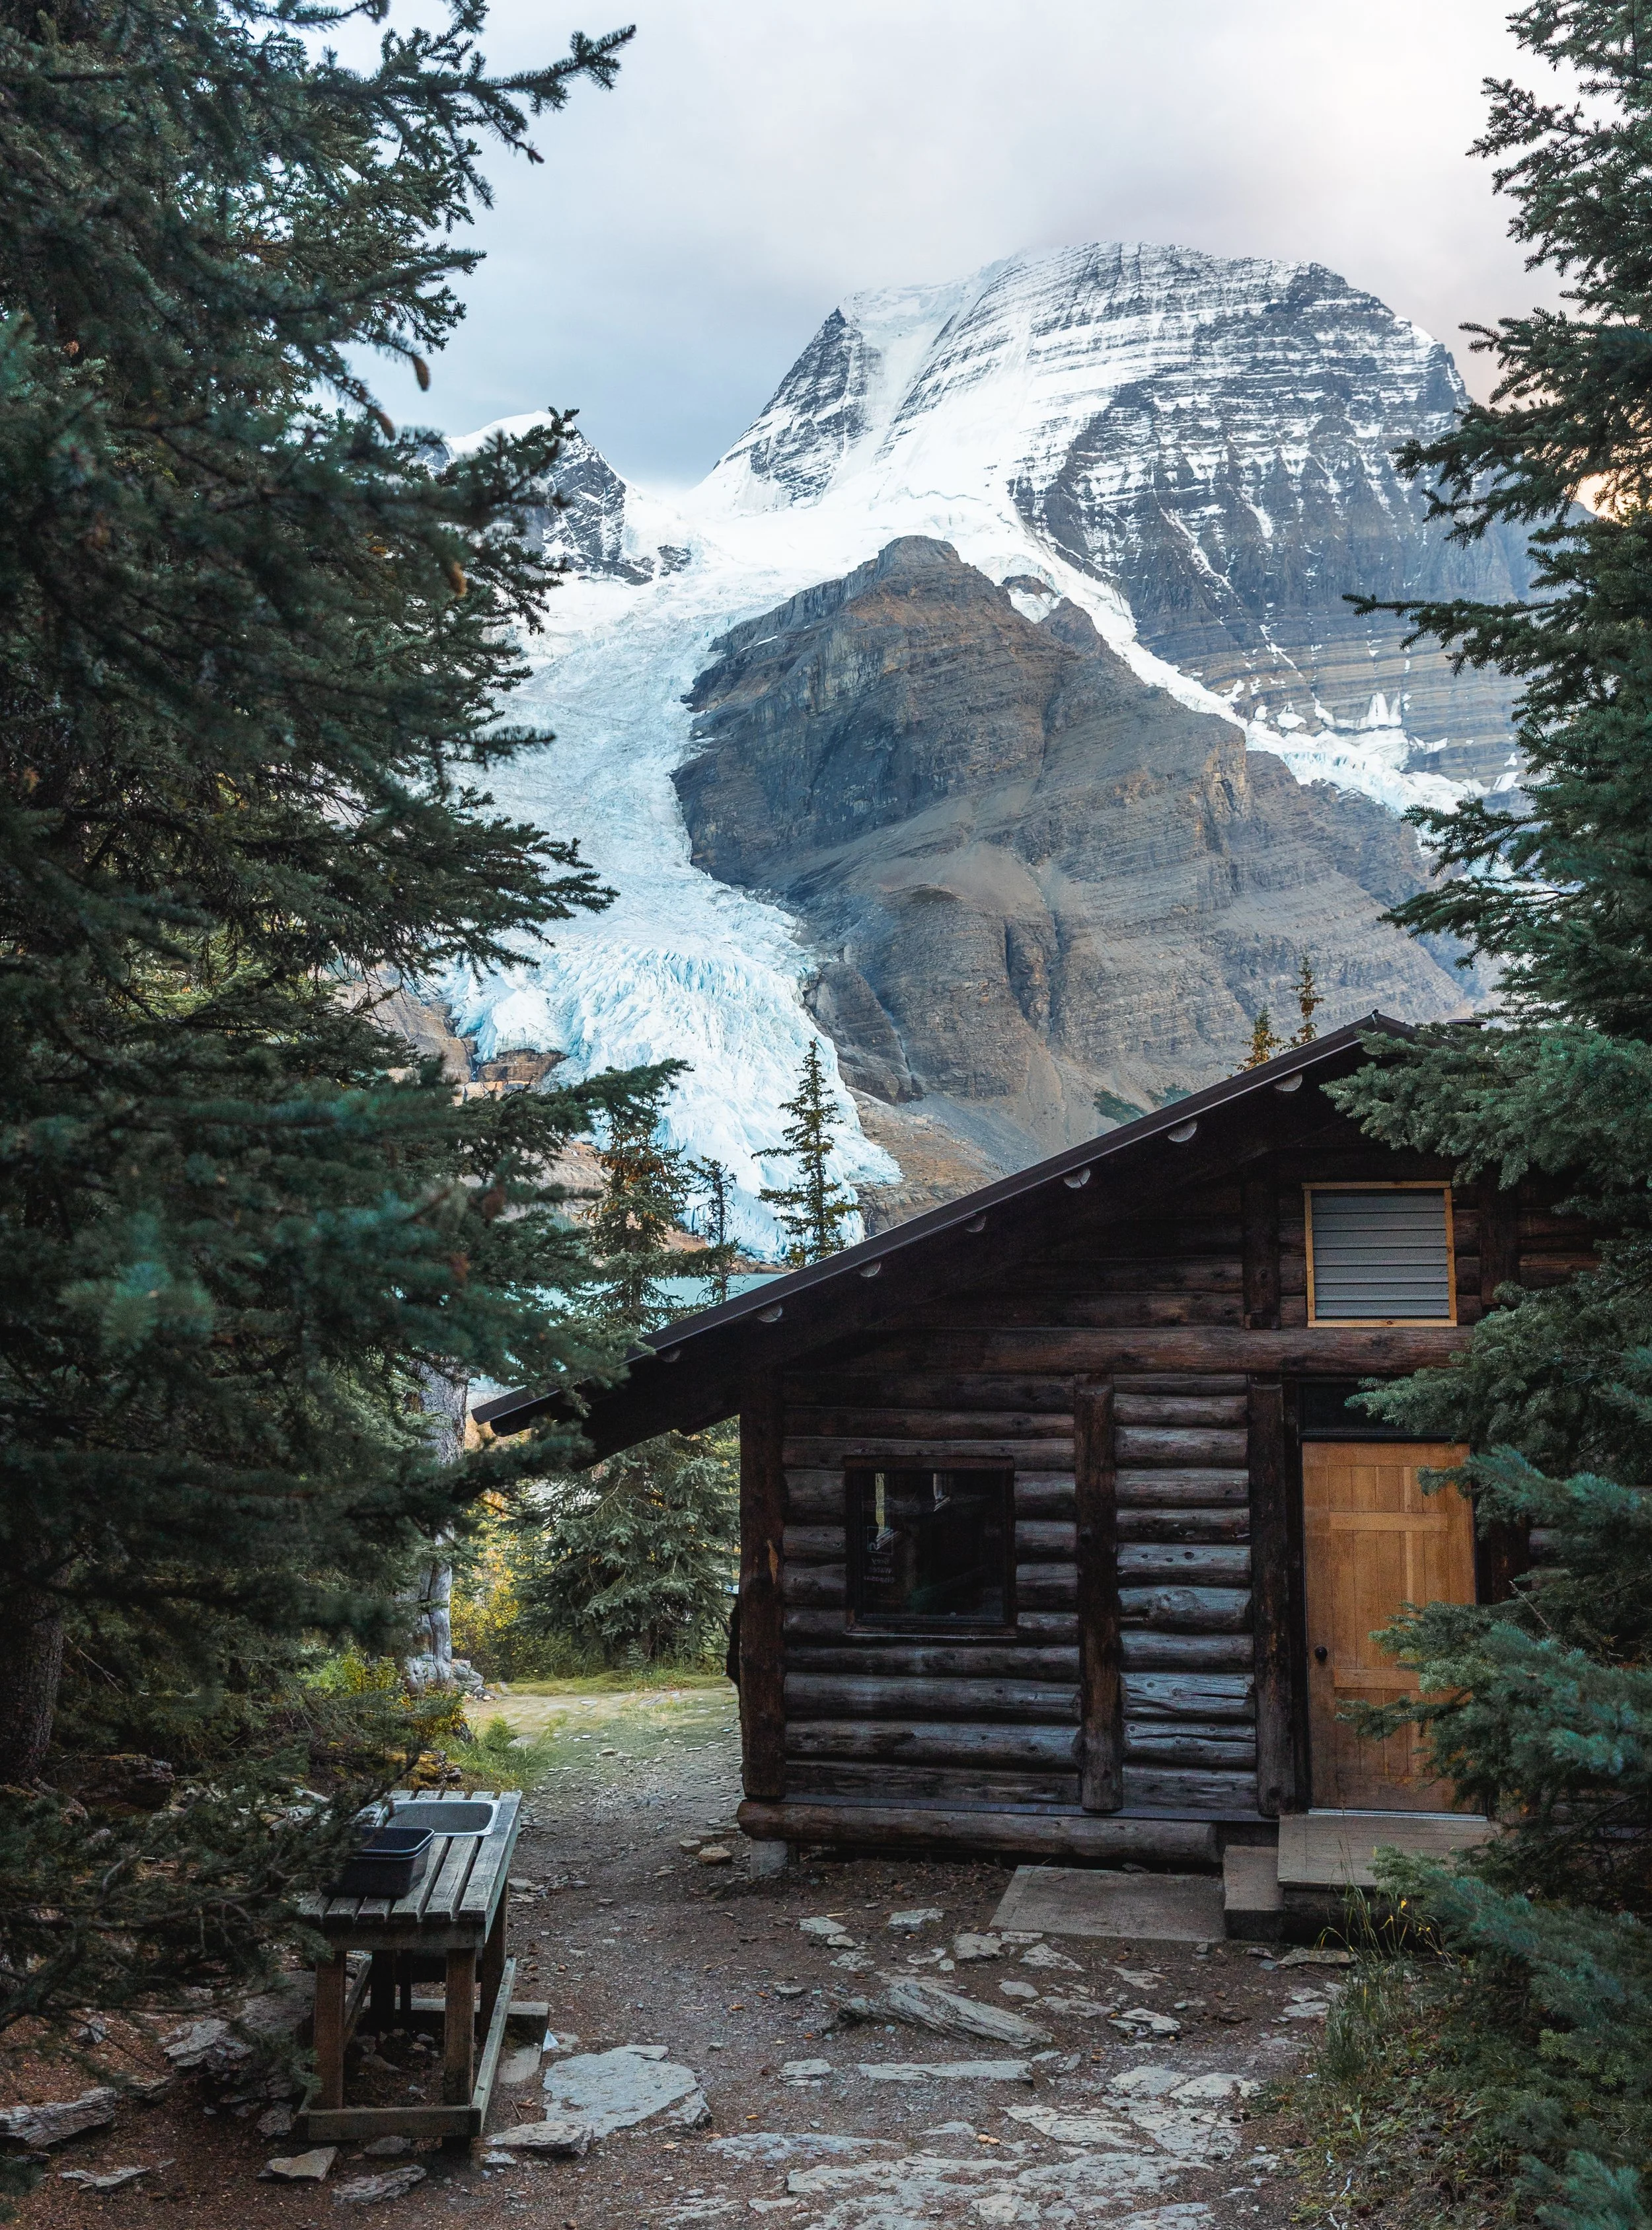
The cook shelter.
Berg lake and the campground is definitely the highlight of this trail and why I encourage you to try and book as many nights here as you can. On this occasion we had two nights here which was well worth it as it gave us some time to wait out weather windows to make the most of the views and the photography.
The campsite is fully kitted out with lake side picnic benches, a cooking shelter, compost toilets, tent pads and bear lockers. The majority of the tent pads are in the woods but there is the odd one or two that have views of the lake and Mount Robson. Personally I wouldn’t stress too much about which tent pad you end up with as you’ll spend the majority of your time cooking and eating at the lake side cooking area and shouldn’t be doing either of those things close to where you sleep as to not attract bears! Don’t be like those influencers you see who are happily smiling with a jetboil in front of them sat by their tent with Mount Robson behind, it sets a bad example!
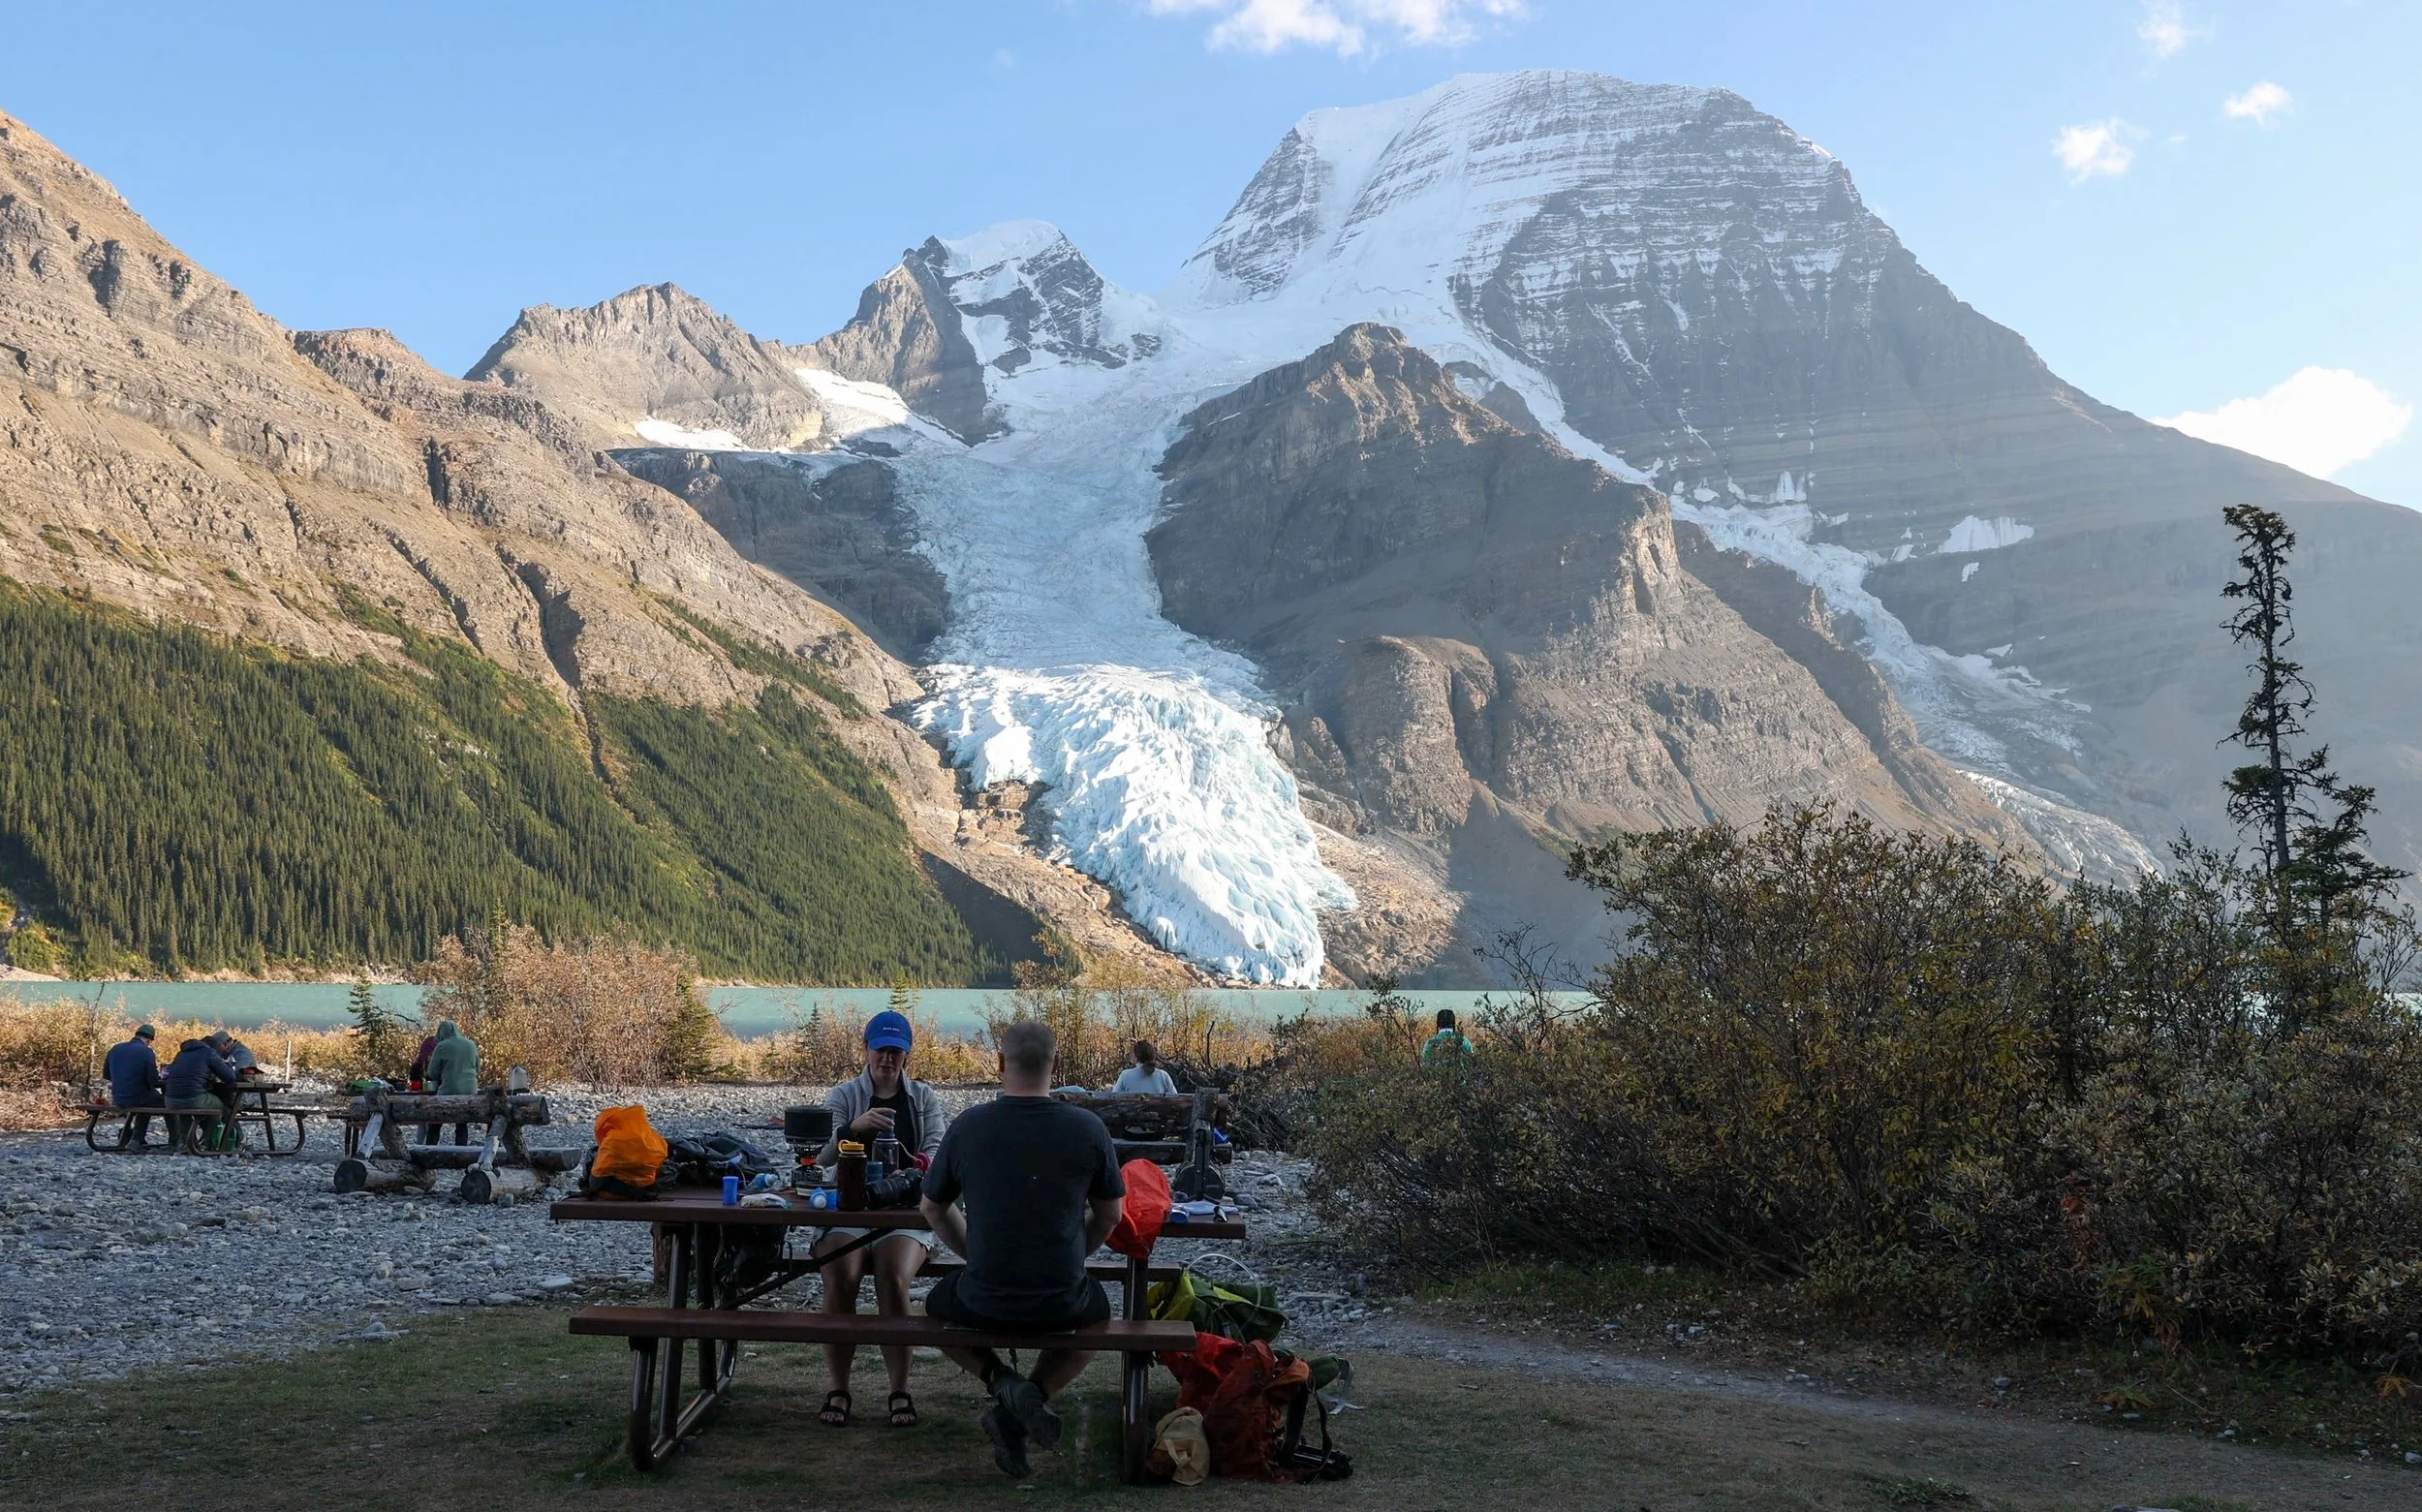
Enjoying dinner with a view.
Photography and Side Hikes on The Berg Lake Trail
Now once settled at Berg Lake campground it is by no means the end of your hiking or your experience! There are lots of fantastic photography locations as well as side hikes that you can do from this campground that offer even better views (who thought that would even be possible!)
Lakeside Photography
Just a stones throw away from the campground is of course Berg Lake and first thing in the morning you’ll find some near perfect reflections. If the lake itself is a little too rippled you’ll often find shallower pools just back from the shoreline which with the right angle can offer some phenomenal images.
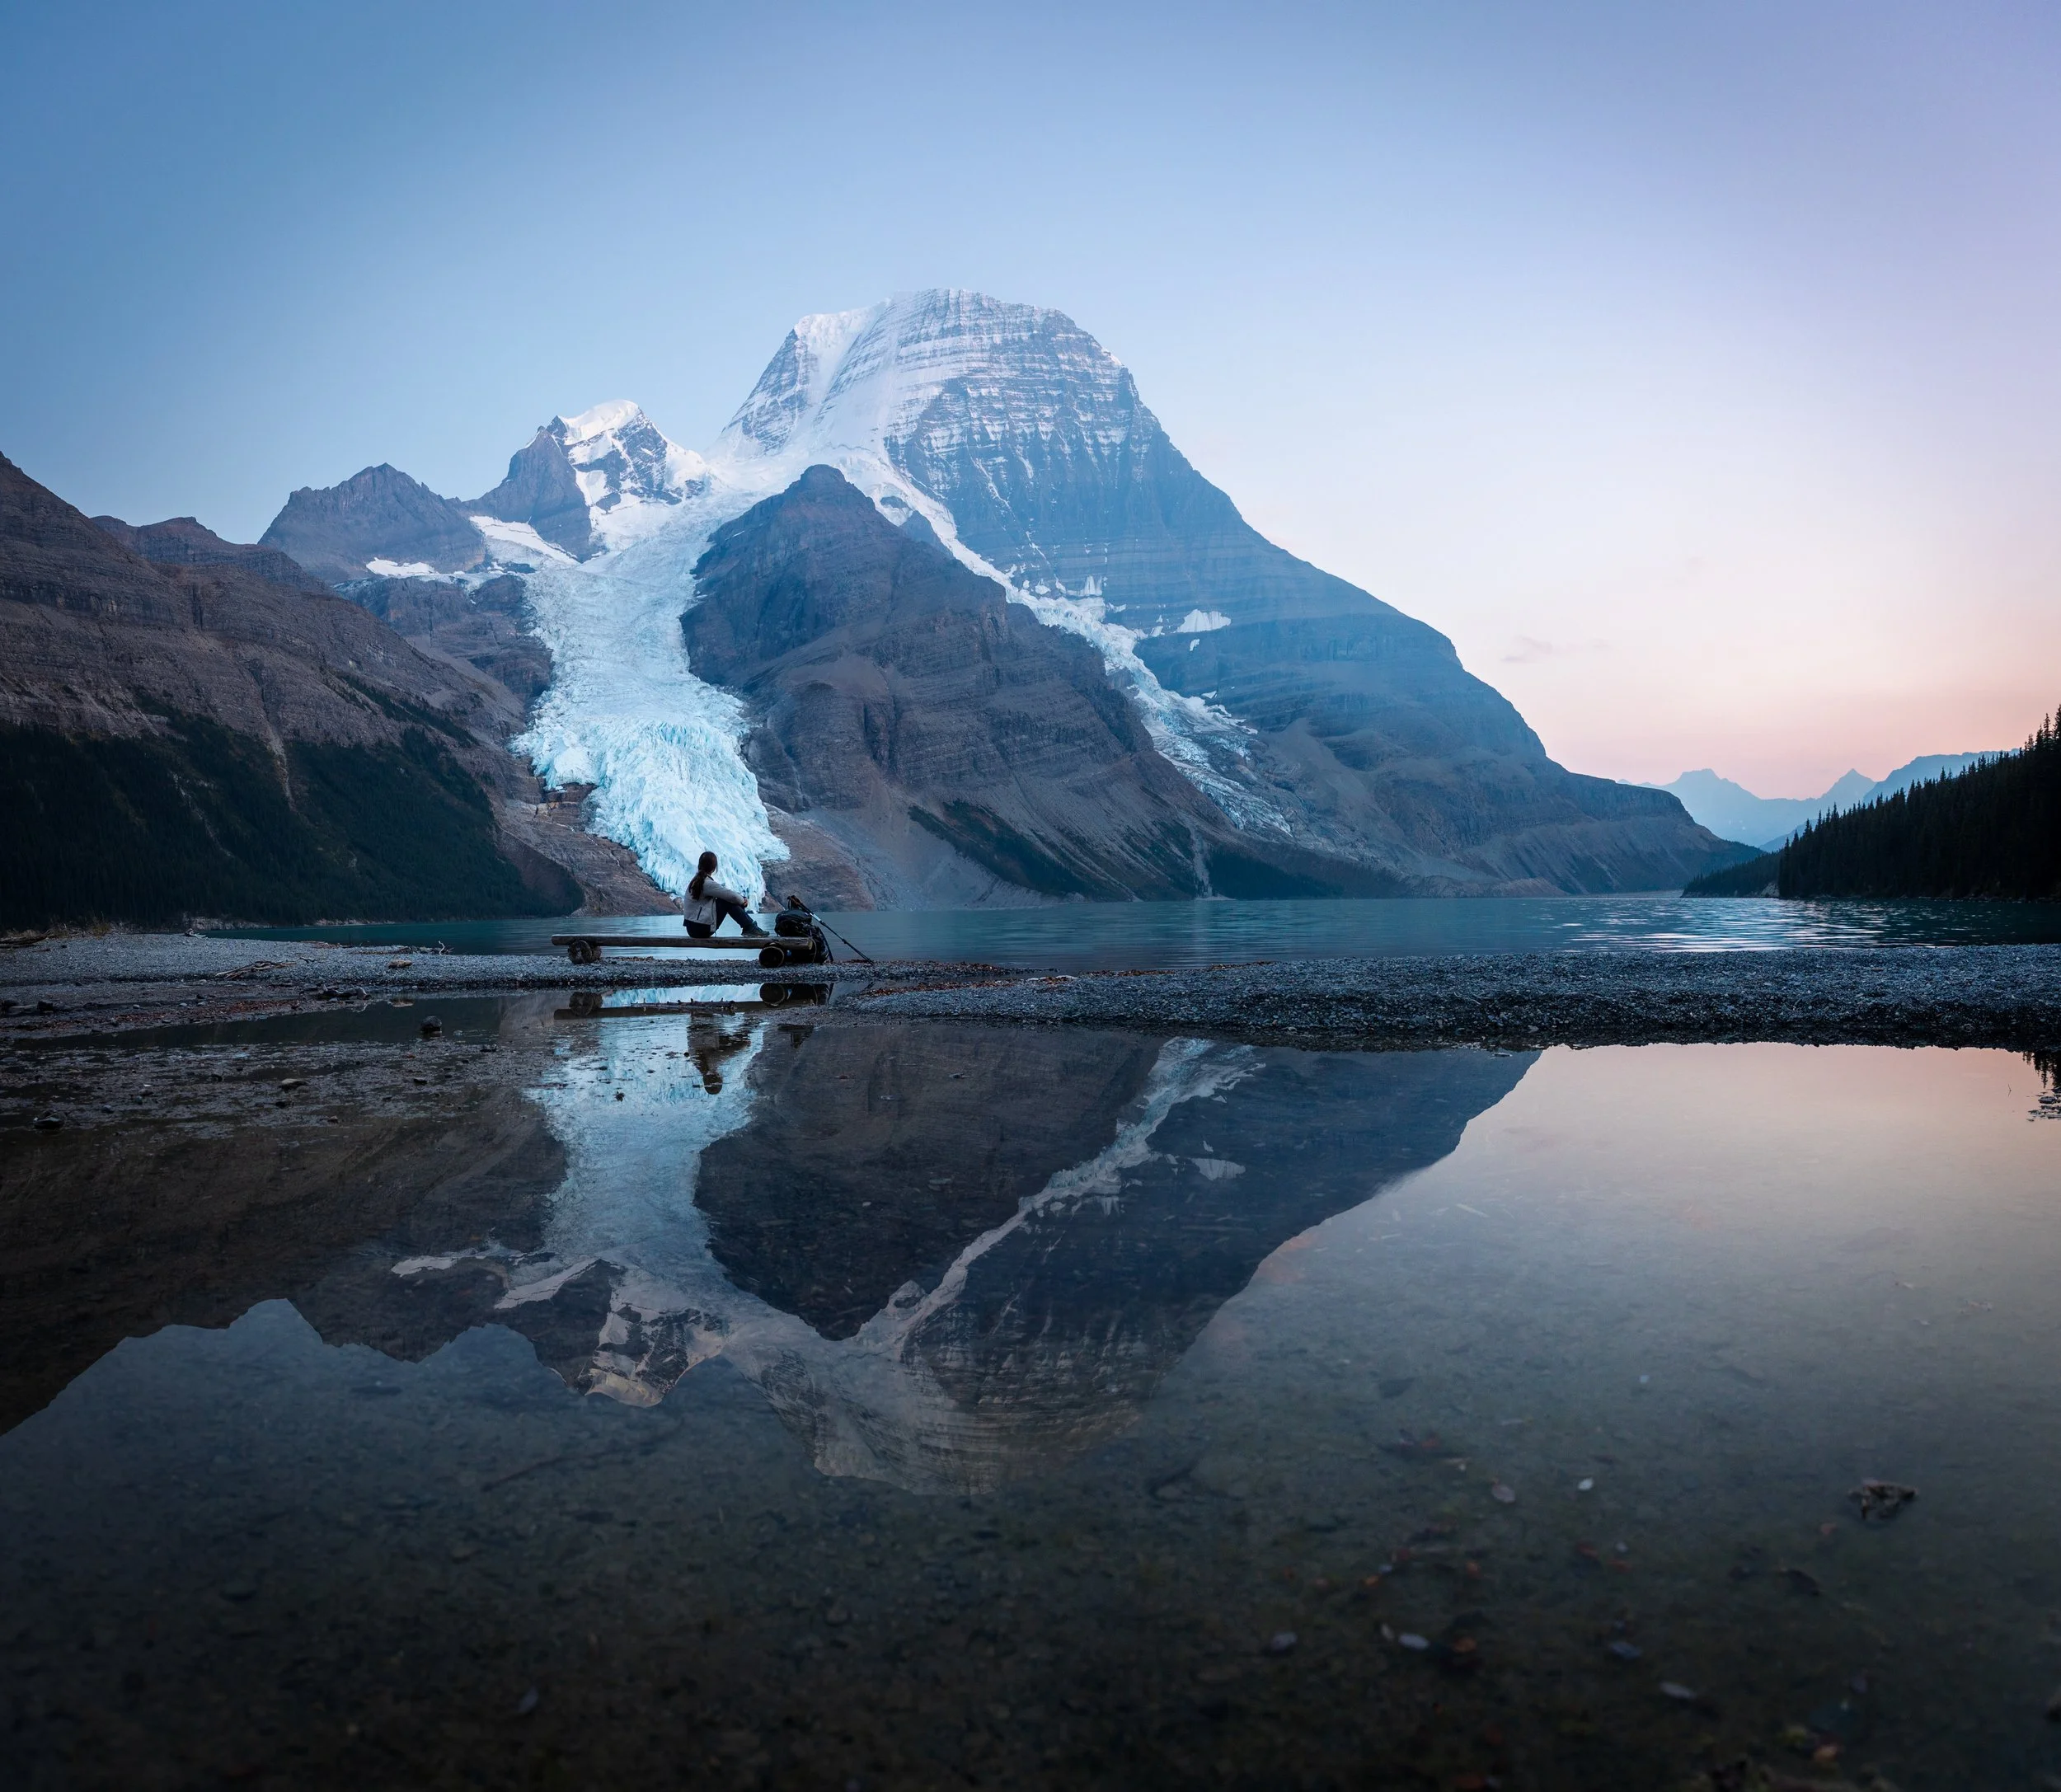
Blue hour at the Berg Lake shorefront.
Toboggan Falls and Mount Robson Viewpoint
A short walk uphill from the campground will take you up past Toboggan falls and eventually on to Mount Robson viewpoint. The effort to reward ratio of this trail is out of this world! Although it’s a little steep it’s only around 2.5 km to get to the top.
The walk up to Toboggan falls
Be sure to keep an eye out for compositions as you hike past the falls.
The views from the Mount Robson viewpoint
Mumm Basin
The Mumm Basin trail is around 7.5 km and takes you up past Toboggan falls towards the Mount Robson view point. From here you traverse to the right and come back down on the far side of Berg Lake near Robson Pass campground. Throughout the hike you’ll get some slightly different view points of the lake below and it makes for a great, but not too strenuous day hike. Personally I like to be in and around the top of the view point and Mumm basin around sunset as you can get some stunning images from this point.
Snowbird Pass
Now Snowbird Pass is the big one! It’s around 20 km with 1000 m of elevation gain and takes in some unspoilt views of Snowbird Glacier. It’s a big day so if it’s in your plans I’d recommend leaving a couple of full days at Berg Lake. One to rest and do a shorter hike and one day to commit to the full 20 km. Personally I think that the views and pictures to be had are actually better from the shorter hikes so don’t feel like you’re missing out if you don’t have the energy for another 20 km day!
The Way Out!
The way out on this trail is super simple as it’s an out and back! All you need to do is follow the trail you hiked in on back the way you came. The good news is though it’s almost all down hill with only about 250 m of elevation gain over the 21 km which you won’t really notice. The way out took us just over 5 hours with a little lunch break on the way too so it’s easy enough to get back to your car and drive back home before the sun comes down!
Where to Stay Before and After Hiking The Berg Lake Trail
Jasper
The town of Jasper is around a 40 minute drive away and whether you’re camping or going for luxury hotel there are lots of different options! The main campgrounds in Jasper are Whistlers and Wapiti both are just on the outskirts of town.
For more budget conscious travellers that want a decent bed there’s the Jasper Downtown hostel, as well as lots of other hotel options.
Valemount
Alternatively the small town of Valemount lies 30 minutes south of the visitors centre and offers some great accommodation options.
What Gear Should I Take On The Berg Lake TRail?
Through years of hiking and camping in the Rockies as well as working in outdoor retail and producing gear reviews I’ve dialled in my backcountry kit!
Visiting Berg Lake can end up with some long days on your feet so the lighter and more effective your kit is the better you’ll sleep and the better you’ll feel on trail!
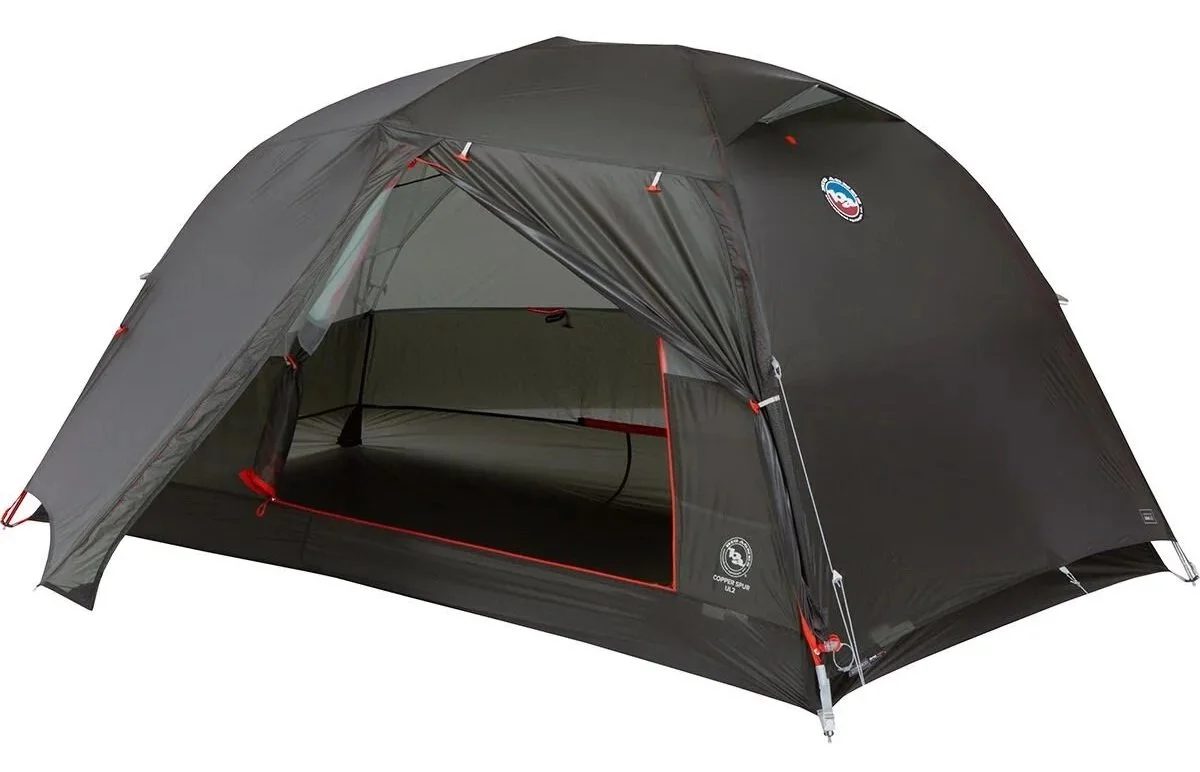
Lightweight Backcountry Tent
I’ve owned the Big Agnes Copper Spur tent for years, in fact I own 2 and it’s never let me down! It’s lightweight, always waterproof and fits perfectly on those backcountry tent pads.
One of the world’s best sellers for good reason
Get it on Backcountry.com
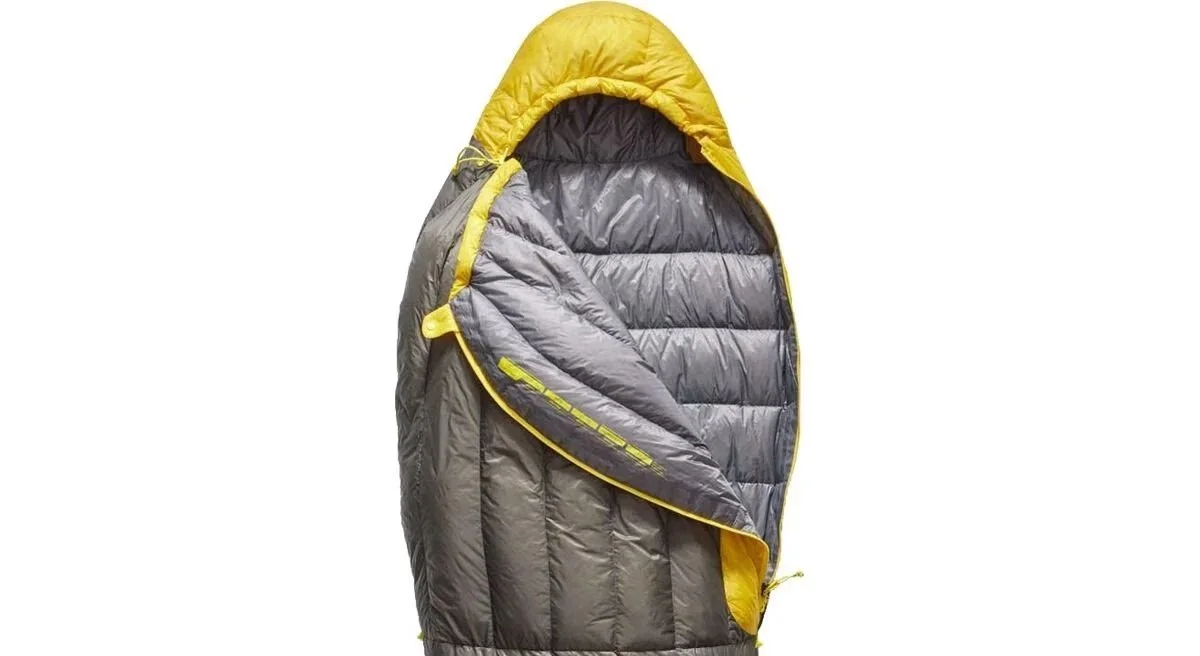
High Quality Sleeping Bag
Getting a high quality down sleeping bag is the best investment I’ve ever made! The Sea to Summit Spark 3 weighs in at 600 grams and packs down to just a few litres whilst keeping me warm down to -8ºC .
Doesn’t take up a lot of room in my bag and keeps be warm!
Get it on Backcountry.com
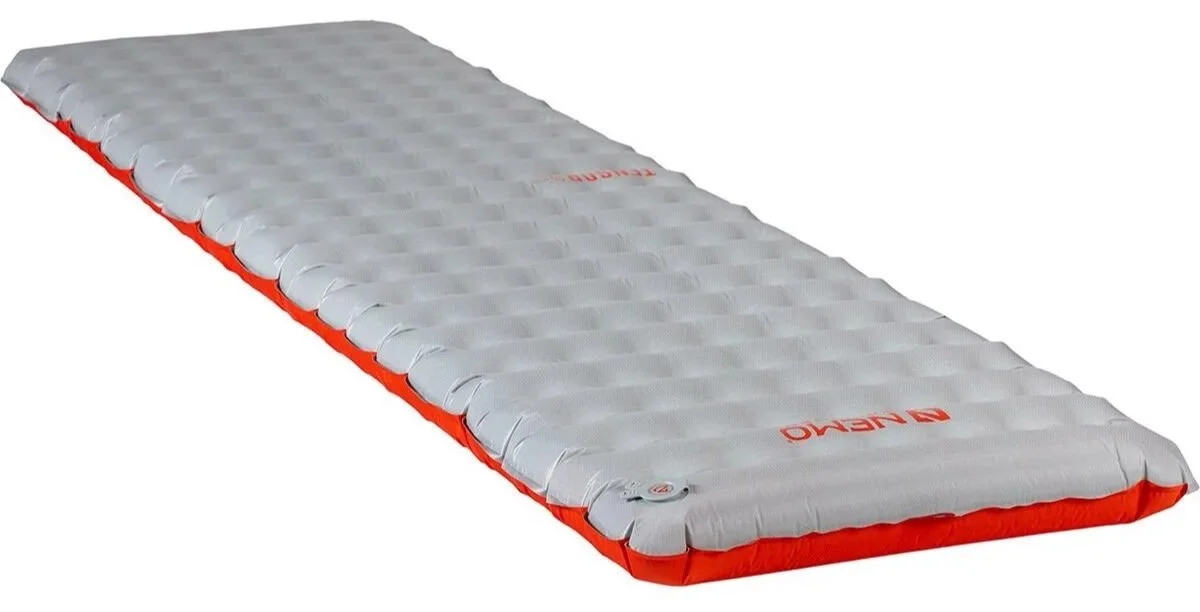
4 season Sleeping Pad
The Rockies can be cold! Even in the summer the temperature will drop in the mountains. An insulated sleeping pad will help keep the cold off the ground. Both me and my partner use the Nemo Tensor.
Get it on Backcountry.com
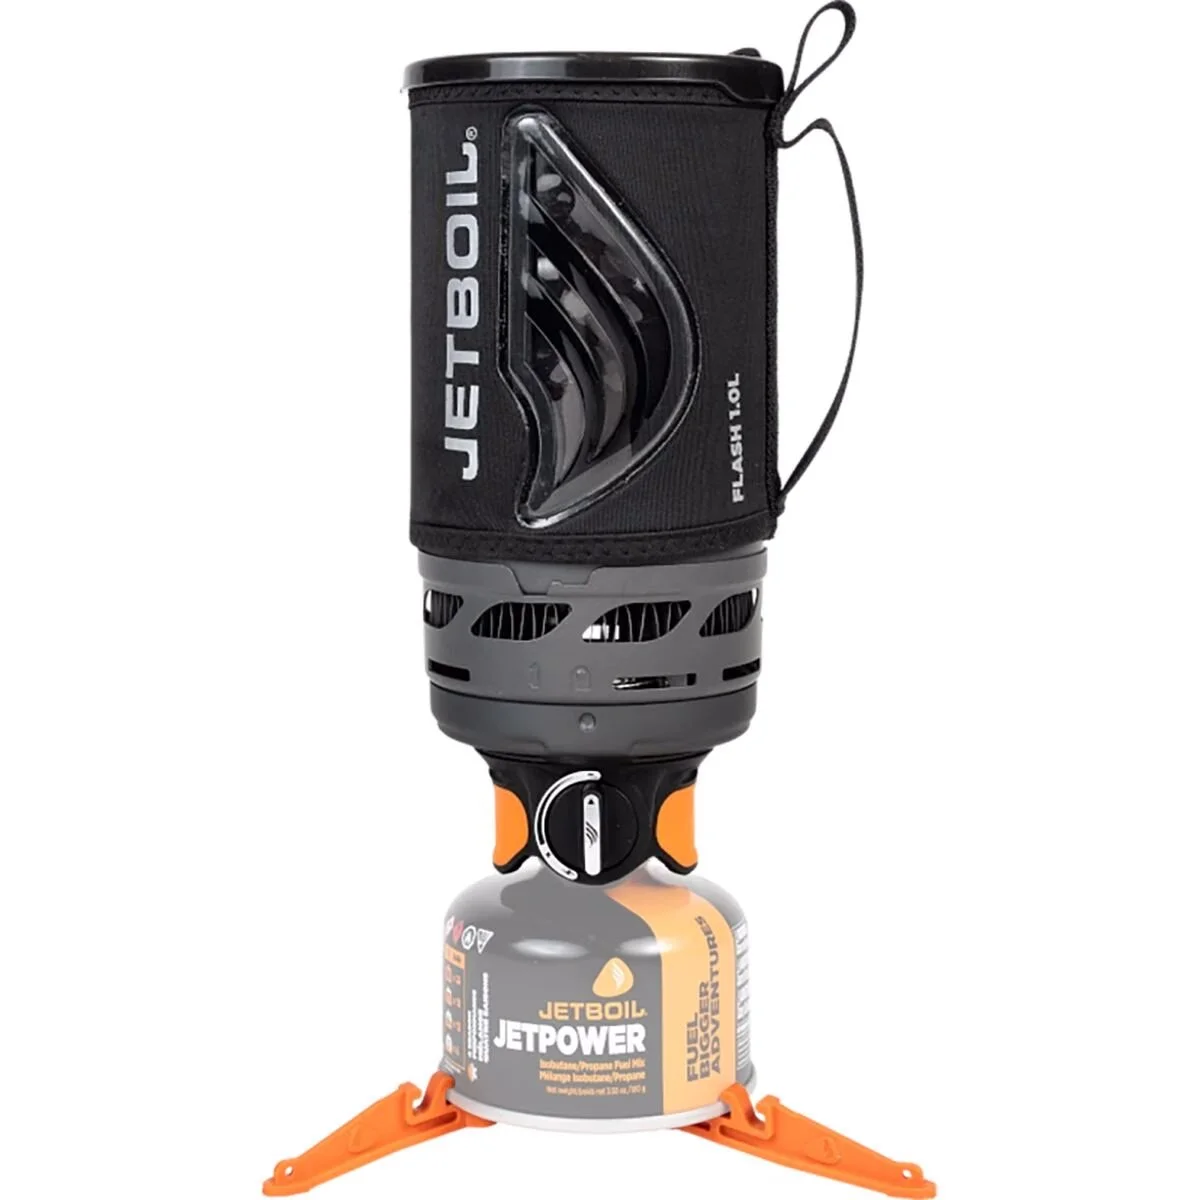
Cooking System
he Jetboil Flash cooking system has become my favourite. It’s incredibly efficient, light and packs down well. You can fire up a hot chocolate on the windiest of ridge lines in just a minute or two!
Get in on Backcountry.com
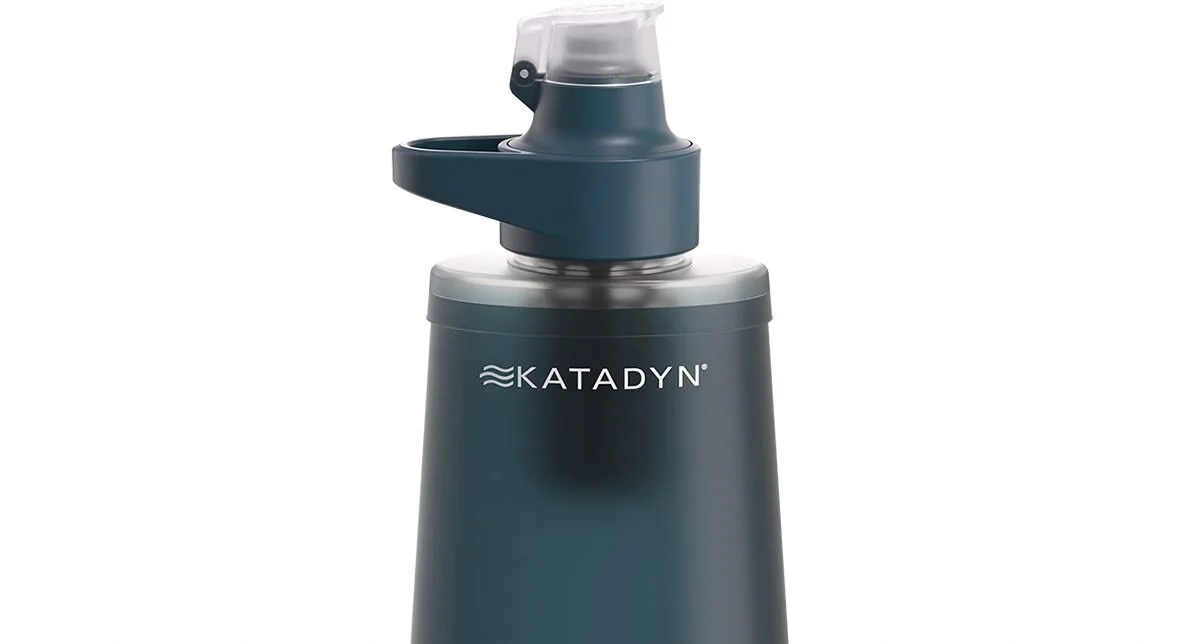
Water Filter
A Katadyn BeFree has to be the easiest filtration system to use. When out on the backcountry you want to be able to filter and refill your water along the way.
This filter packs down small and filters fast. It’s in my bag on every hike!
Get it on Backcountry.com
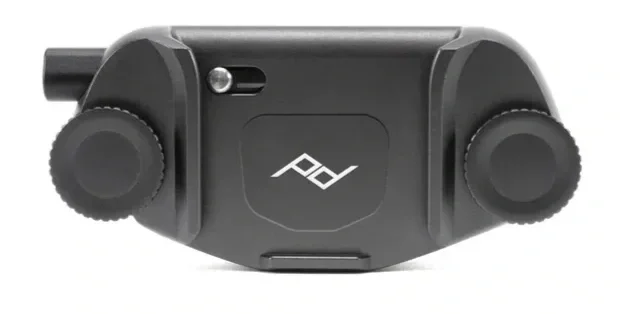
Capture Clip
Another item that comes on every hike with me and a must own for every photographer.
Keeps your camera close at hand making capturing moments much faster!
Get it on Peakdesign.com
Things to know before you go - Berg Lake TRail
Check In
You’ll need to check in at the visitors centre before you start you trail. This is compulsory so don’t forget! The visitors centre opens at 8am and last check in is at 3:30pm.
Offline maps
Knowing where you’re going is super important as to not get lost on your way home. I recommend All Trails Plus for finding routes and offline mapping allowing you to safely find your way home. Perfect to find new side hikes when already out ther1