Hiking Taylor Lake And Panorama Ridge East - A Beginner Friendly Overnighter
Taylor Lake in Banff national park is probably one of the best sign posted hikes in the Rockies with several signs on the highway pointing to the trailhead.
Despite it’s easy access for some reason it still remains relatively quiet and is an absolute gem of a hike, especially during larch season, with the option to add on side hikes or an overnight stay. A perfect trail for a first time overnight backcountry trip!
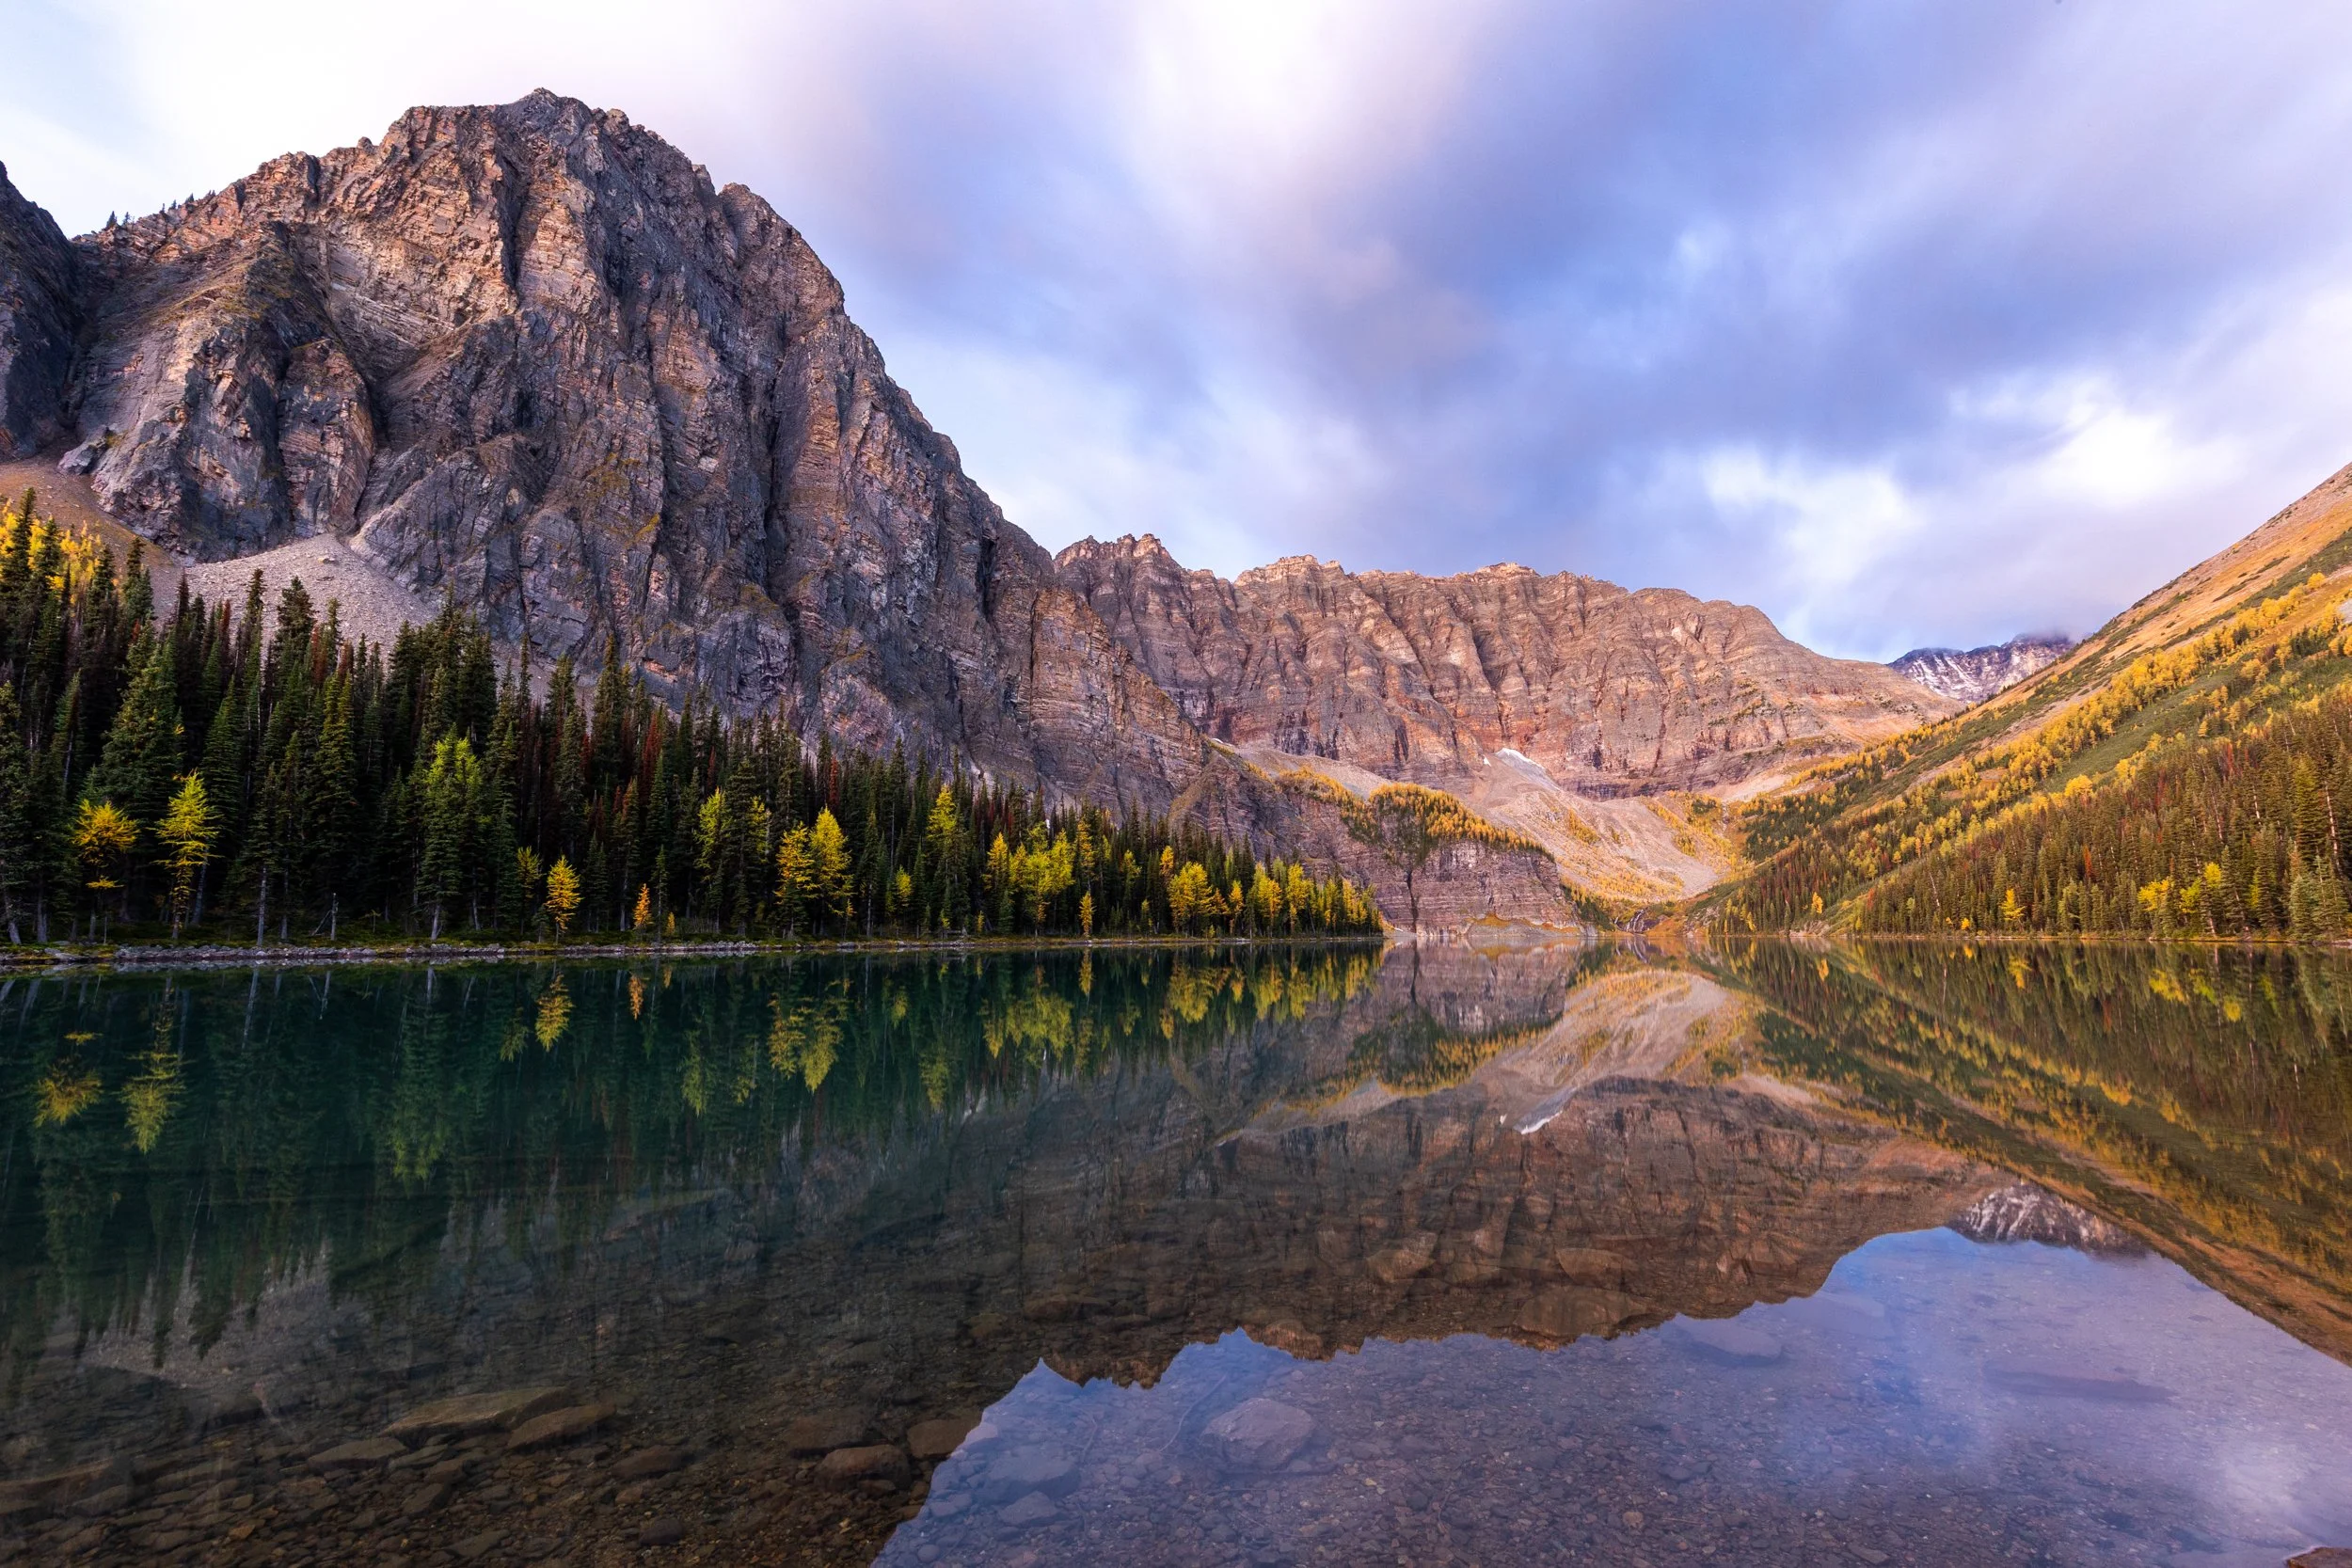
Reflections at Taylor Lake
What Time of Year Is Best For Taylor Lake And Panorama Ridge?
The Taylor Lake campground is actually open year round which is something that’s a little unusual for backcountry sites in the Rockies. The campsite is popular with hikers in the summer and accessible by walkers and skiers in the winter.
Although the lake is accessible year round it’s best visited when it’s a little warmer, the snow on trail has thawed and the lake isn’t frozen over, especially if photography is your aim. As the trail holds it’s snow later in to the hiking season it’s best left until the start of July at the earliest.
Even though the area is fantastic throughout the summer it really comes alive during fall in mid to late September. Of course at this time of year the camping can be a little chillier but it’s made up for by the fact the area takes on a golden glow and we were pleasantly surprised by the sheer quantity of larch trees on trail.
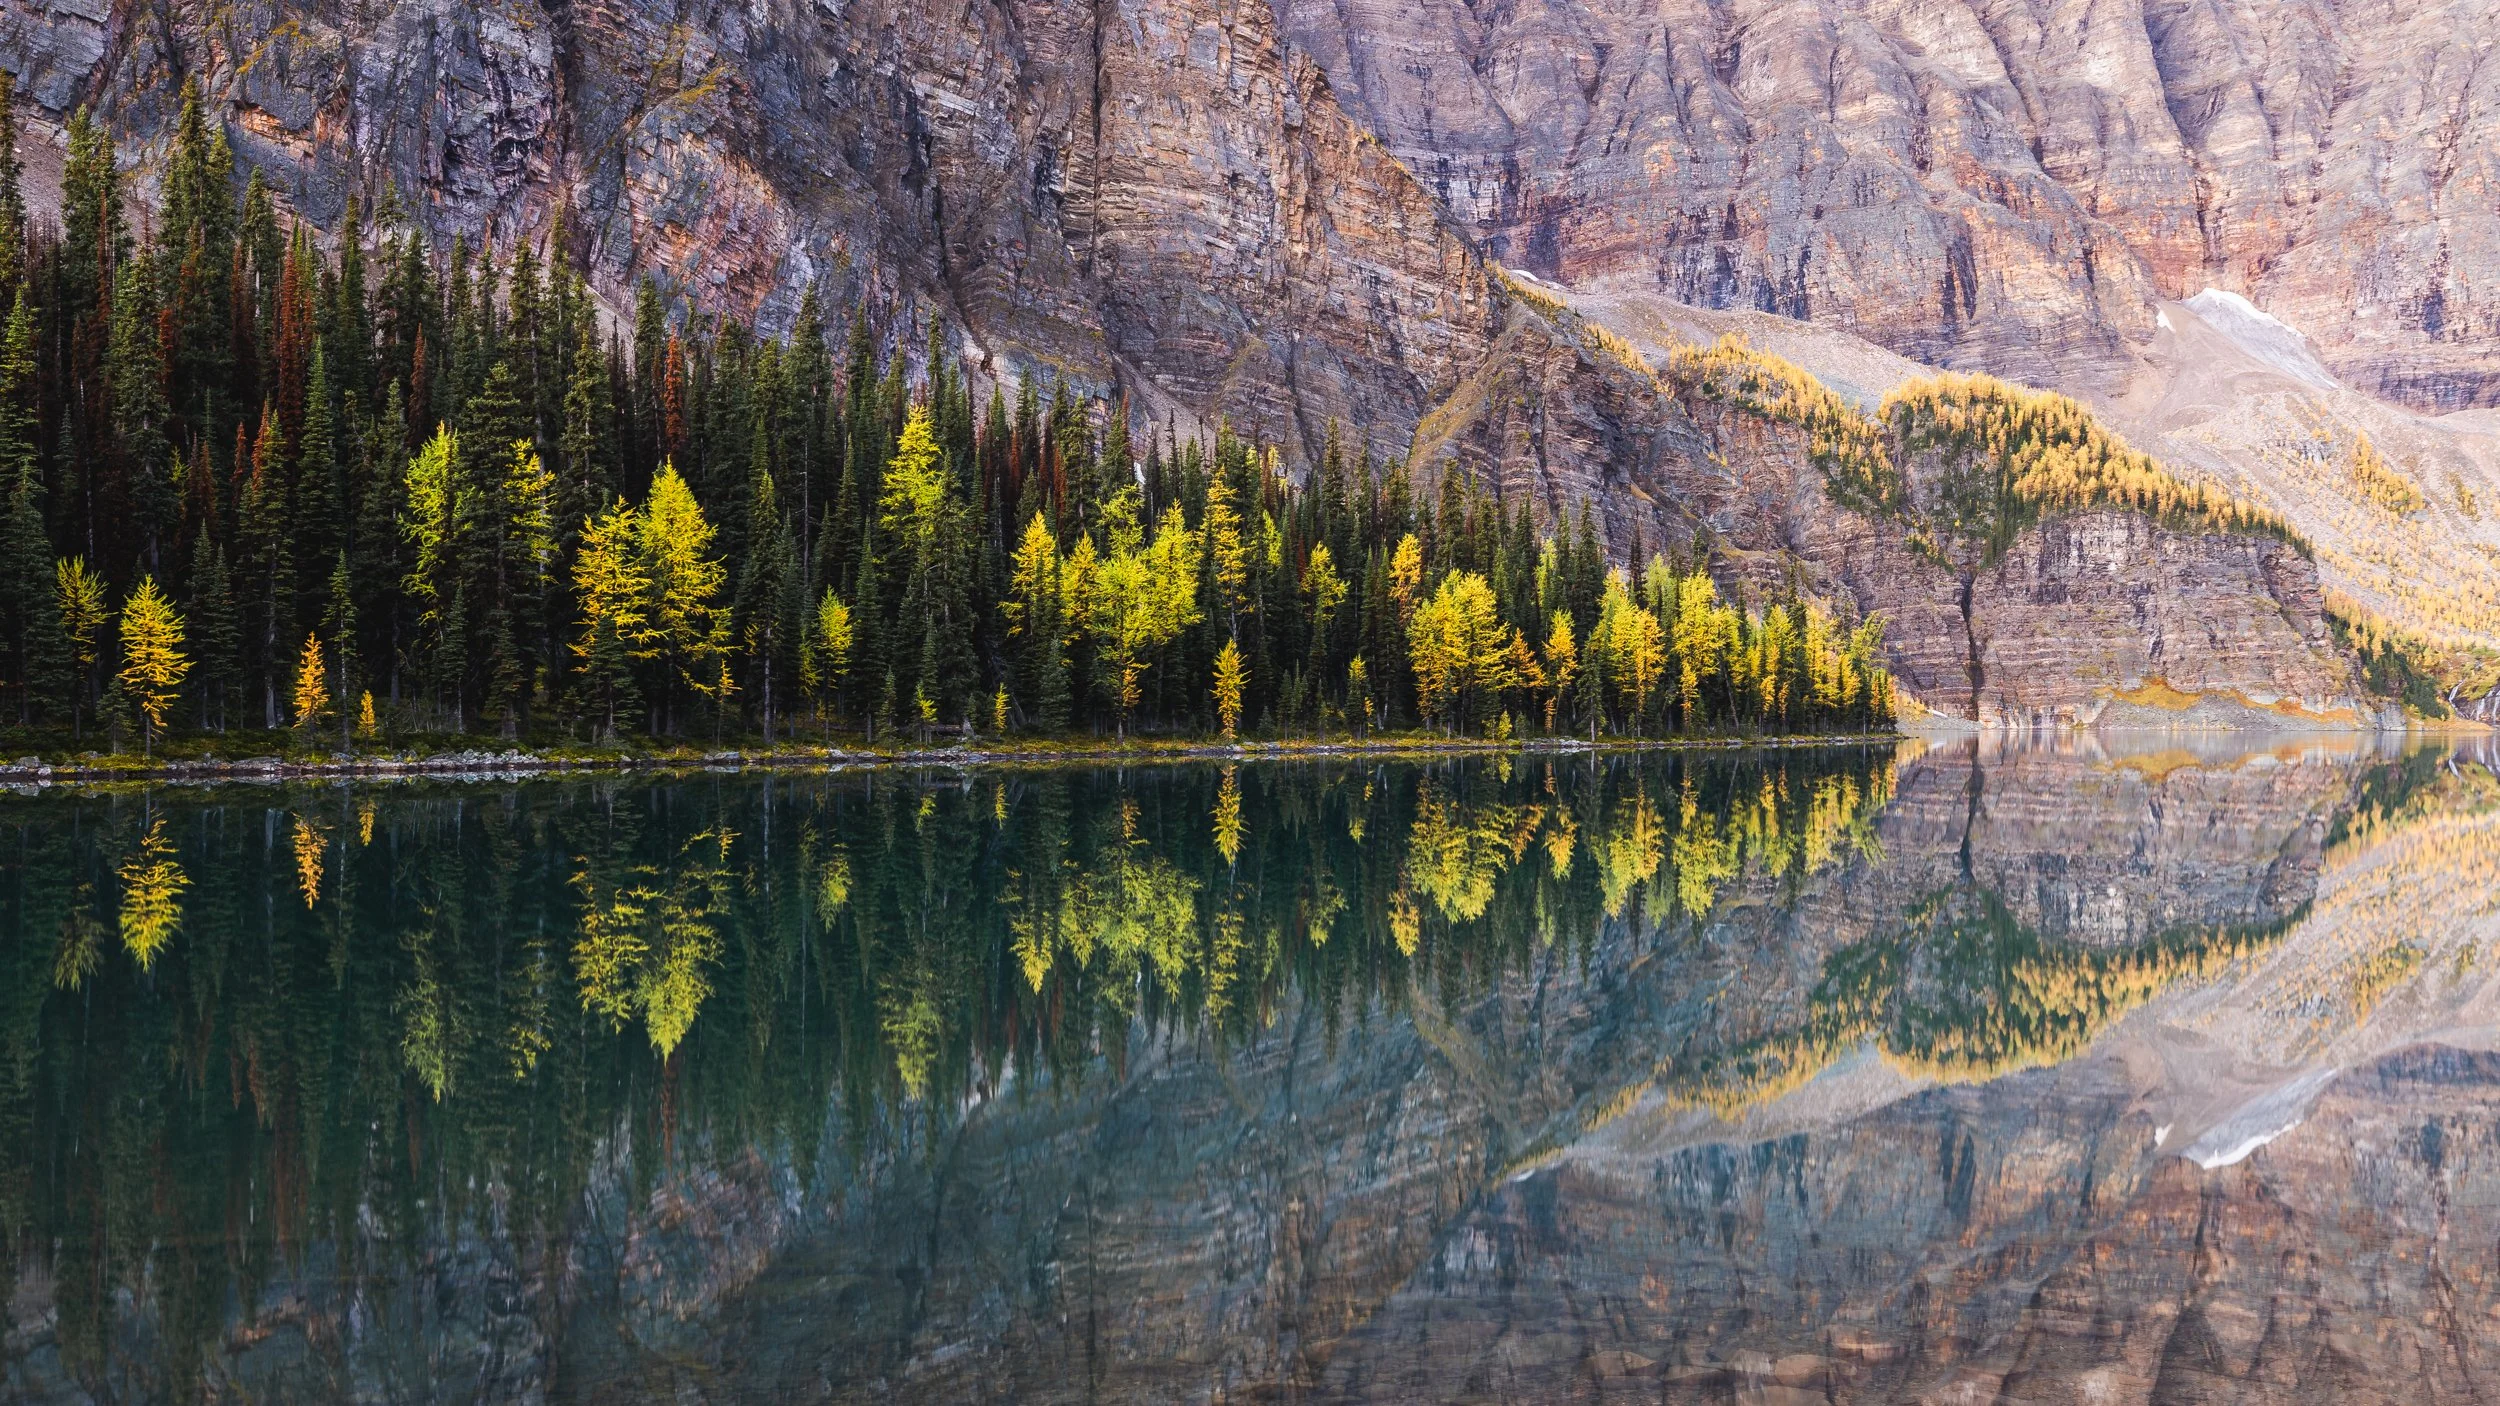
Larch trees reflecting in Taylor Lake
How To Get To The Taylor Lake Trailhead
As mentioned the Taylor Lake trailhead is well signposted right off the freeway, keep an eye out for signs marked ‘Taylor’.
The parking area is about 40 km west of the Town of Banff, it’s a large lot with plenty of space!
The parking lot doesn’t really show up on google maps with a quick search but these are the gps coordinates that will get you there: 51.305244, -116.020826
The Stats
Time: 4 - 5 hours return to the lake, add another 2 - 3 hours if heading up to the ridge.
Distance: 13 km return to the lake, add around 6 km return up to the ridge.
Elevation Gain: 585 m to the lake, add 475 m up to the ridge.
Difficulty: All the way to the ridge makes for a big, moderate to hard day. Hiking just to the lake itself isn’t so bad and I’d consider it easy to moderate.
The Hike To Taylor Lake
The hike to Taylor Lake follows a steady, well maintained trail for the majority of it’s length. Even though you’ll take in a decent amount of elevation gain over this distance I’d say it’s gradual gain and easy terrain makes it possible for even beginner hikers. Just take your time!
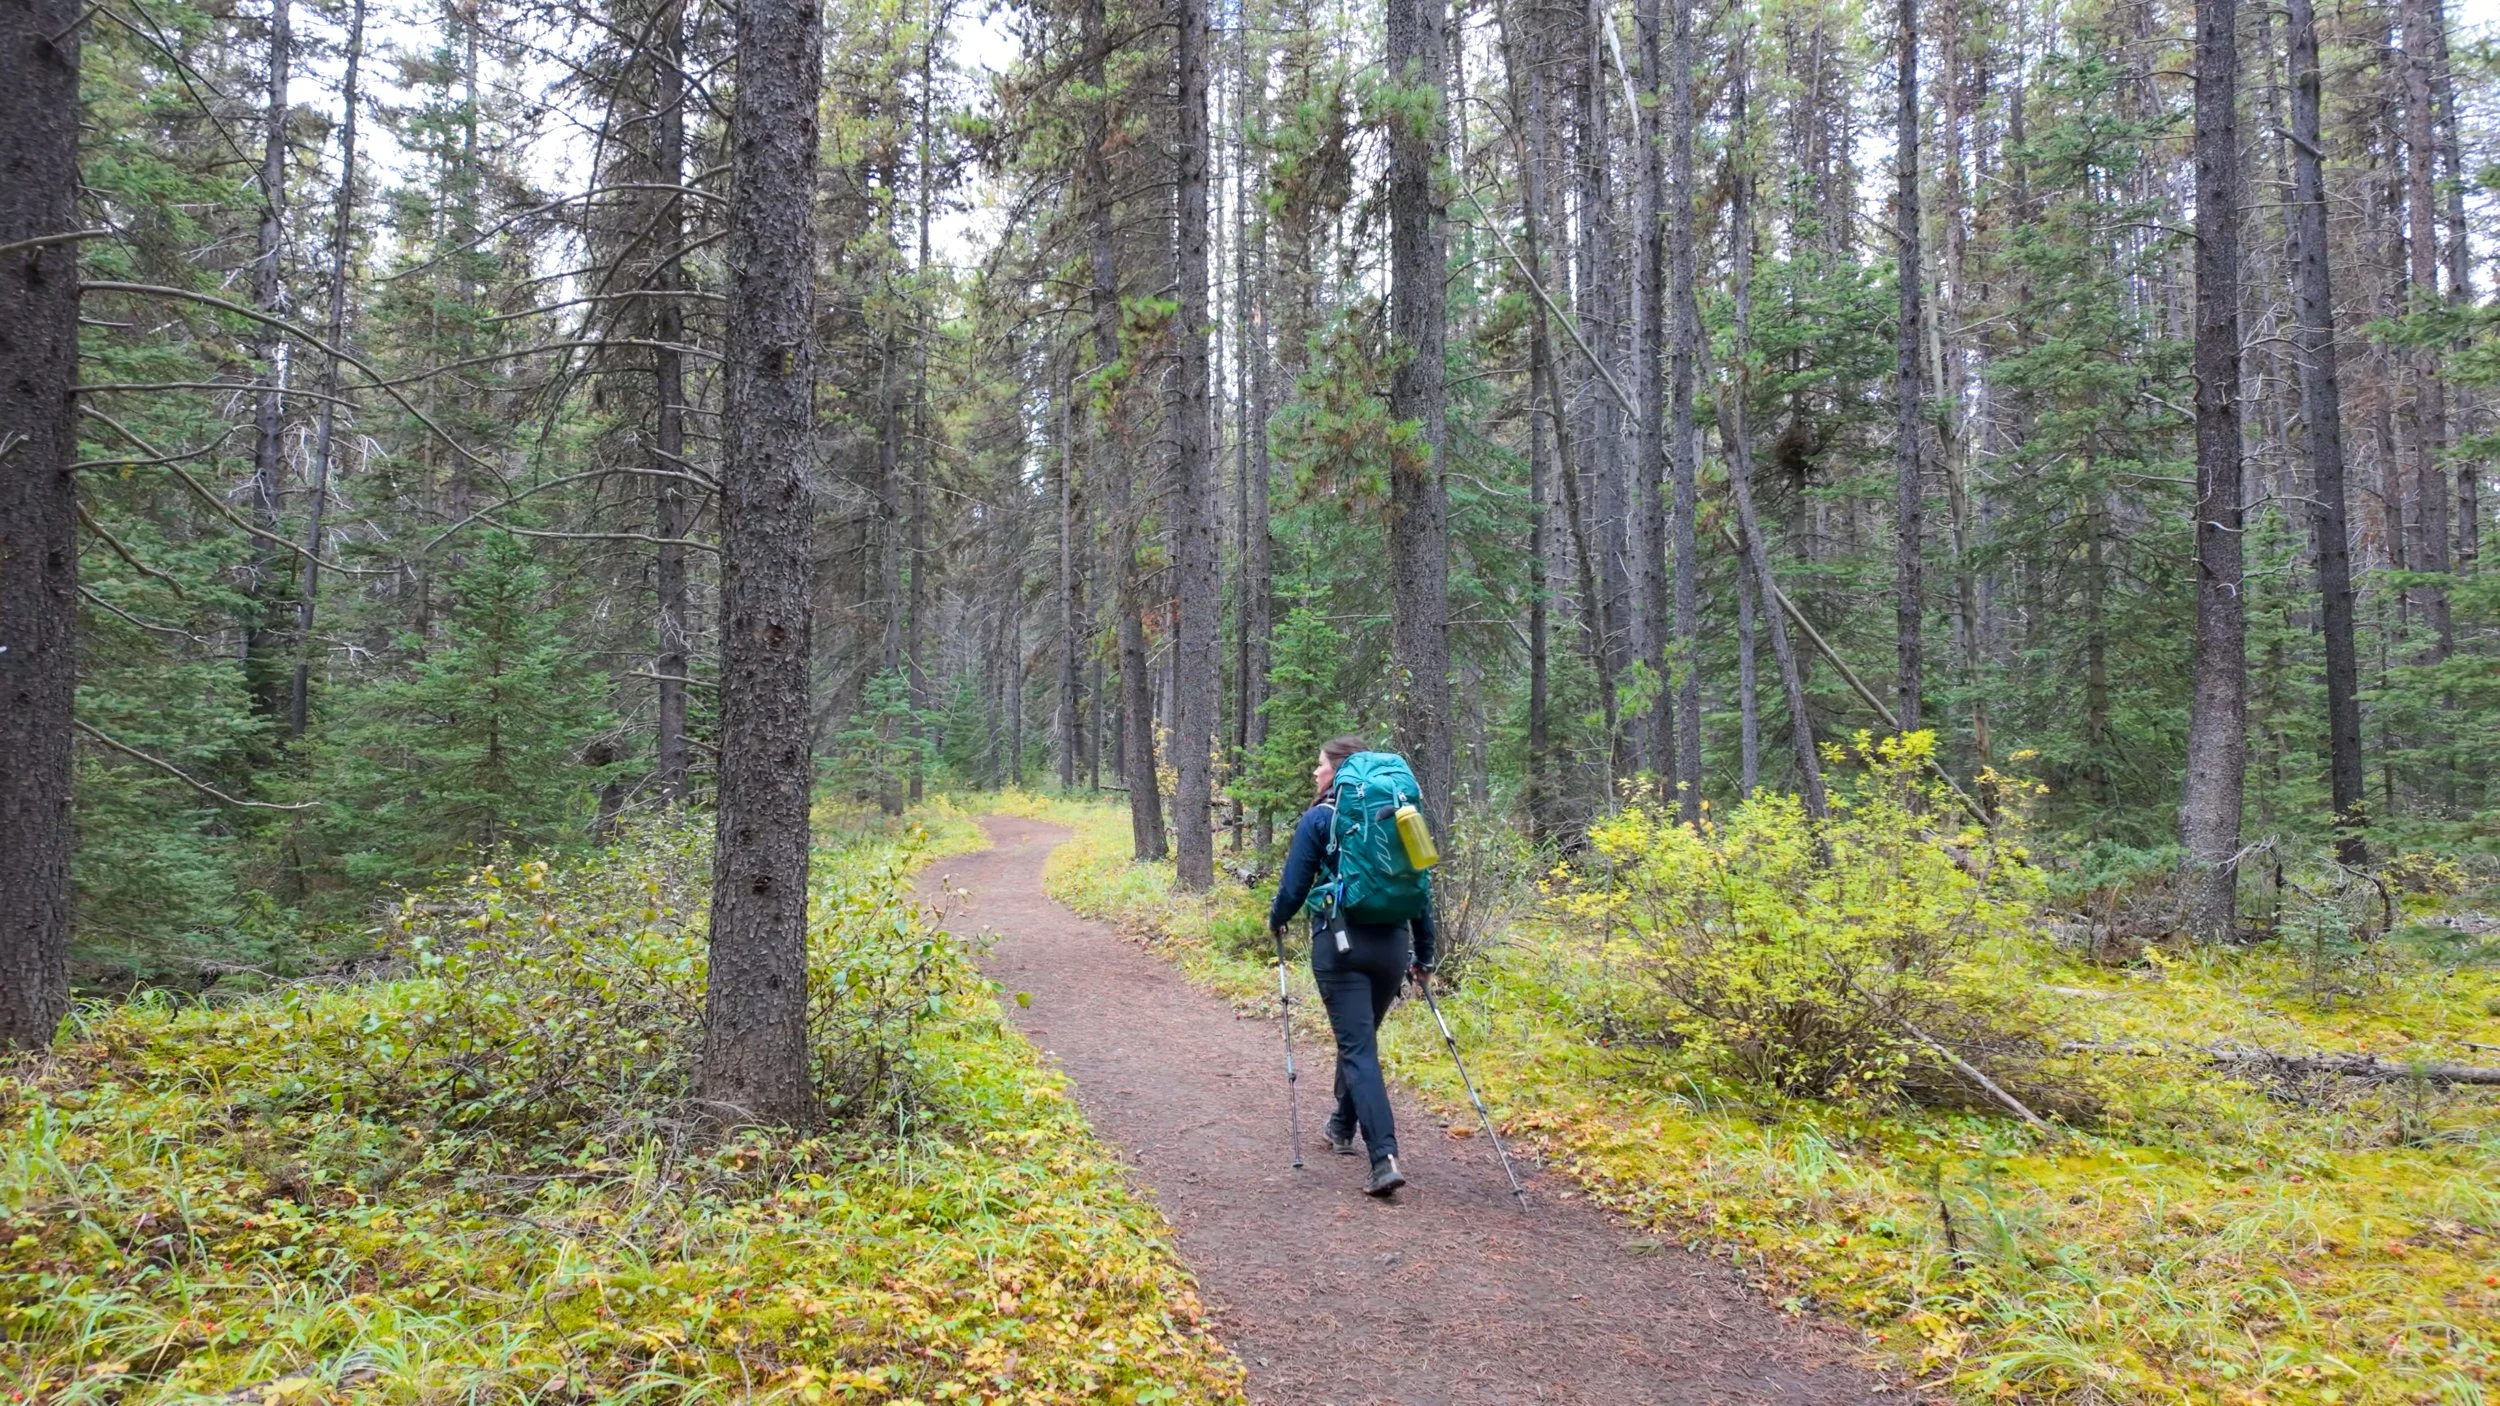
Hiking through the woods to Taylor Lake
The first 5 - 6 km weaves it’s way through a dense pine forest but autumnal colours scattered throughout the woodland towards the end of September help brighten up the hike.
Towards the last few hundred meters of the trail before the lake and campground you’ll cross a small wooden bridge and then after this the ground gets much softer and soggier underfoot. Here you may have to dodge, jump and weave a little to keep your feet dry!
The trail to the lake can be a little uneventful scenery wise but once you reach your main objective, Taylor Lake, your effort certainly pays off!
The towering headwall of Mount Bell reflects in the lake below, as waterfalls cascade down the hill side in the distance.
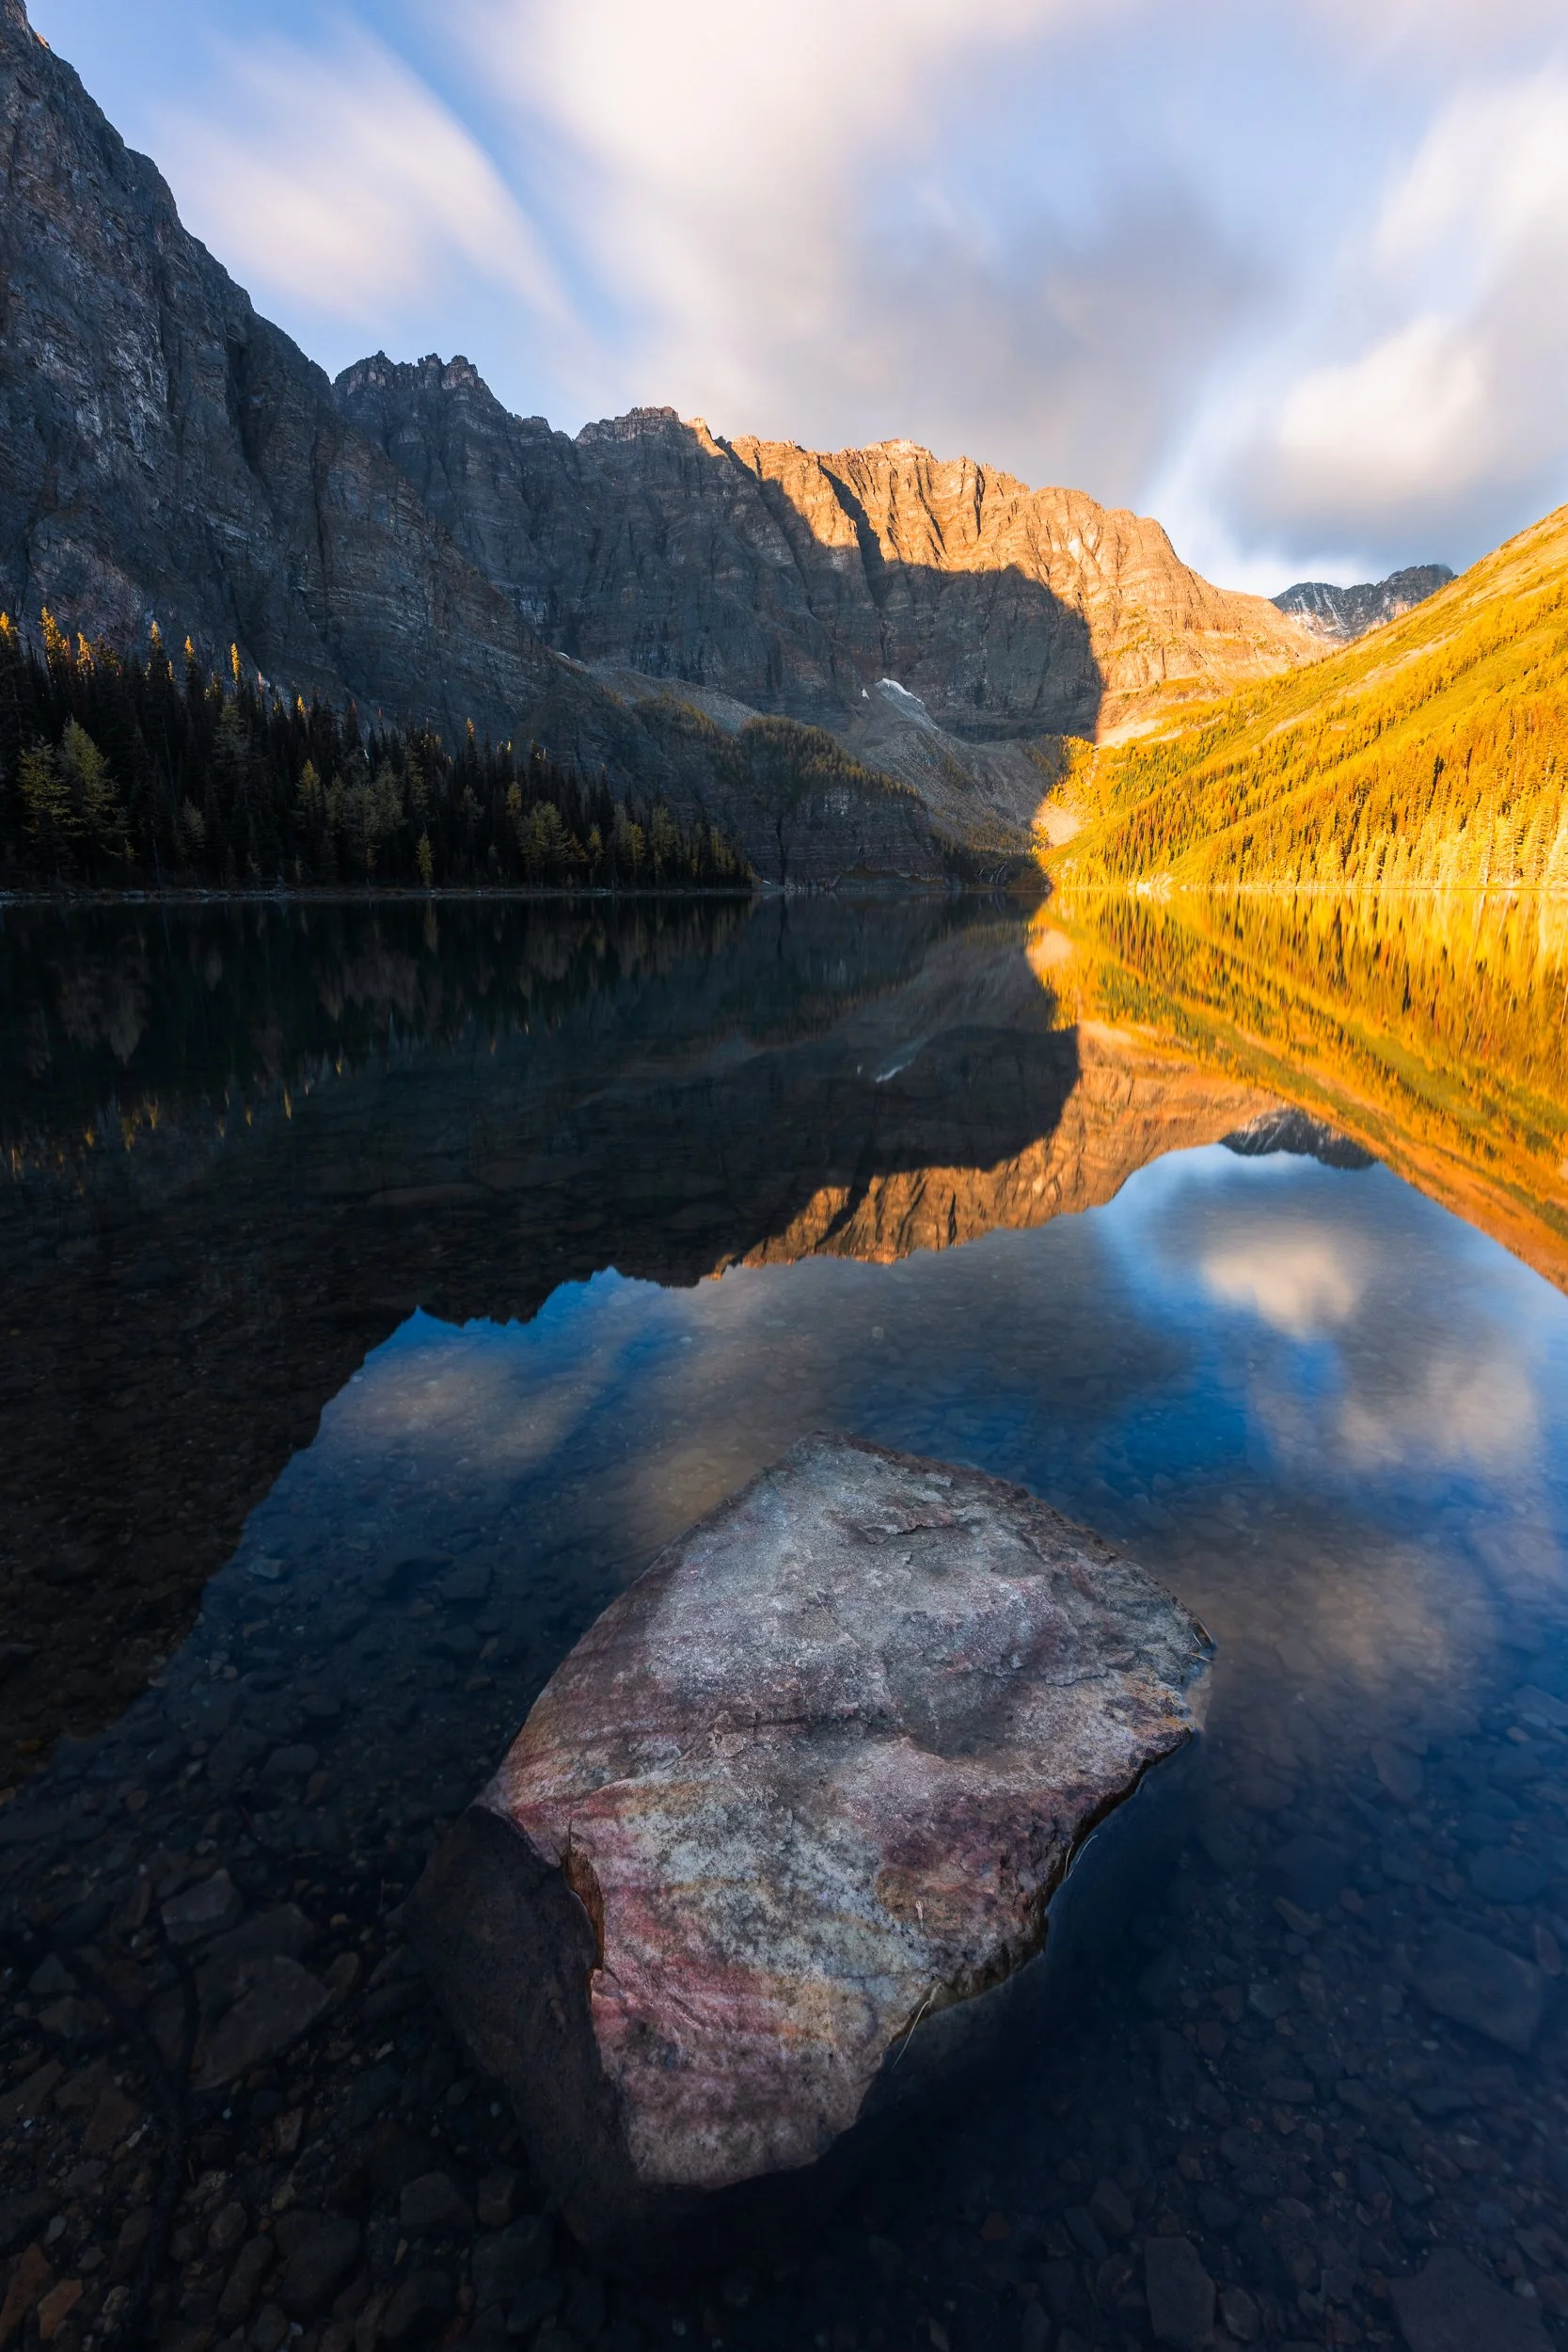
Taylor Lake at Sunrise
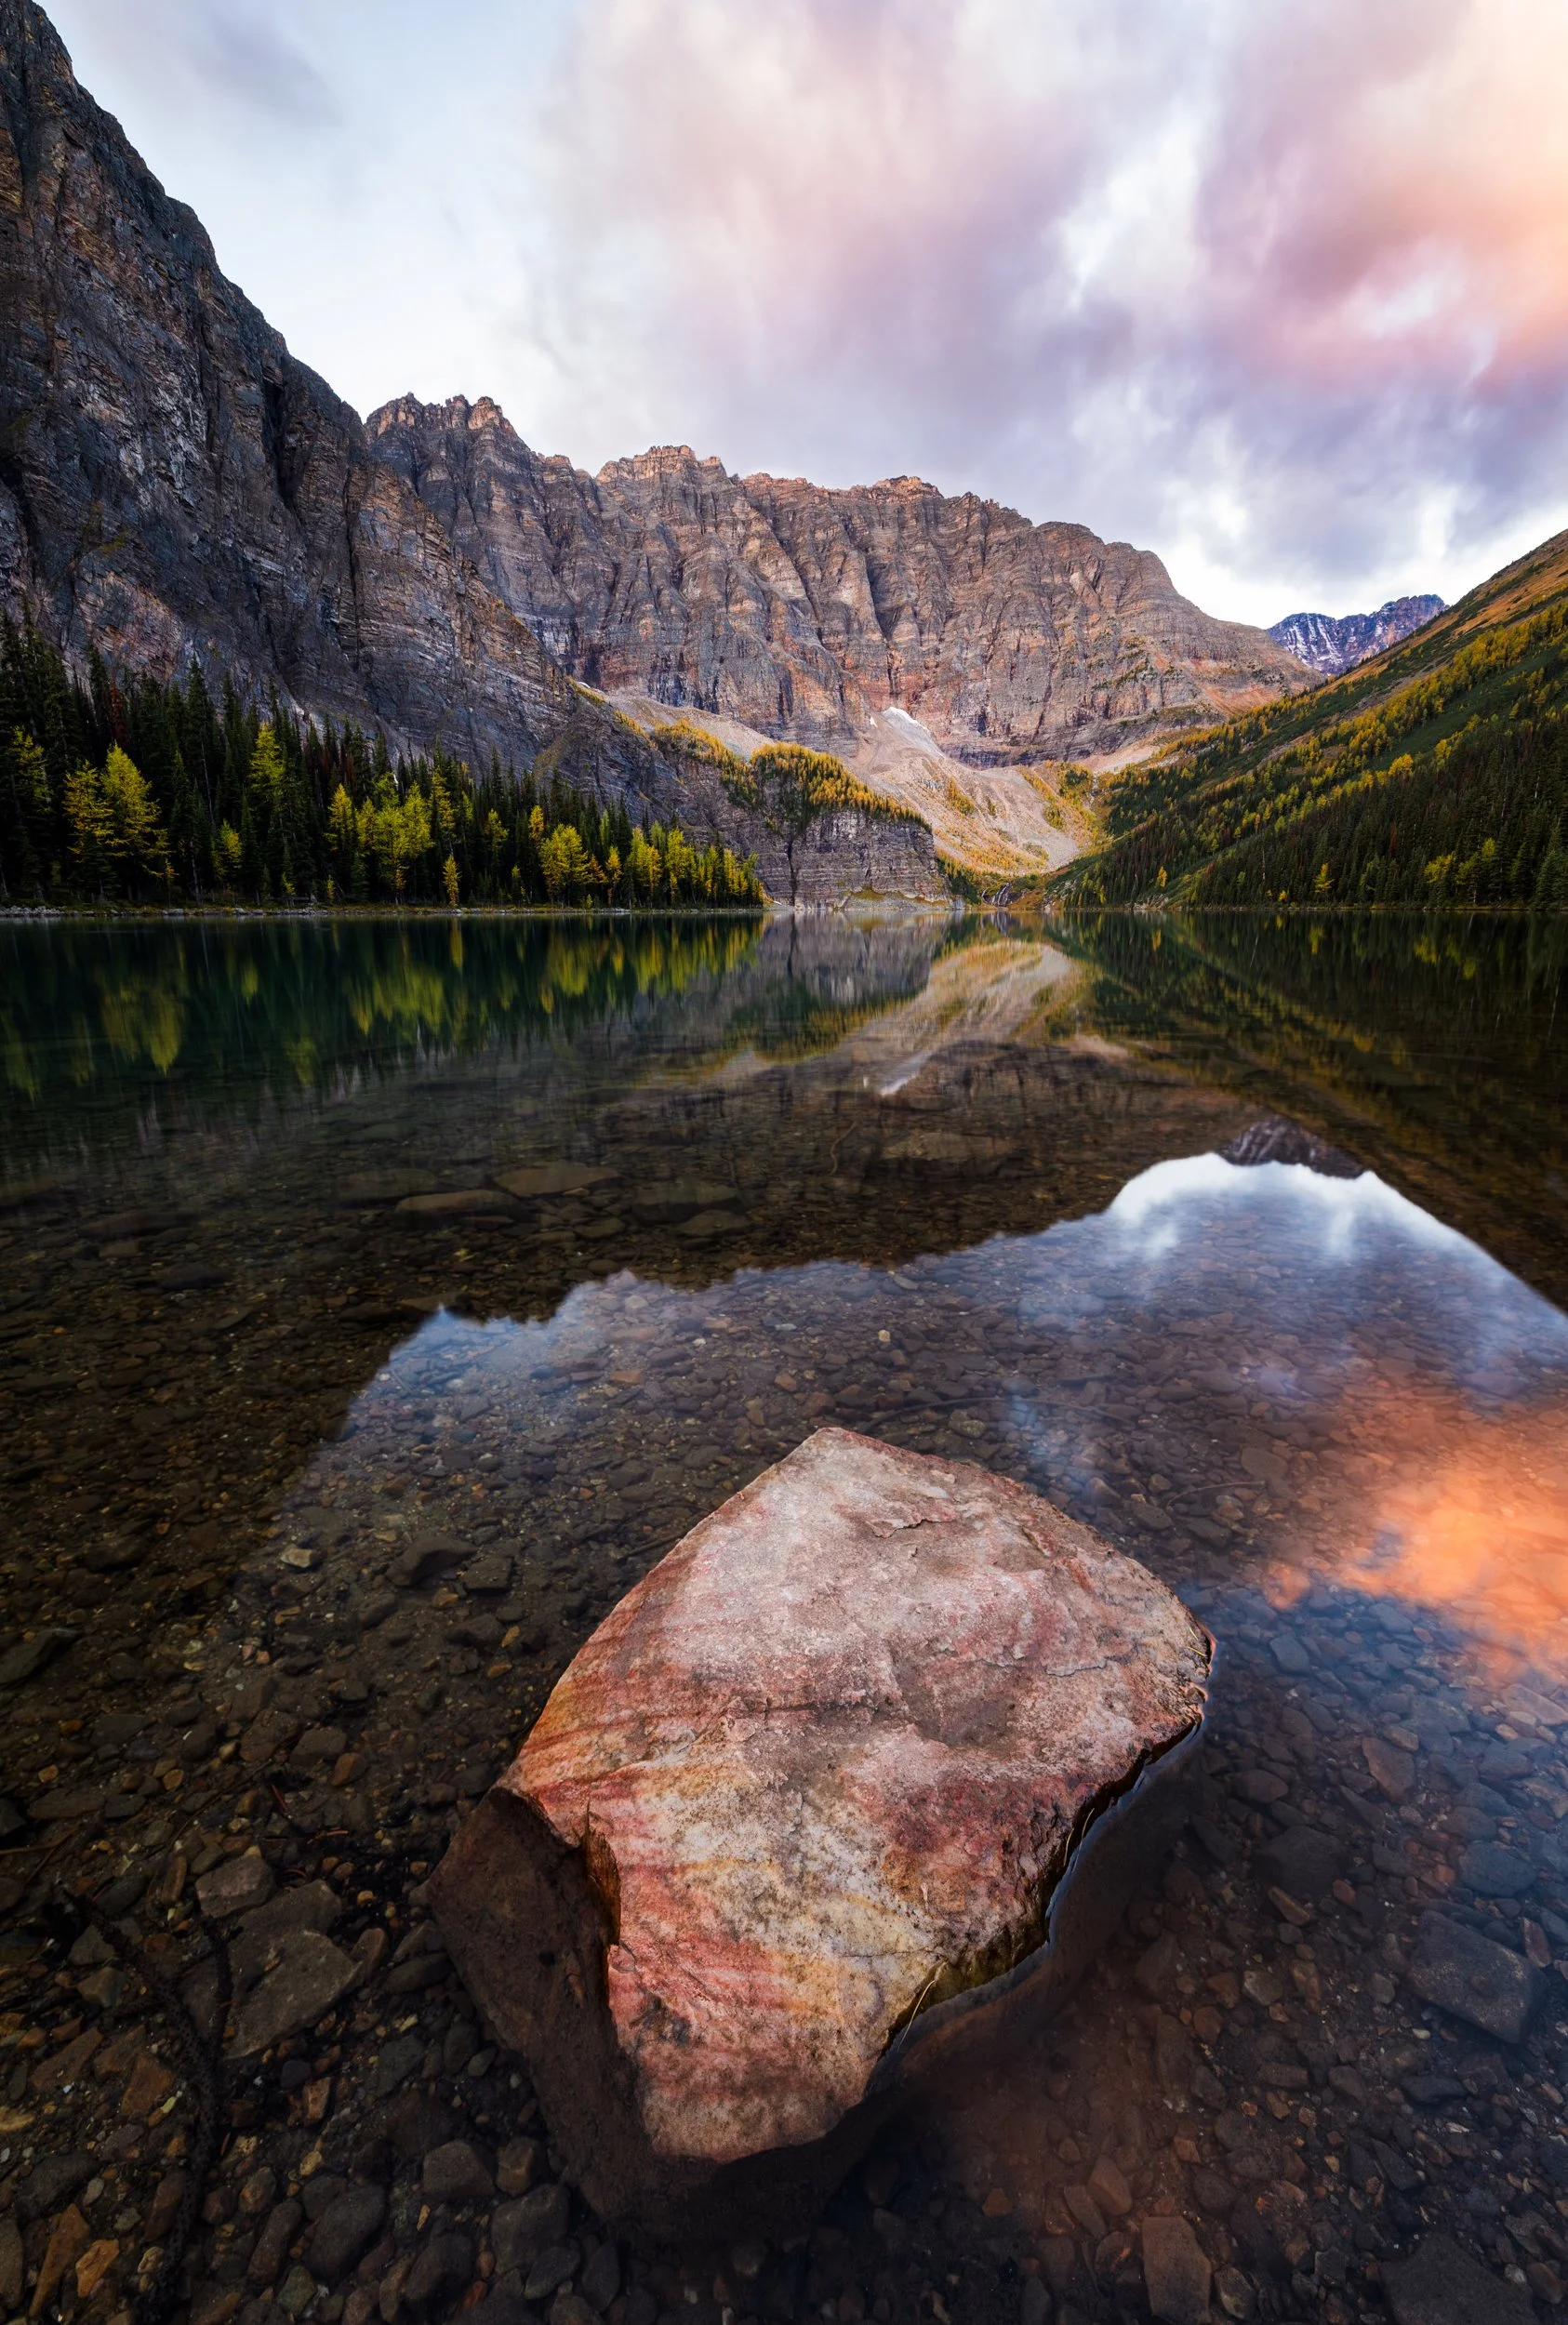
Taylor Lake at Sunset
Wolves On Trail!
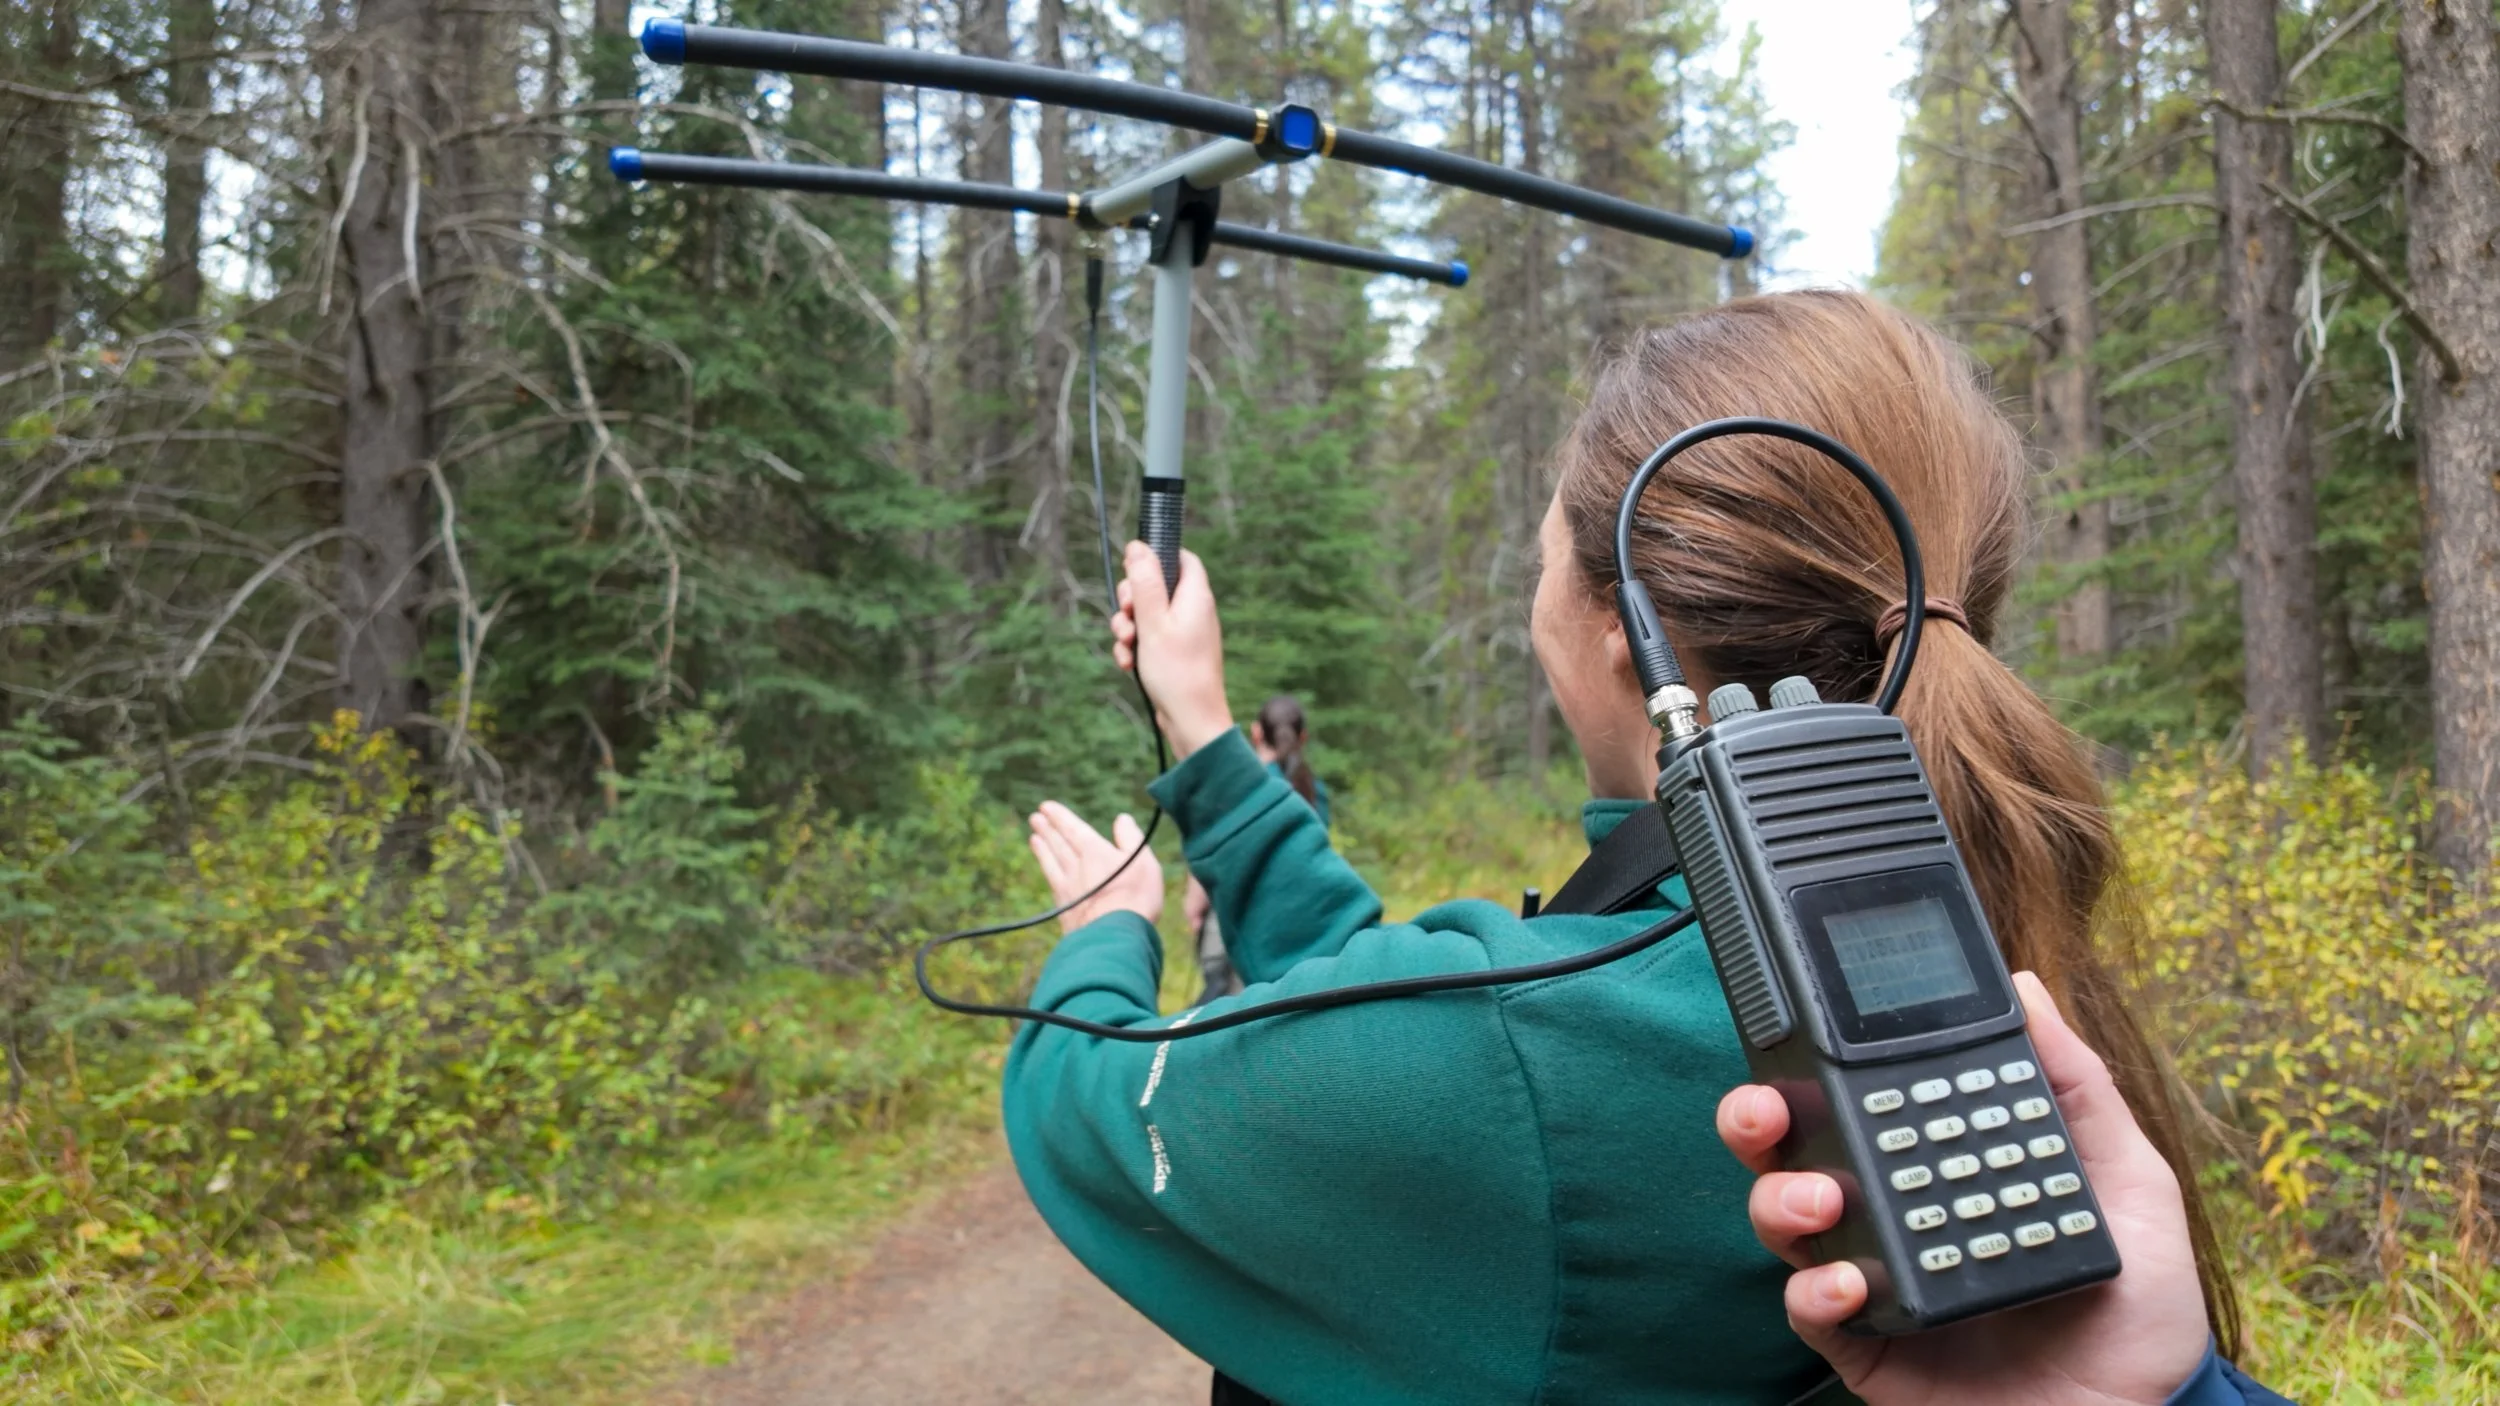
Scanning for wolves close to trail.
When we went to start this trail we came across a couple of hikers talking with two Parks Canada rangers at the trailhead. It turns out that a wolf had followed the hikers along the last section of trail and out towards the car park.
The Taylor Lake trail is accessed from the car park through a gate in a wild life fence and once the hikers passed back through this gate the wolf turned around and went on its way.
We spent some time talking to the Parks rangers about whether the wolf would be an issue on our hike and whether we should just call it a day and head home.
They came to the conclusion that this wolf was simply escorting the hikers out of her territory and posed no real threat. They then kindly let us have a go on their radio collar receiver to show us where the wolf was hiding, the faint but frequent beeps indicated she was just 10 meters off trail!
The Rangers shared some advice that if the wolf began to follow us we should raise our poles above our heads and growl or shout in a low pitched tone towards the canine.
We were told that under no circumstances should we make a high pitched scream as this makes you sound like scared, fleeing prey. I won’t lie - not sounding like that wasn’t a promise I was able to make if I came face to face with a wolf! I think my natural reaction would be a high pitched squeal similar to that of a terrified rabbit.
Luckily though I didn’t have to put on my fearless growl whilst on trail even if part of me was a little disappointed we didn’t get the opportunity to see the magnificent beast!
The Hike To Panorama Ridge East
The lakeside campground is a great place to take a breather, get some rest and have some lunch. A lot of hikers call it a day at this point and return back to the car park unbeknown to them that one of the best larch meadows in the area is just a stones throw away.
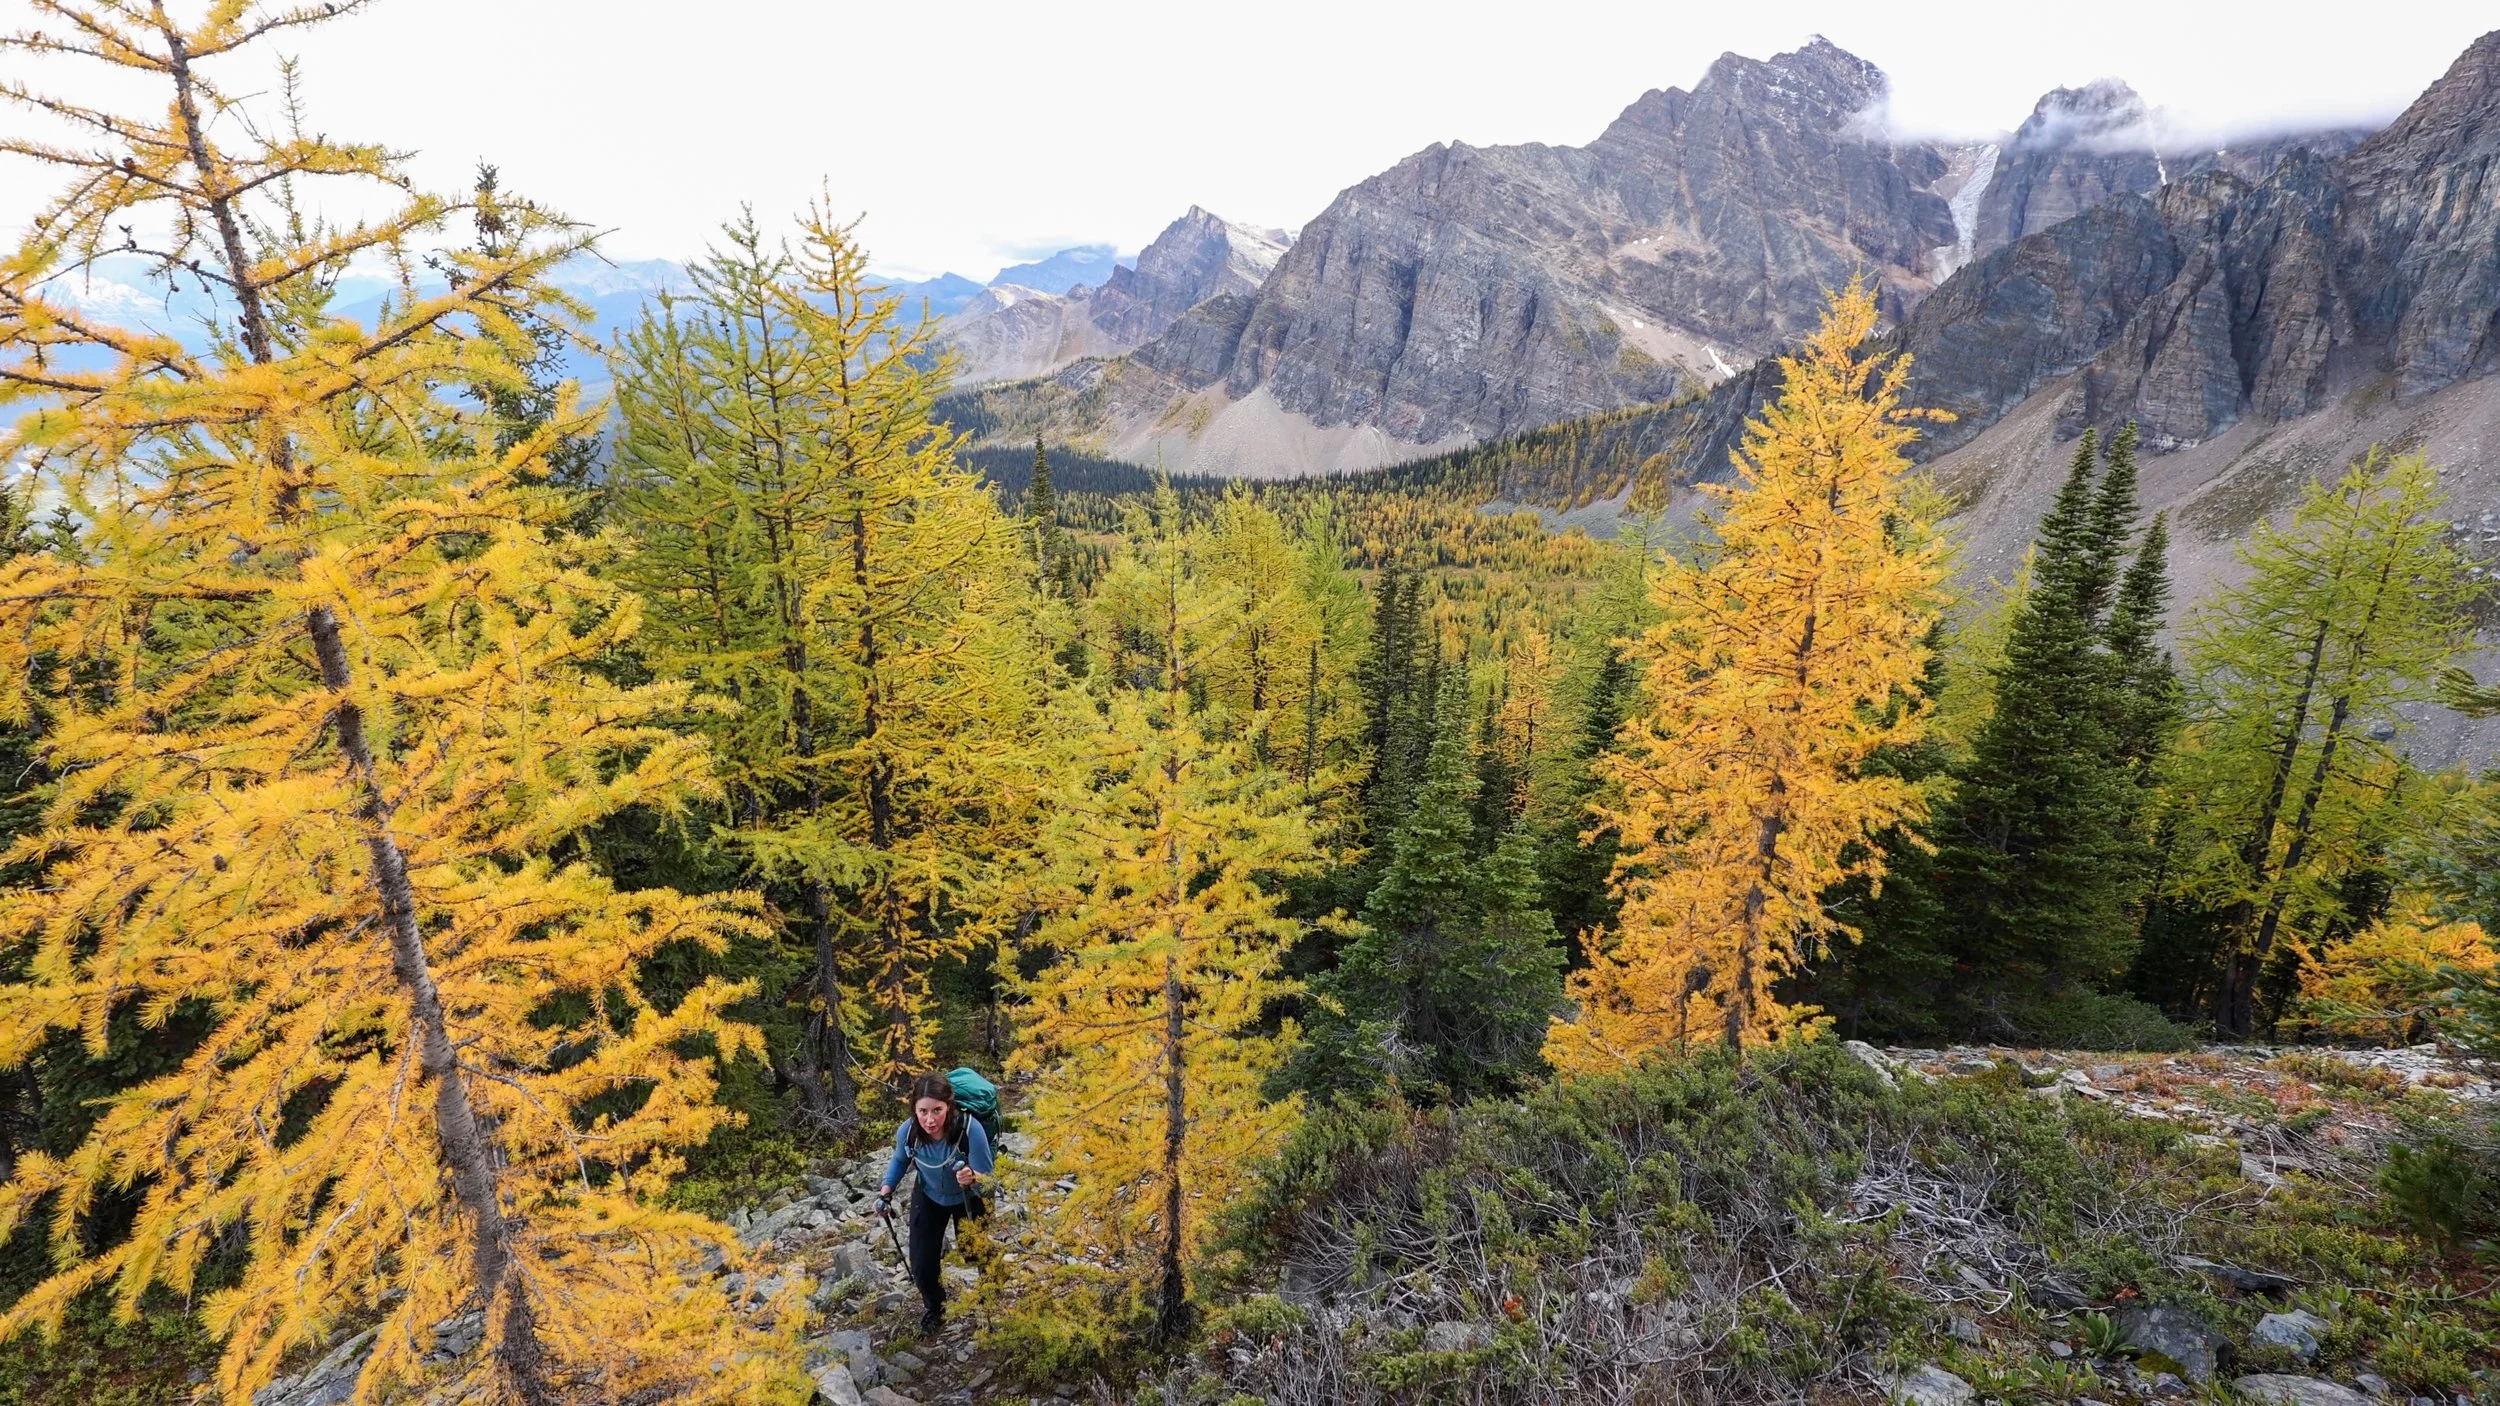
After the lake the best hiking is yet to come, especially during larch season. I was genuinely surprised at how abundant the larch trees were on this trail and how quickly they started appearing.
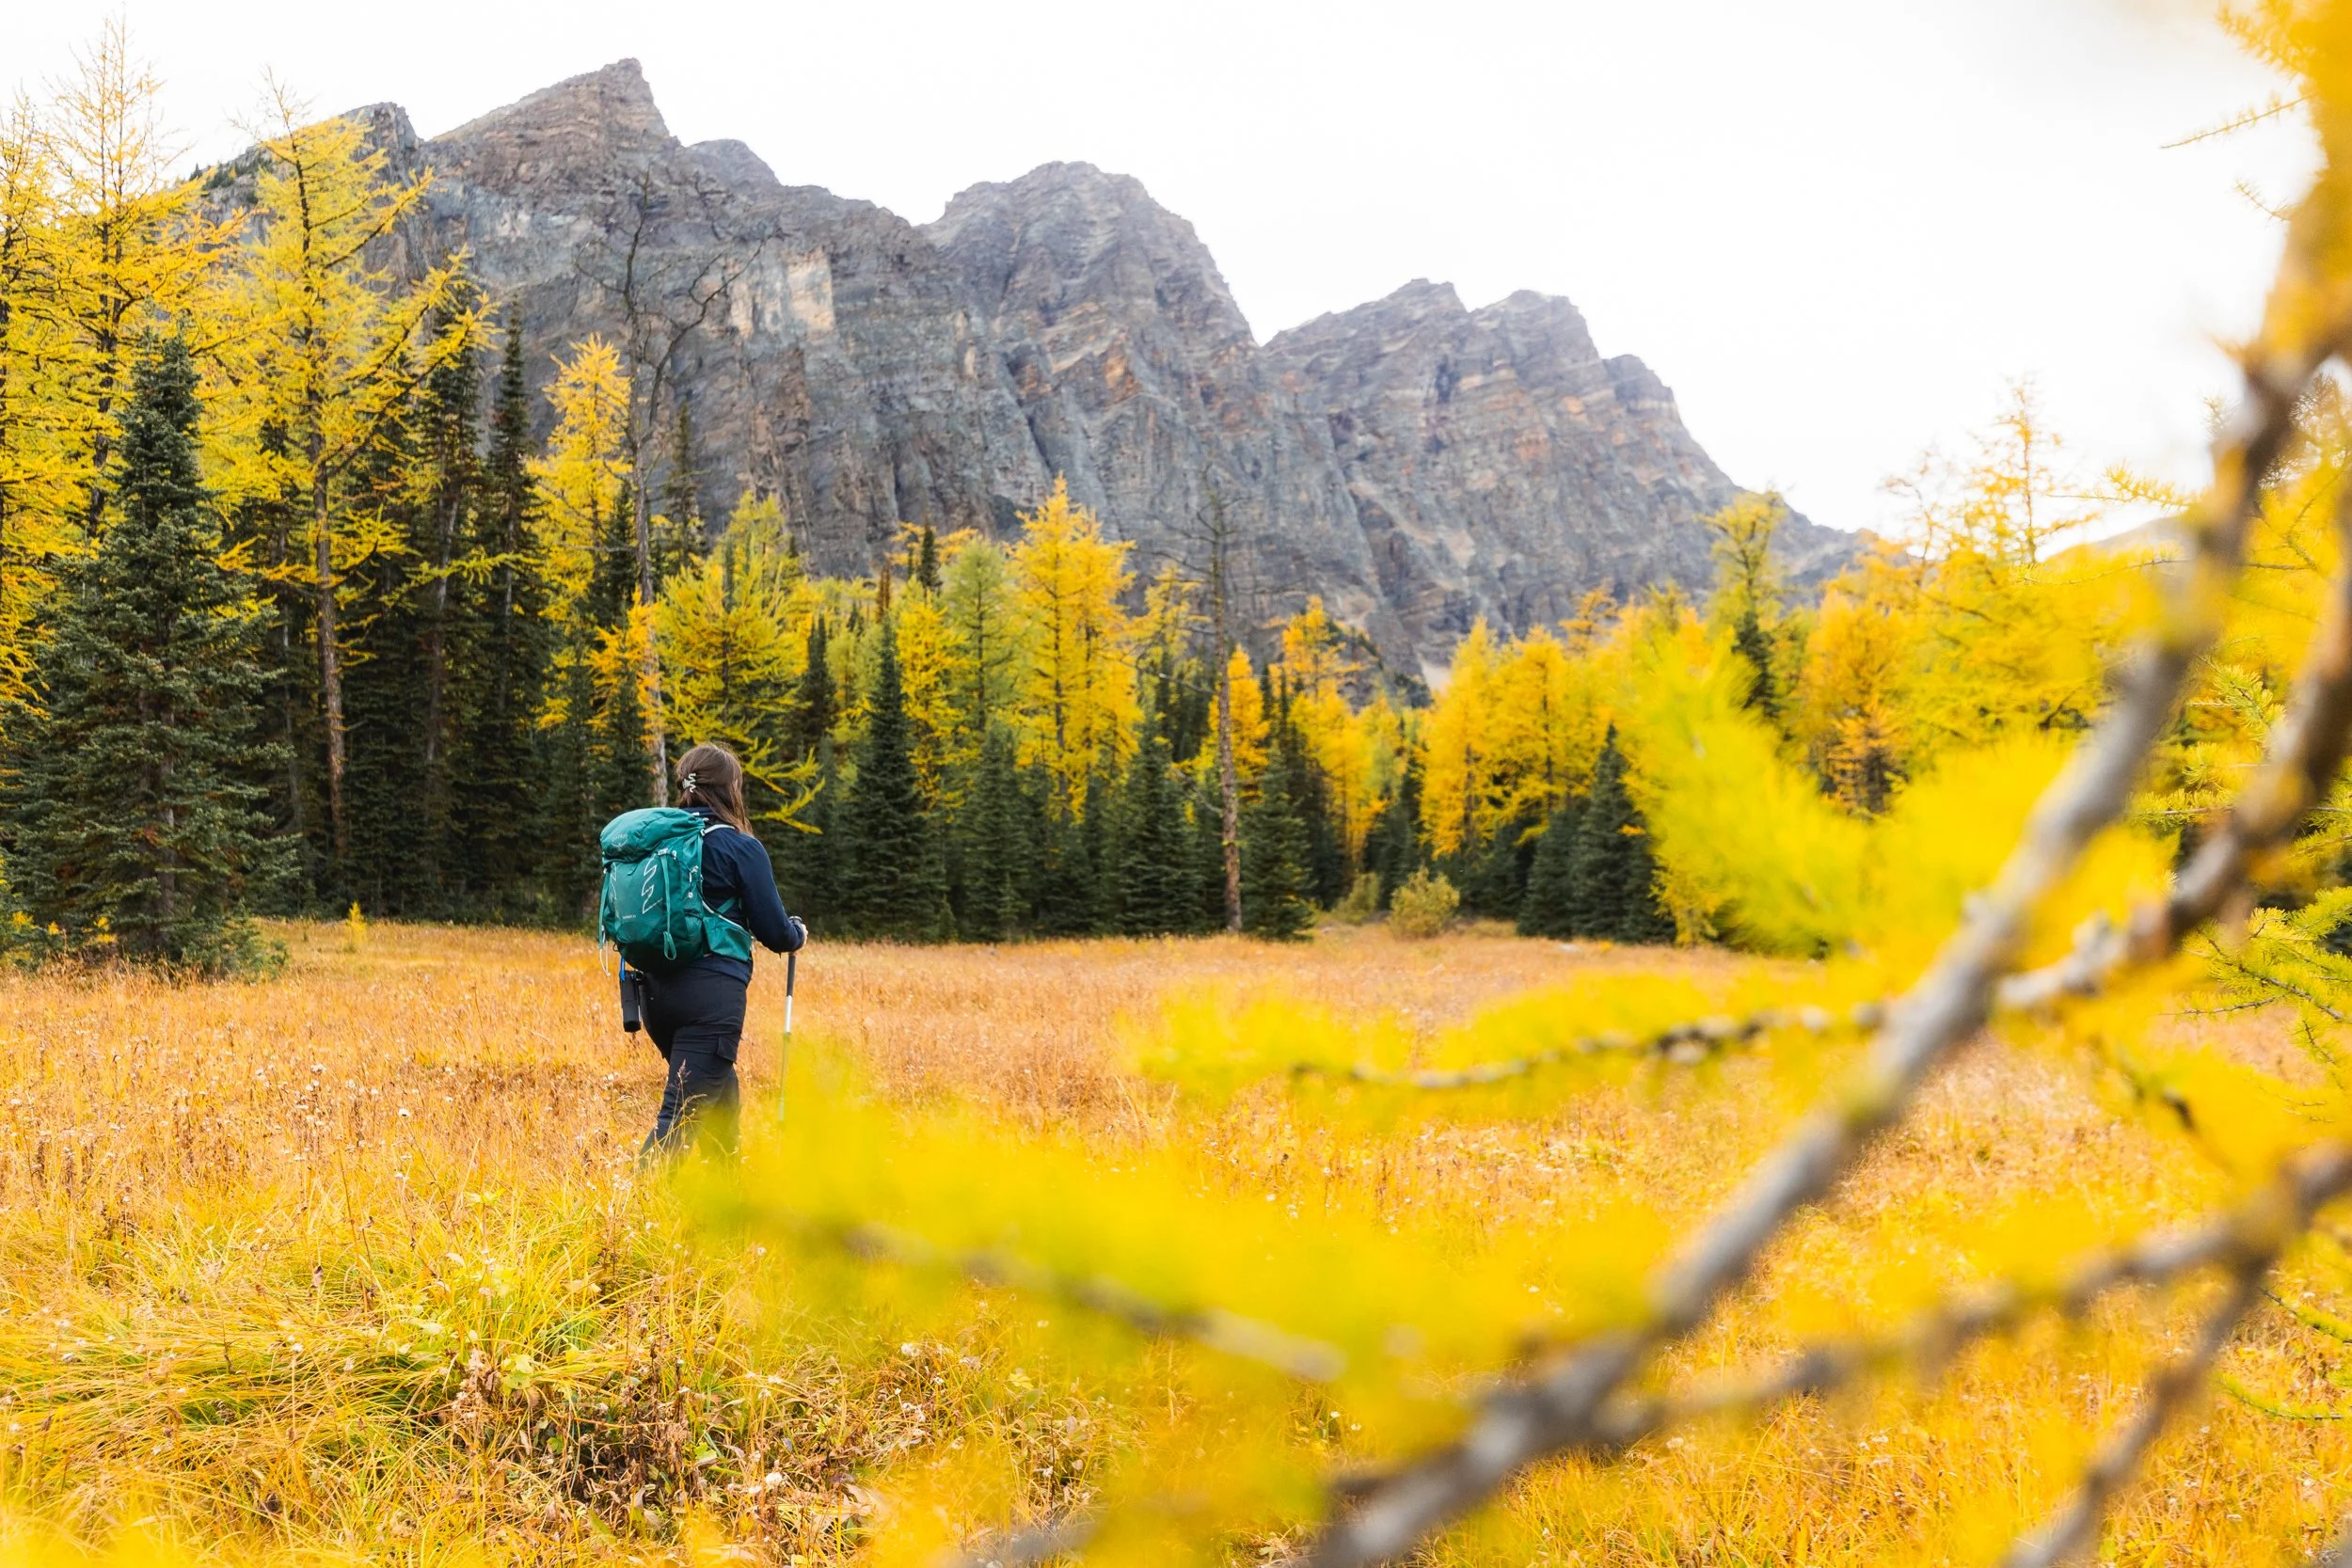
A larch meadow not far from the campground.
The trail to Panorama Ridge East starts just behind the campground, there’s a small sign attached to a tree to help you find your way.
The elevation gain is immediate and consistent throughout with only a small reprieve early on on the hike as you approach the more open meadow. This section of the hike has a similar amount of elevation gain as the main trail but in half the distance.
If you aren’t feeling up to the full hike the meadows are a great place to call it a day and turn around.
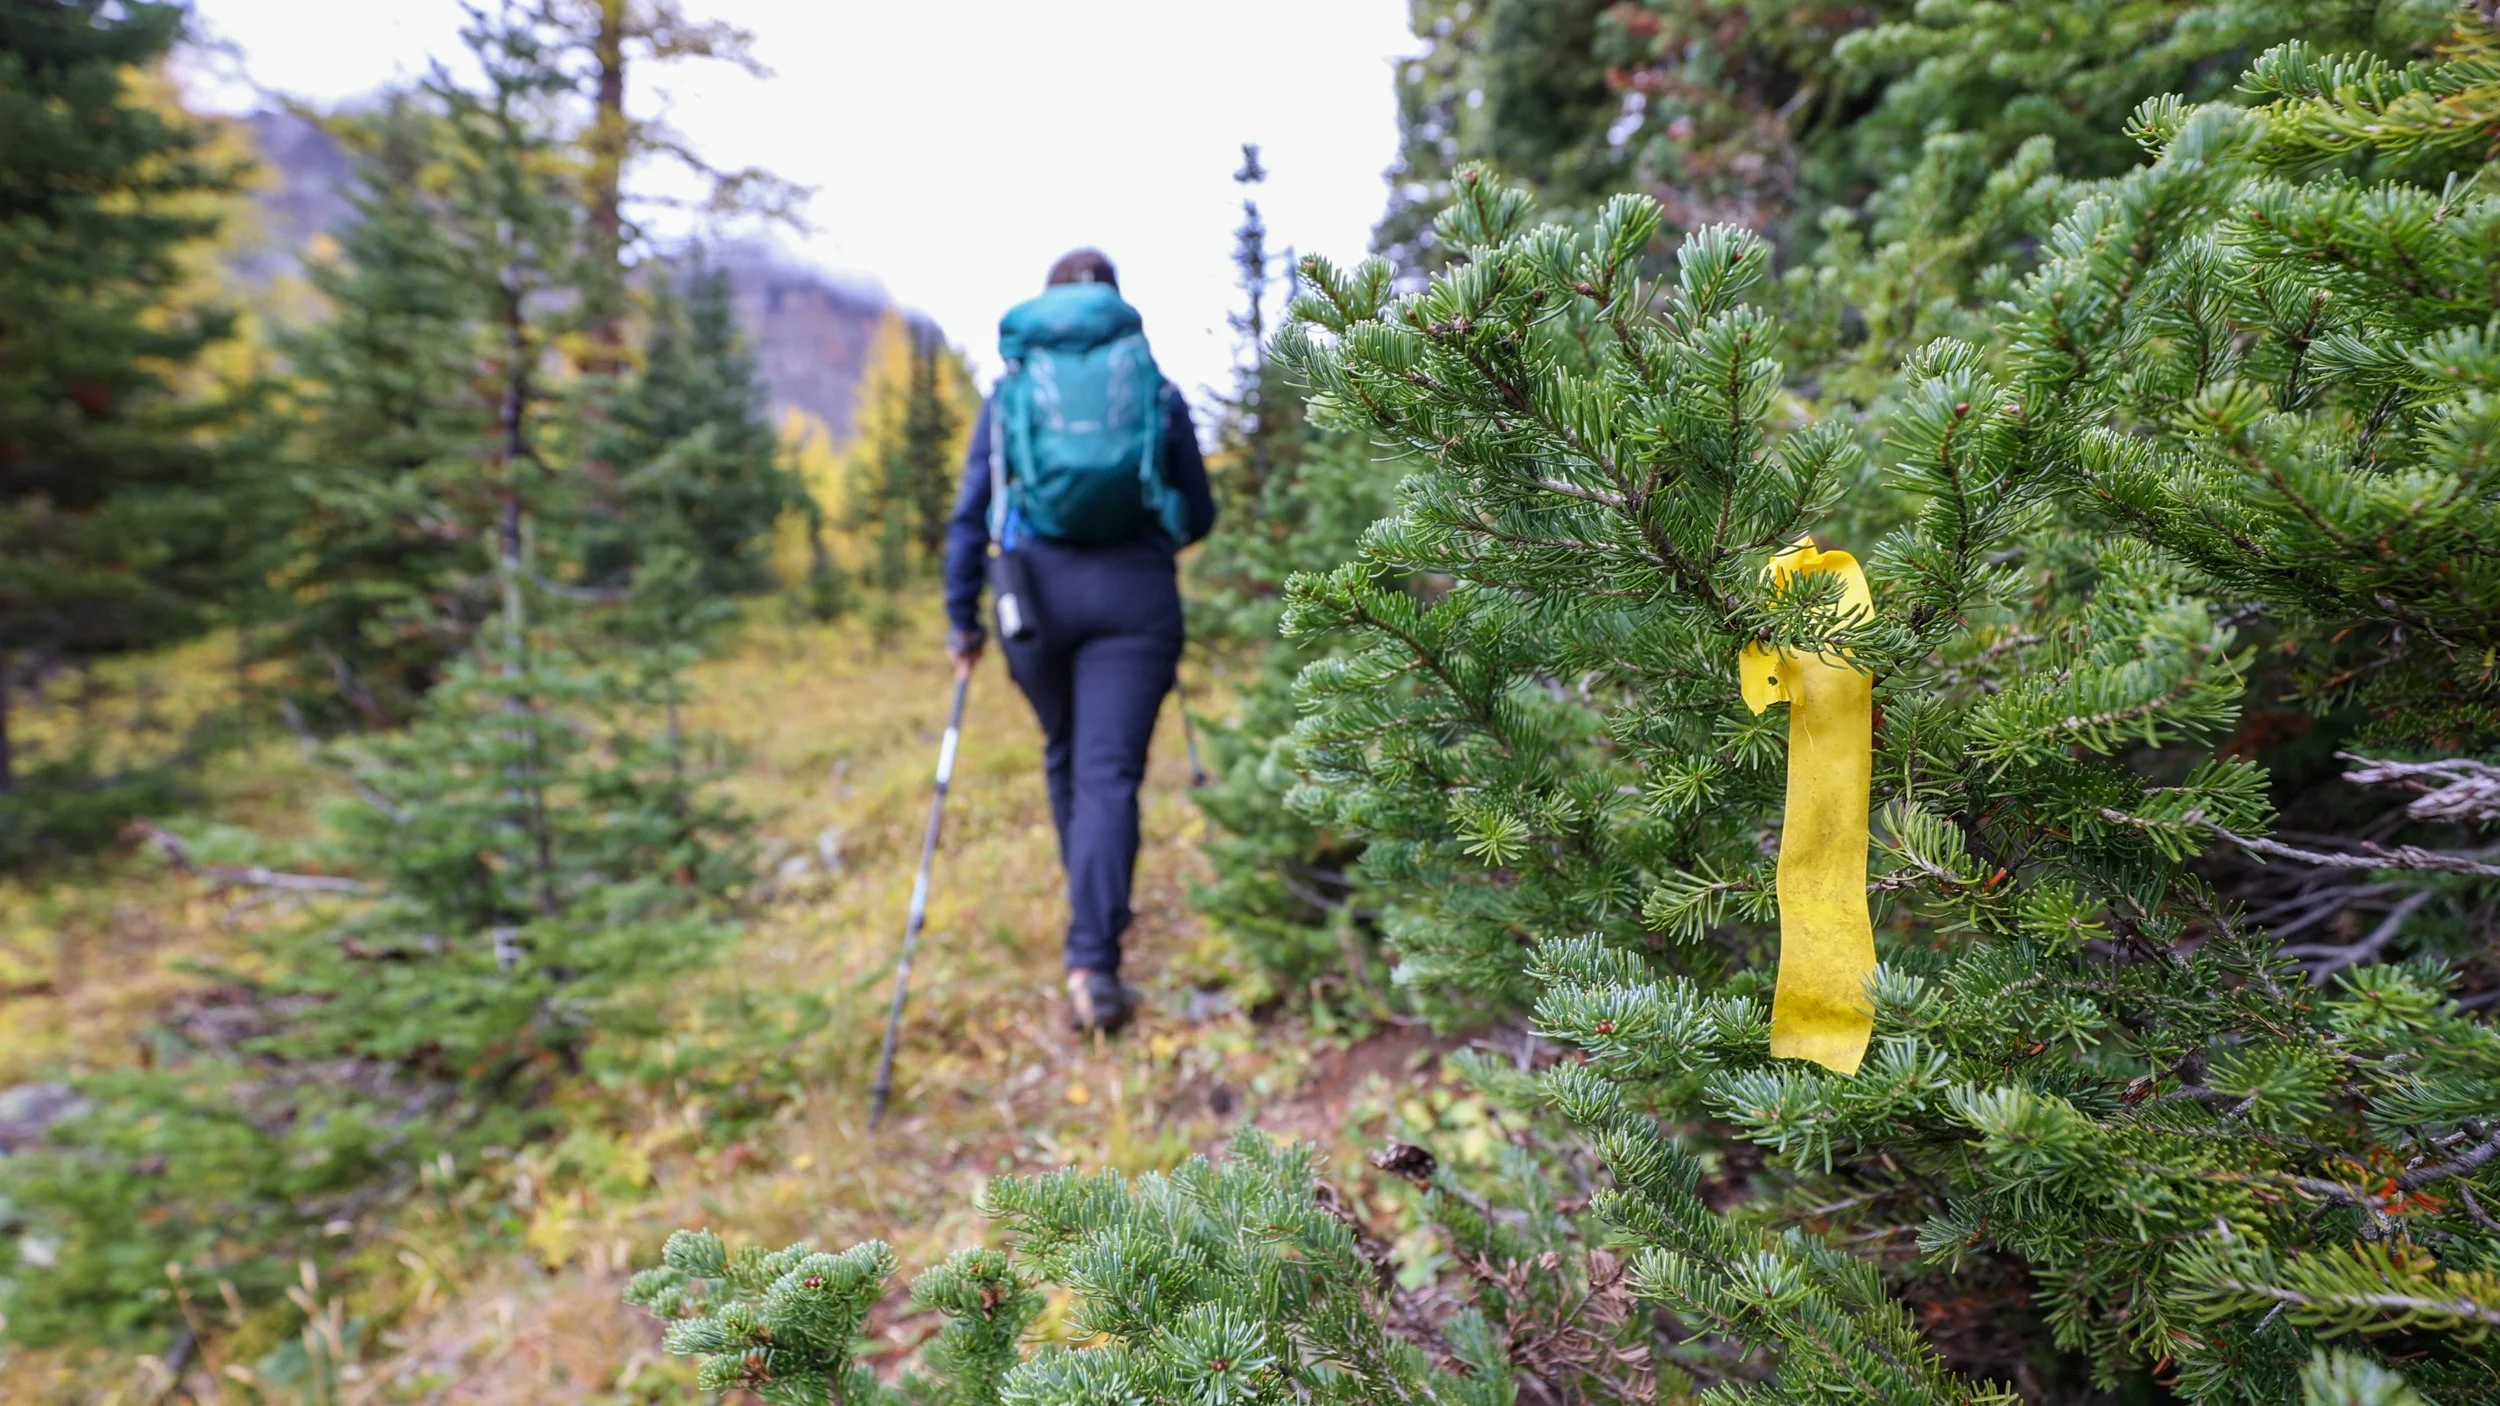
Trail markers leading the way
A Confusing Route!
If I’m honest the trail up to Panorama Ridge east isn’t the easiest to follow. There are several routes and goat tracks that weave amongst the meadow and forest so it’s easy to get a little lost - like we did on the way up (much to Brook’s annoyance)!
There are a few trail markers made from yellow tape attached to bushes and tree branches but some routes I’ve found online are by no means the most direct or accurate.
In fact on the way up we covered almost 4.5 km by following an online map whilst on the way down we almost cut that in half by taking a more direct trail back down and only covered around 3 km - this is the route I’d suggest taking!
Below you can see our hike tracked via GPS on the way back down, I’ve uploaded it to AllTrails so you can download it and use that more direct path to guide you! I’d highly recommend signing up to a free trial so you can use AllTrails maps offline.
Note: Some of the other routes on AllTrails marked as ‘Panorama Ridge East Route’ don’t take you a direct route and don’t even really follow much of a trail at all!
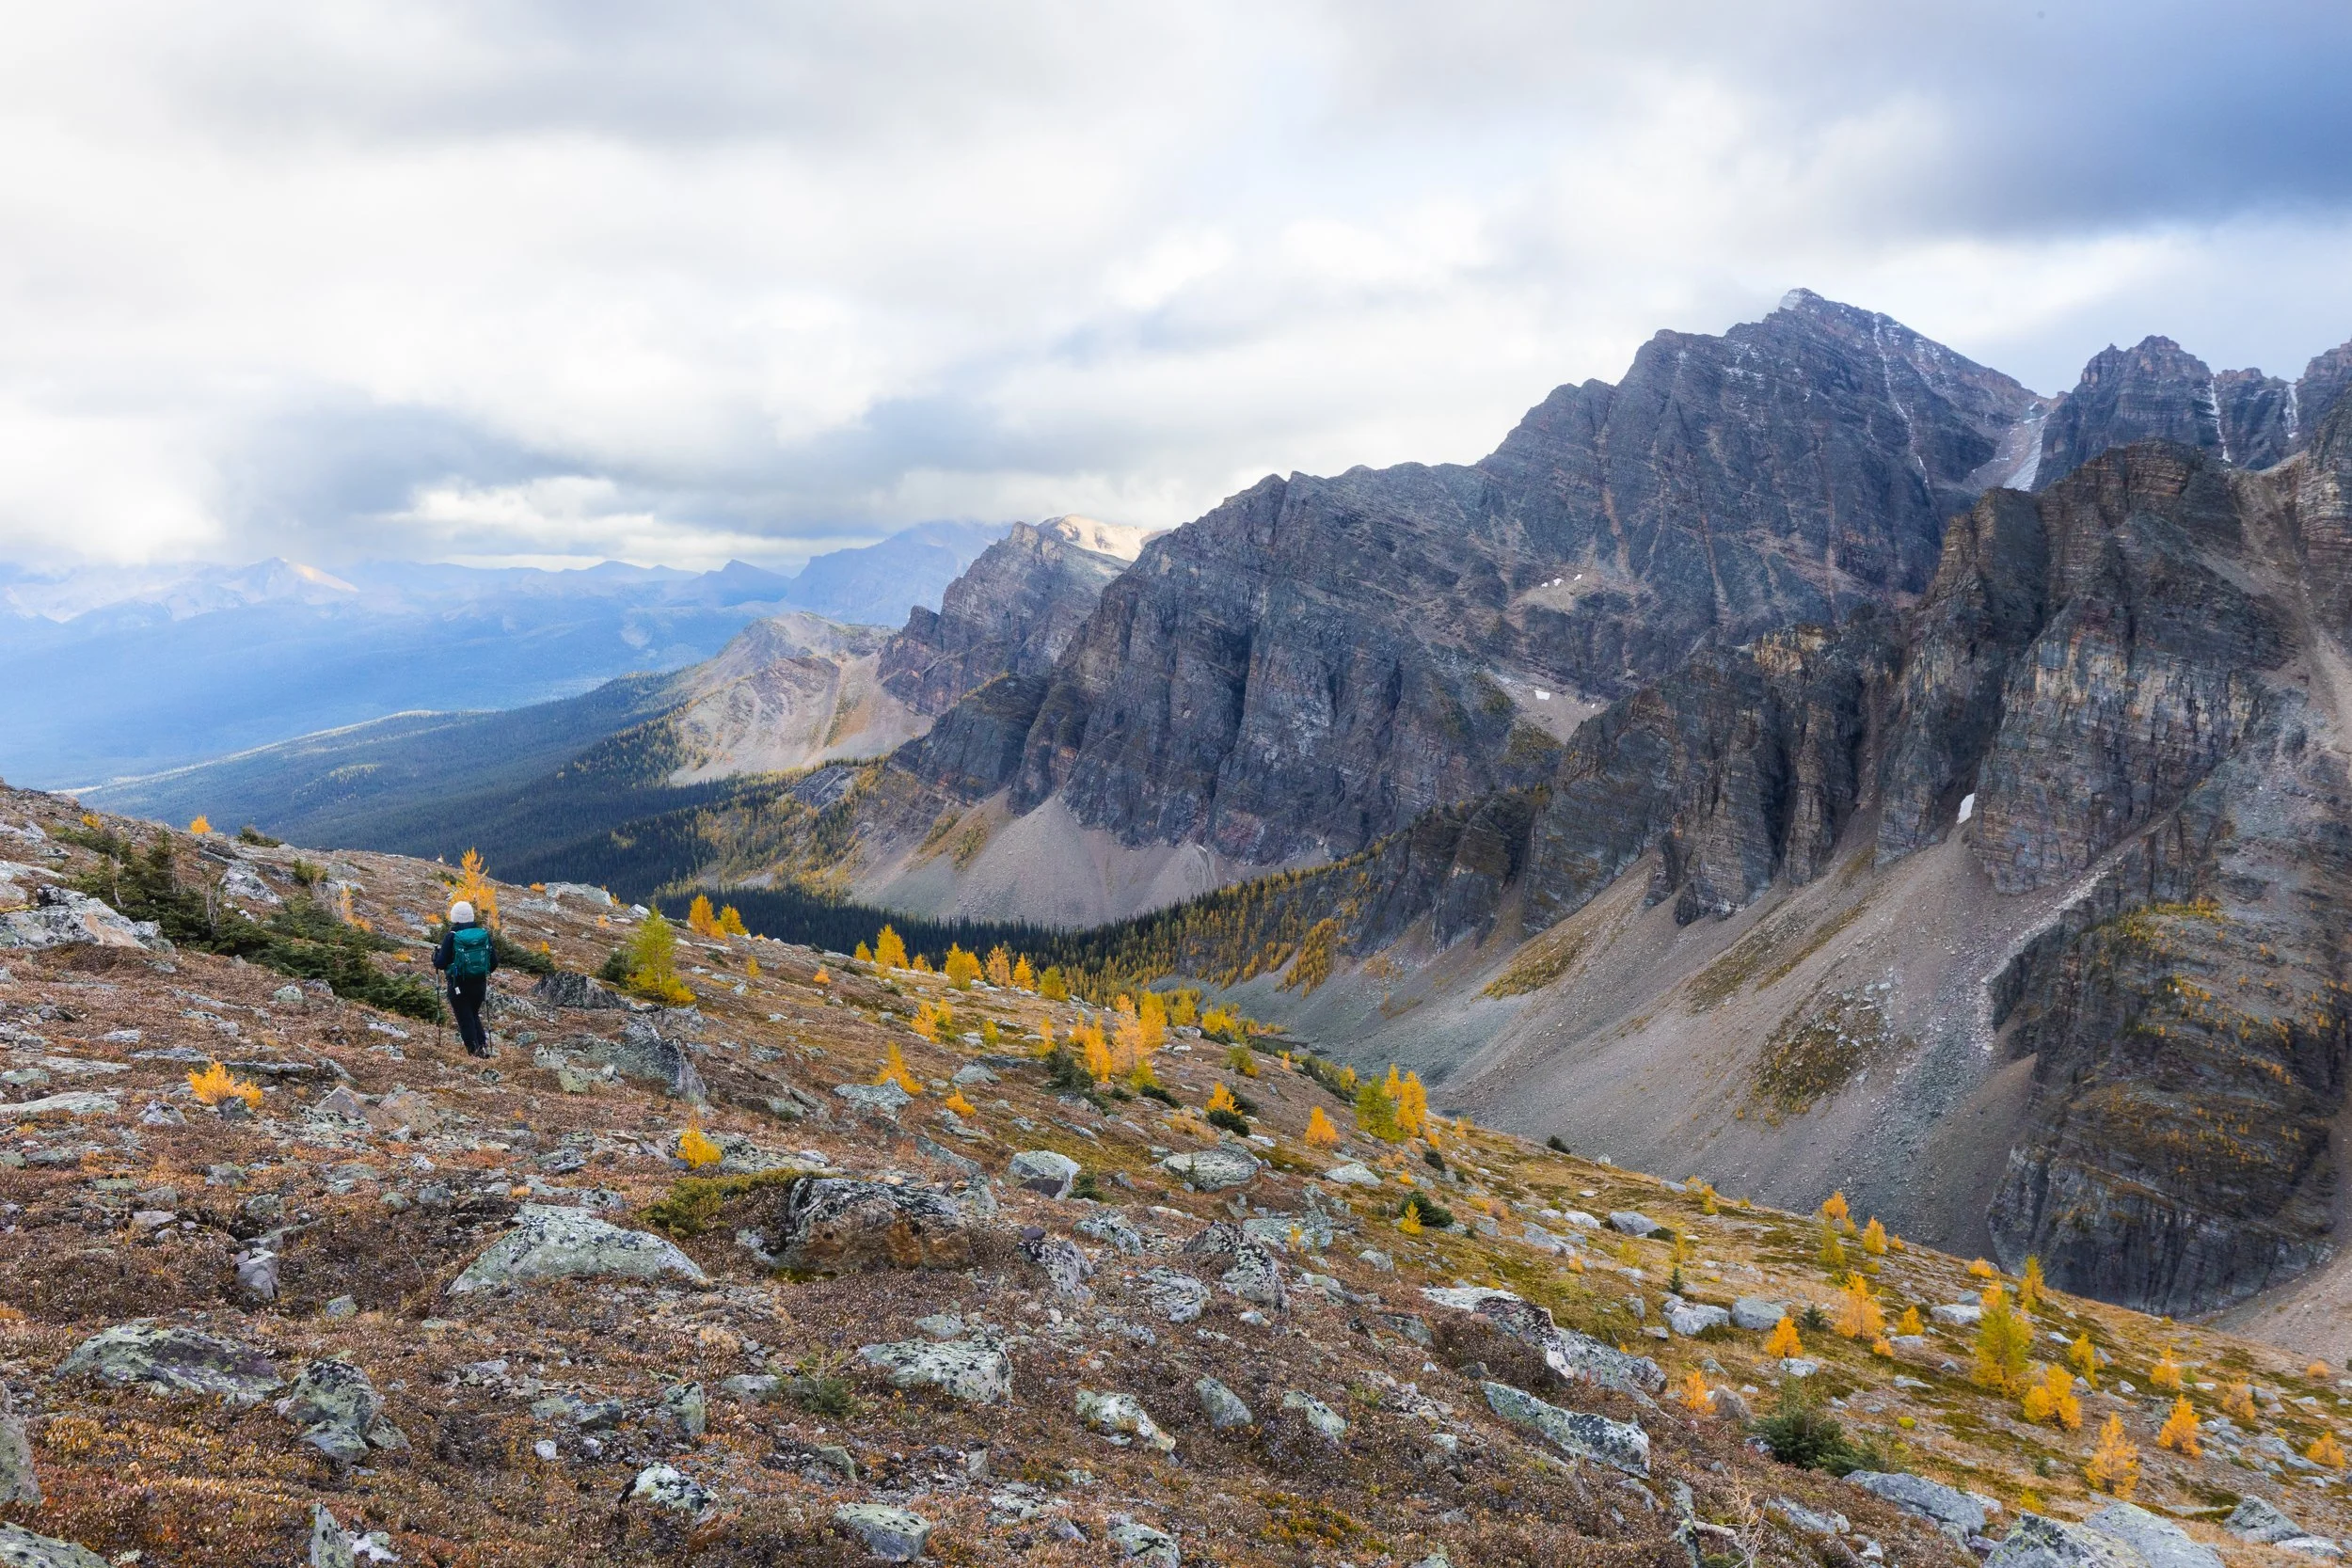
Around 1.5 km in to the trail the terrain starts to steepen further and the trail becomes more braided. Here you’ll want to follow the ridge line as directly as you can to the top.
Ascending up to the ridge
On and around Panorama Ridge there are the old remnants of a miners hut as well as an old slate mine tunnel. The hut is pretty much on the above trail, however you’ll need to get pretty lost to find the old mine itself! We ended up unintentionally exploring the tunnel on our detour on the way up. If I’m honest though I’m not sure I could find it again even if I tried! It also resulted in a bit of a scramble to get back on trail so not sure I would even recommend it!

The old hut on the way up.
Once towards the top of the ridge the forest fades away leaving some incredible panoramic views across the valley, I guess that’s why they call it Panorama Ridge!
Views walking back from the ridge line view point.
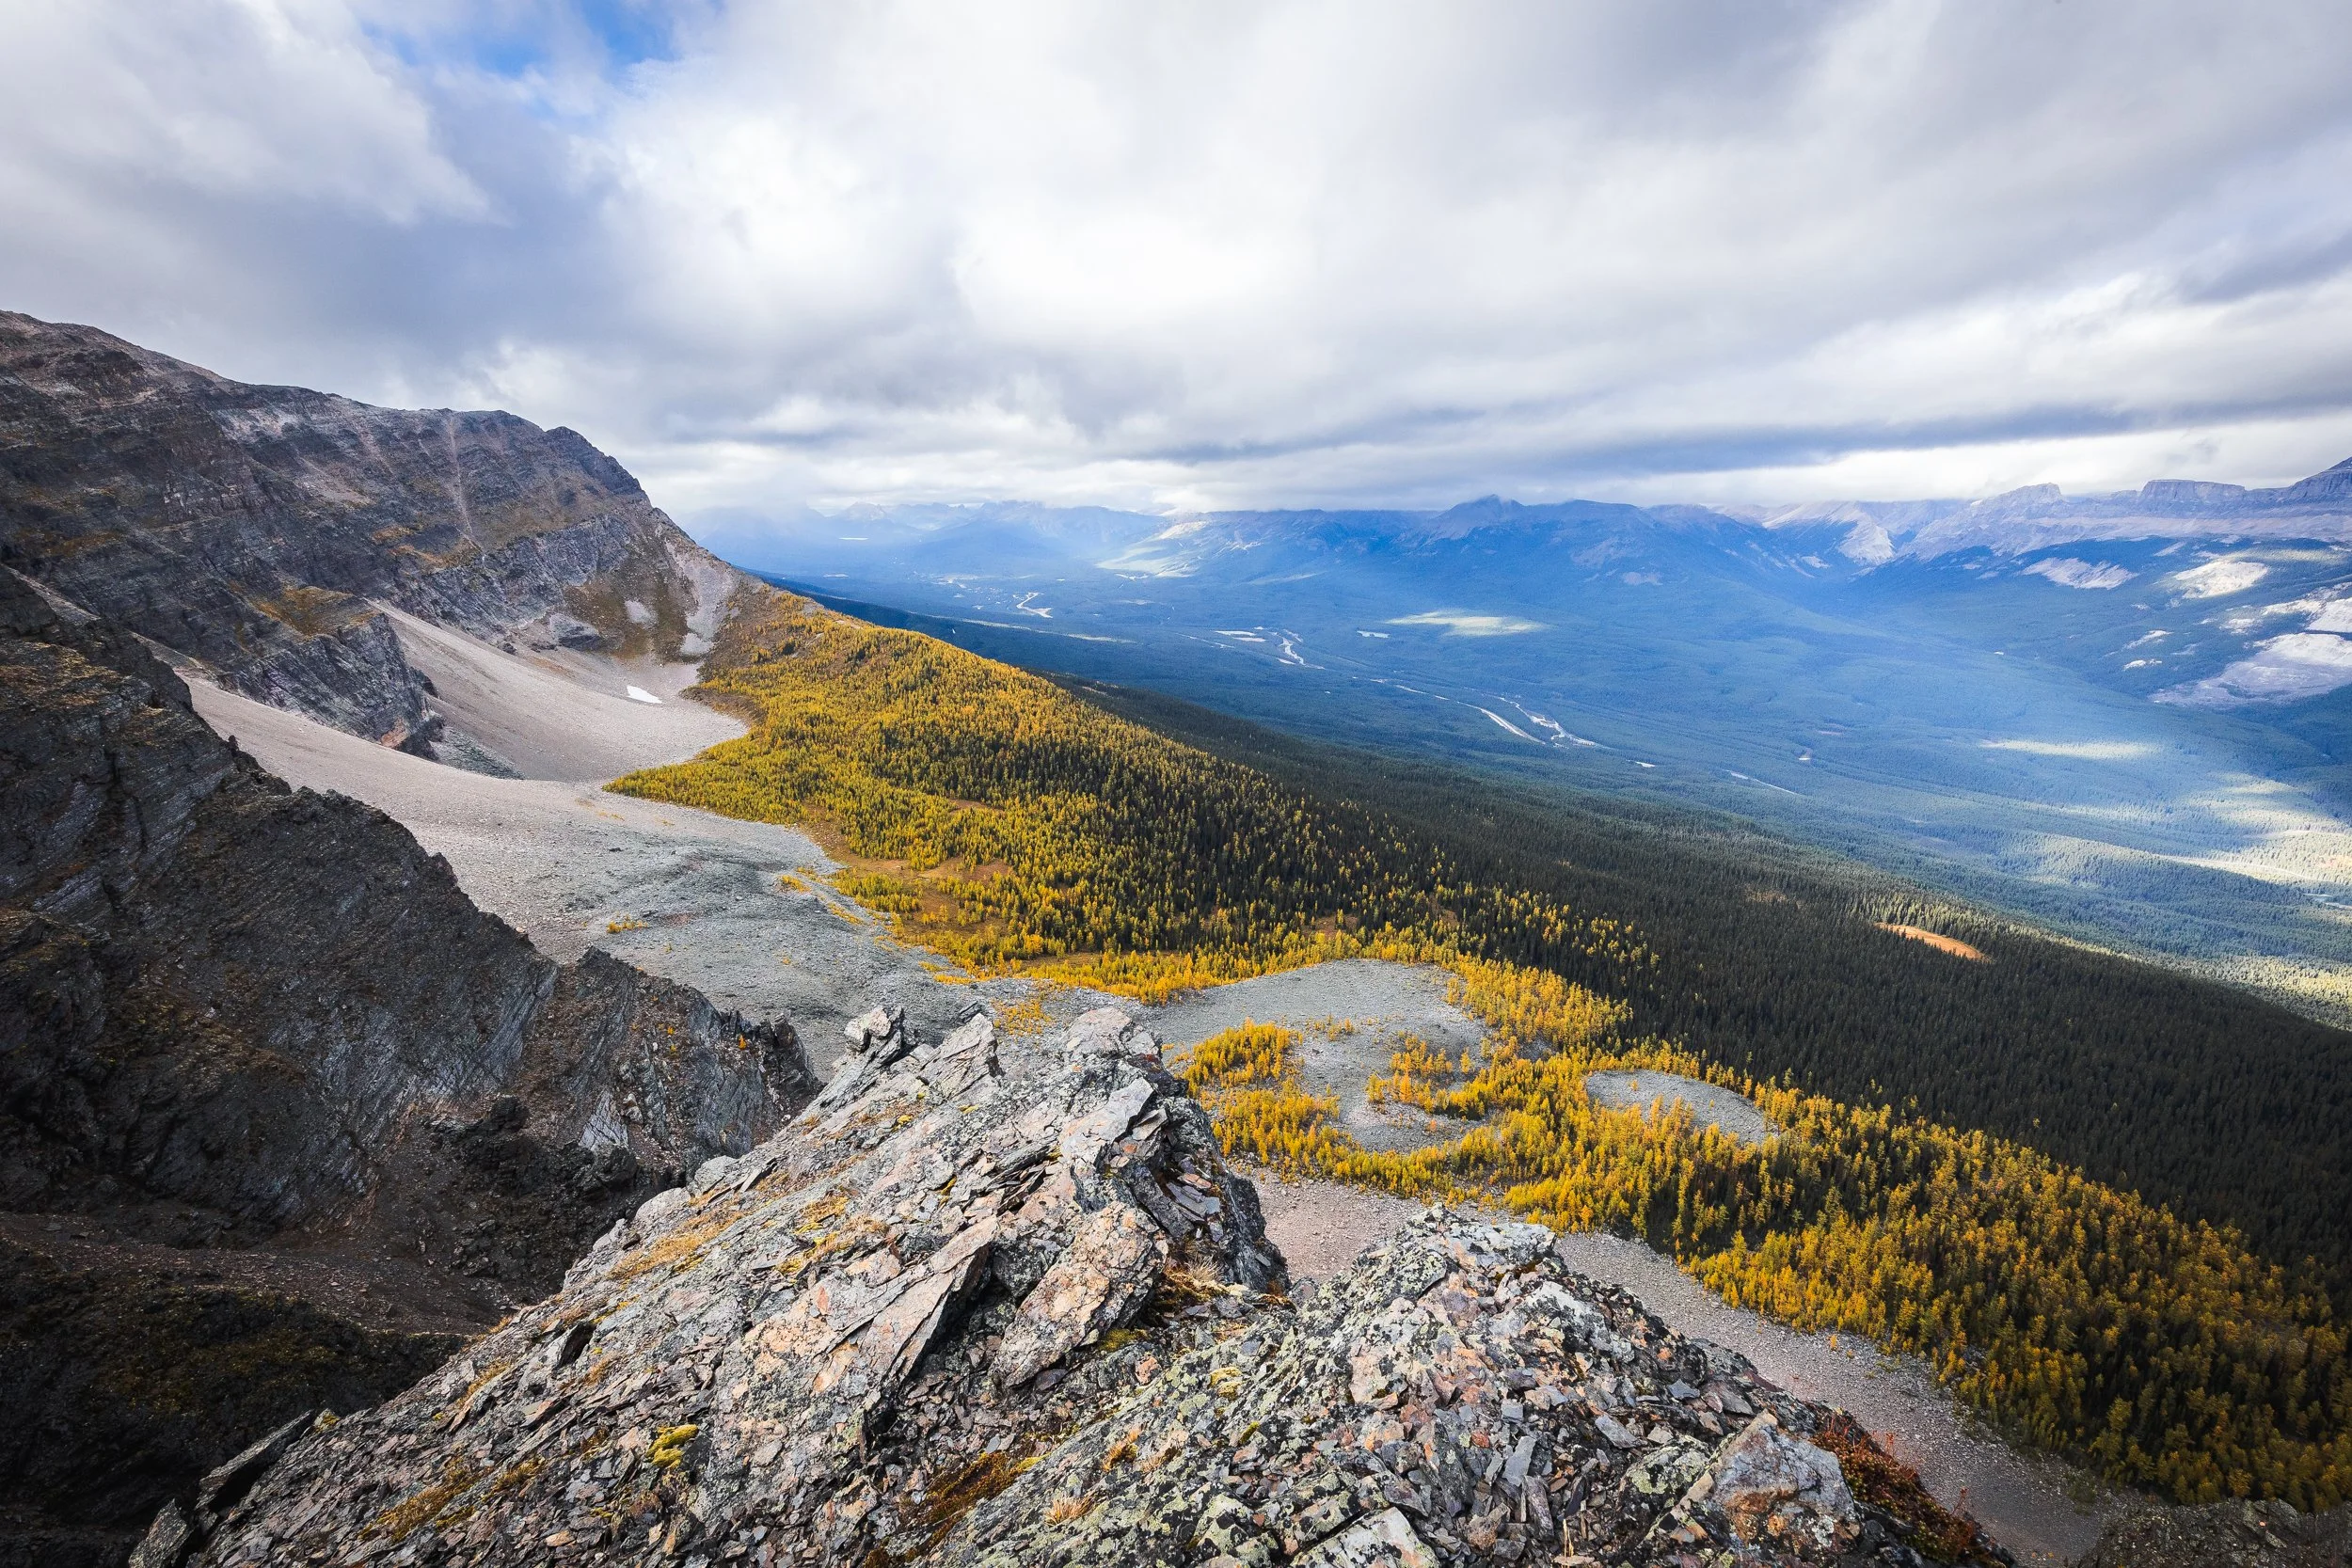
Views from the ridge over the valley with many a larch tree below!
The Campground And How To Book
I think the best way to complete this hike is to book an overnight stay at the Taylor Lake campground.
Our preference is to hike up to the lake, unpack some gear and set up camp, eat some food and then set off up to Panorama Ridge with lighter packs before heading back to camp for the night.
This way you get to experience a tranquil sunset and sunrise at the lake before hiking back down to the car park the next morning.
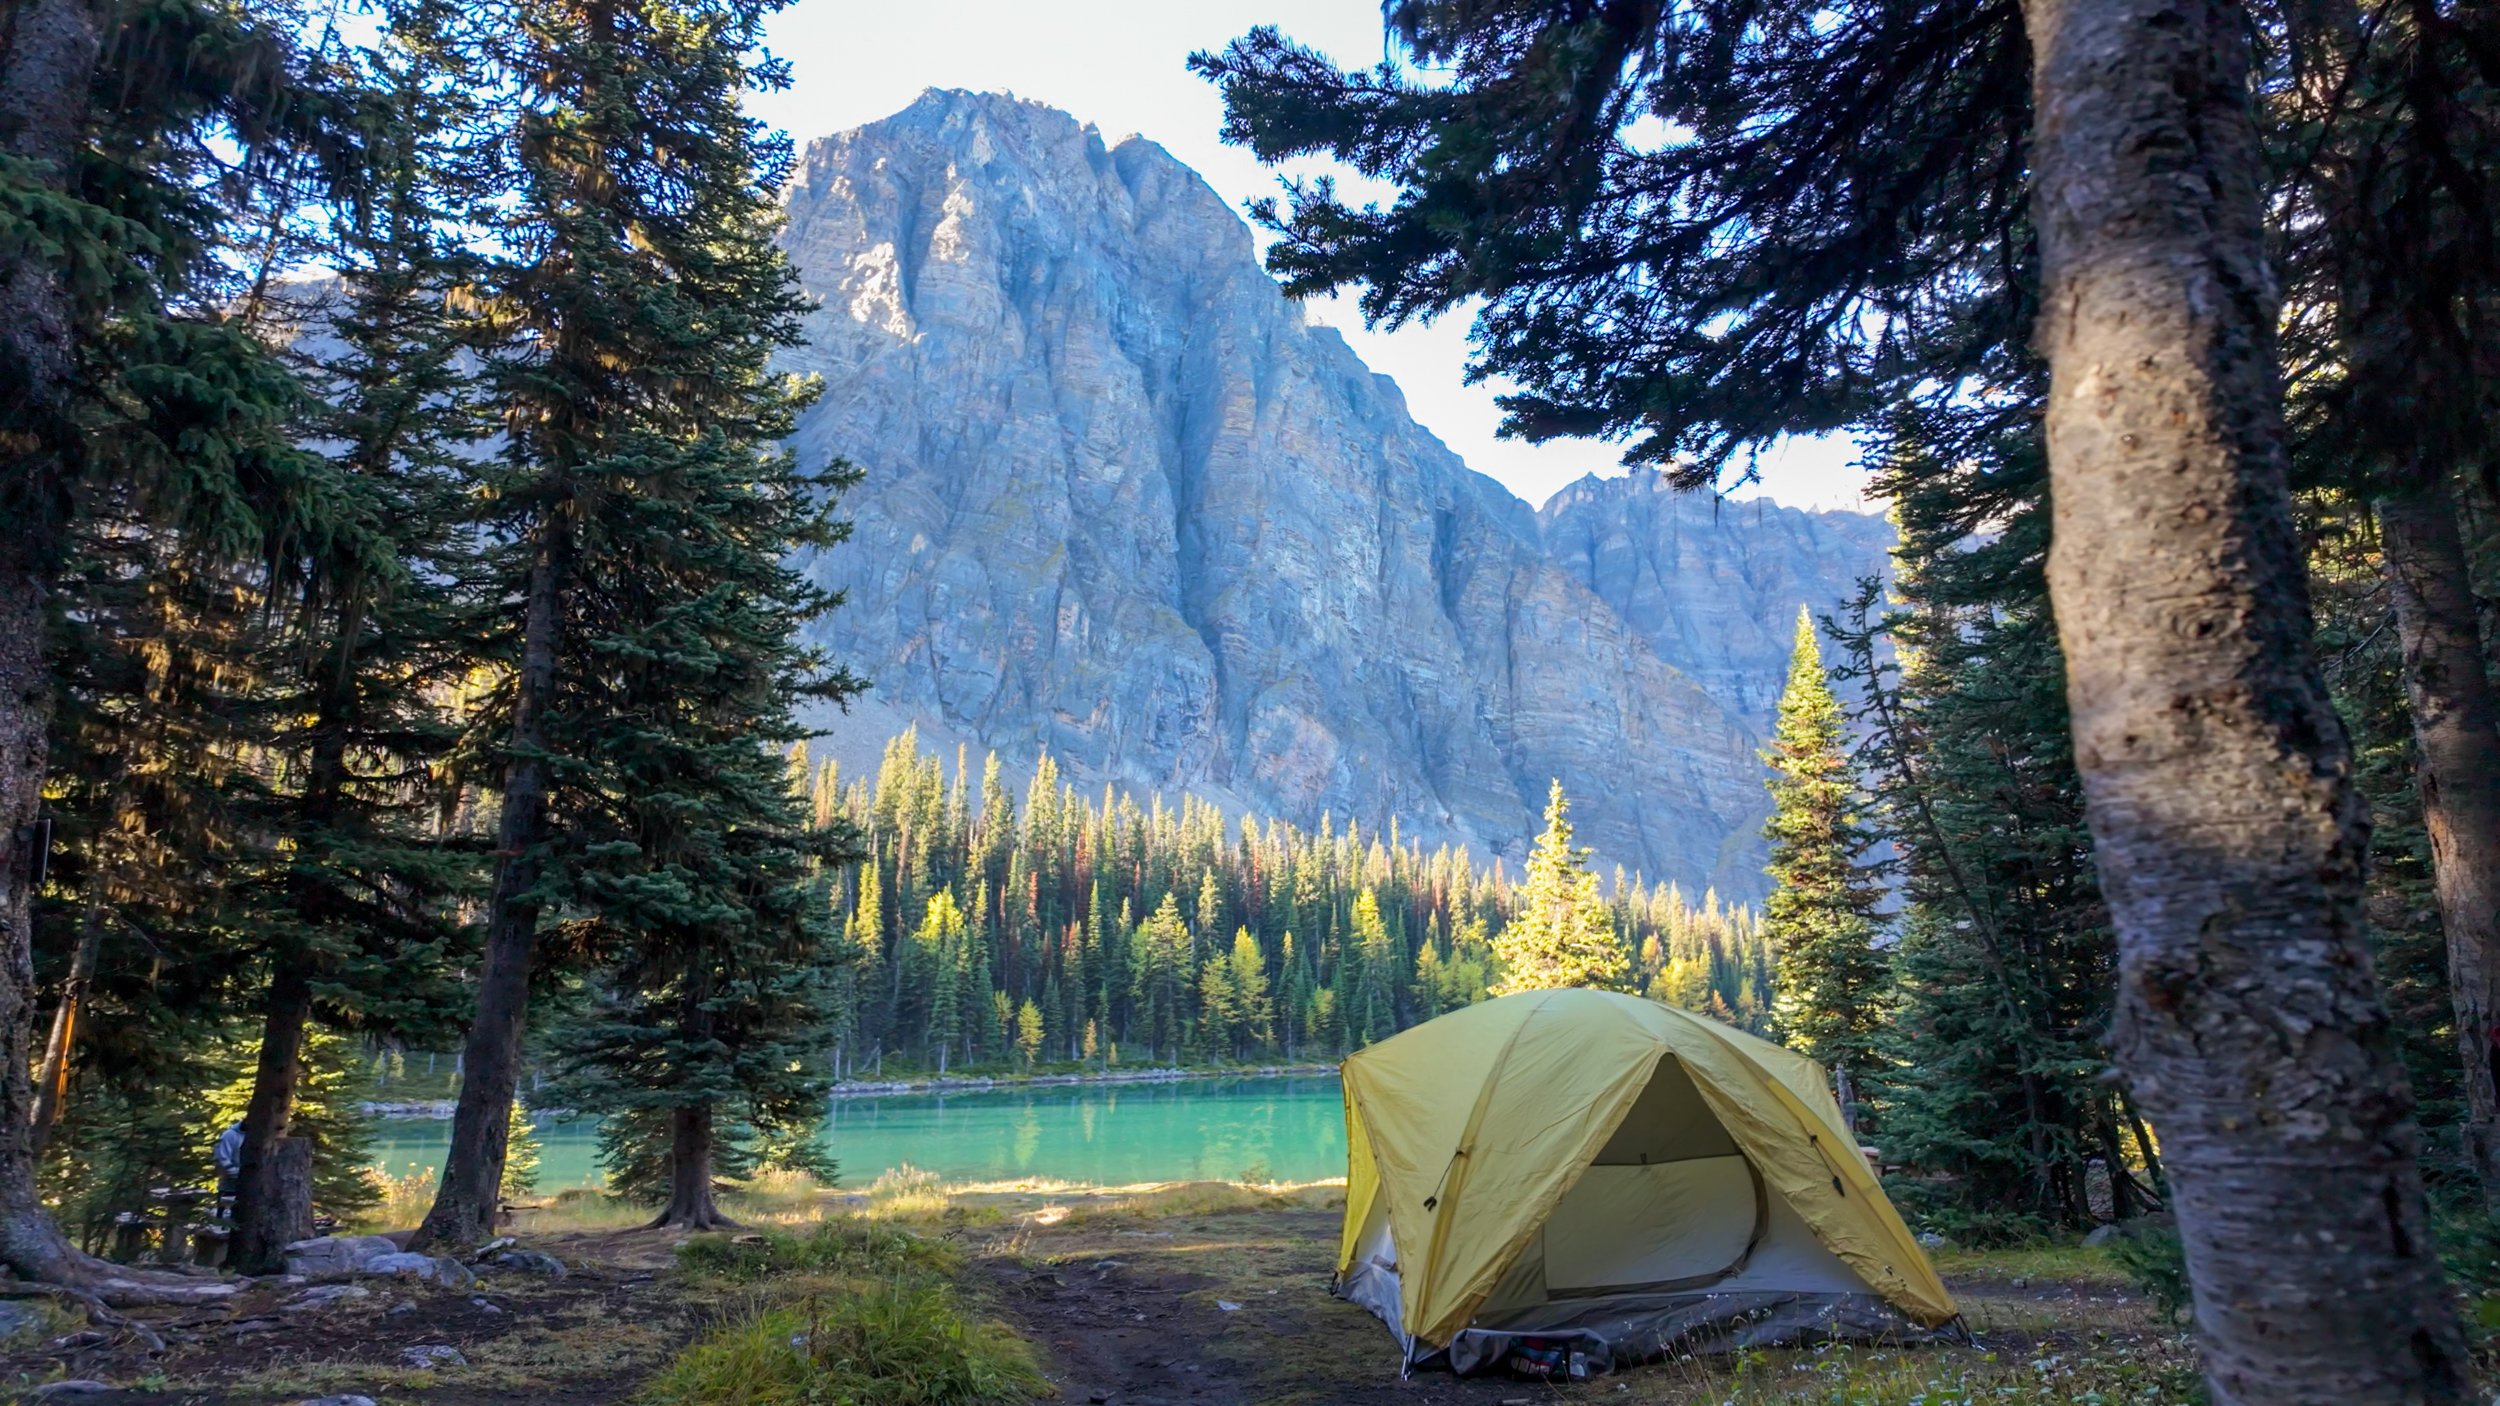
A tent pitched up with some amazing views!
Campground Facilities
5 Tent Pads
Bear Lockers
Picnic Benches and tables
Stunning views and fantastic lake access.
Note: Fires NOT permitted
Campground Booking
You can reserve a pitch on the Parks Reservation page.
Select: ‘Backcountry - Backcountry Zone - Park: Banff, Kootenay and Yoho - Access Point: Taylor Lake Trailhead’
Take the rules seriously!
When we stayed at Taylor Lake there were a group fishing in the lake, having fires, camping outside of designated areas and leaving their trash out over night. The majority of this you aren’t meant to do!
Even though fishing with the right permits is allowed at Taylor Lake, keeping and eating the fish is not. This is regarded as poaching.
We were later contacted by Parks Canada and found out that this group were in fact taken to court and fined for breaking several Parks rules. Not only poaching fish but for lighting unpermitted fires and leaving out food that can attract wild life.
Not only is this type of behaviour inconsiderate to other hikers and wildlife but you may also find yourself in some really hot water! It’s always best to read up on a campground or Park so you know what is and isn’t allowed before you arrive.
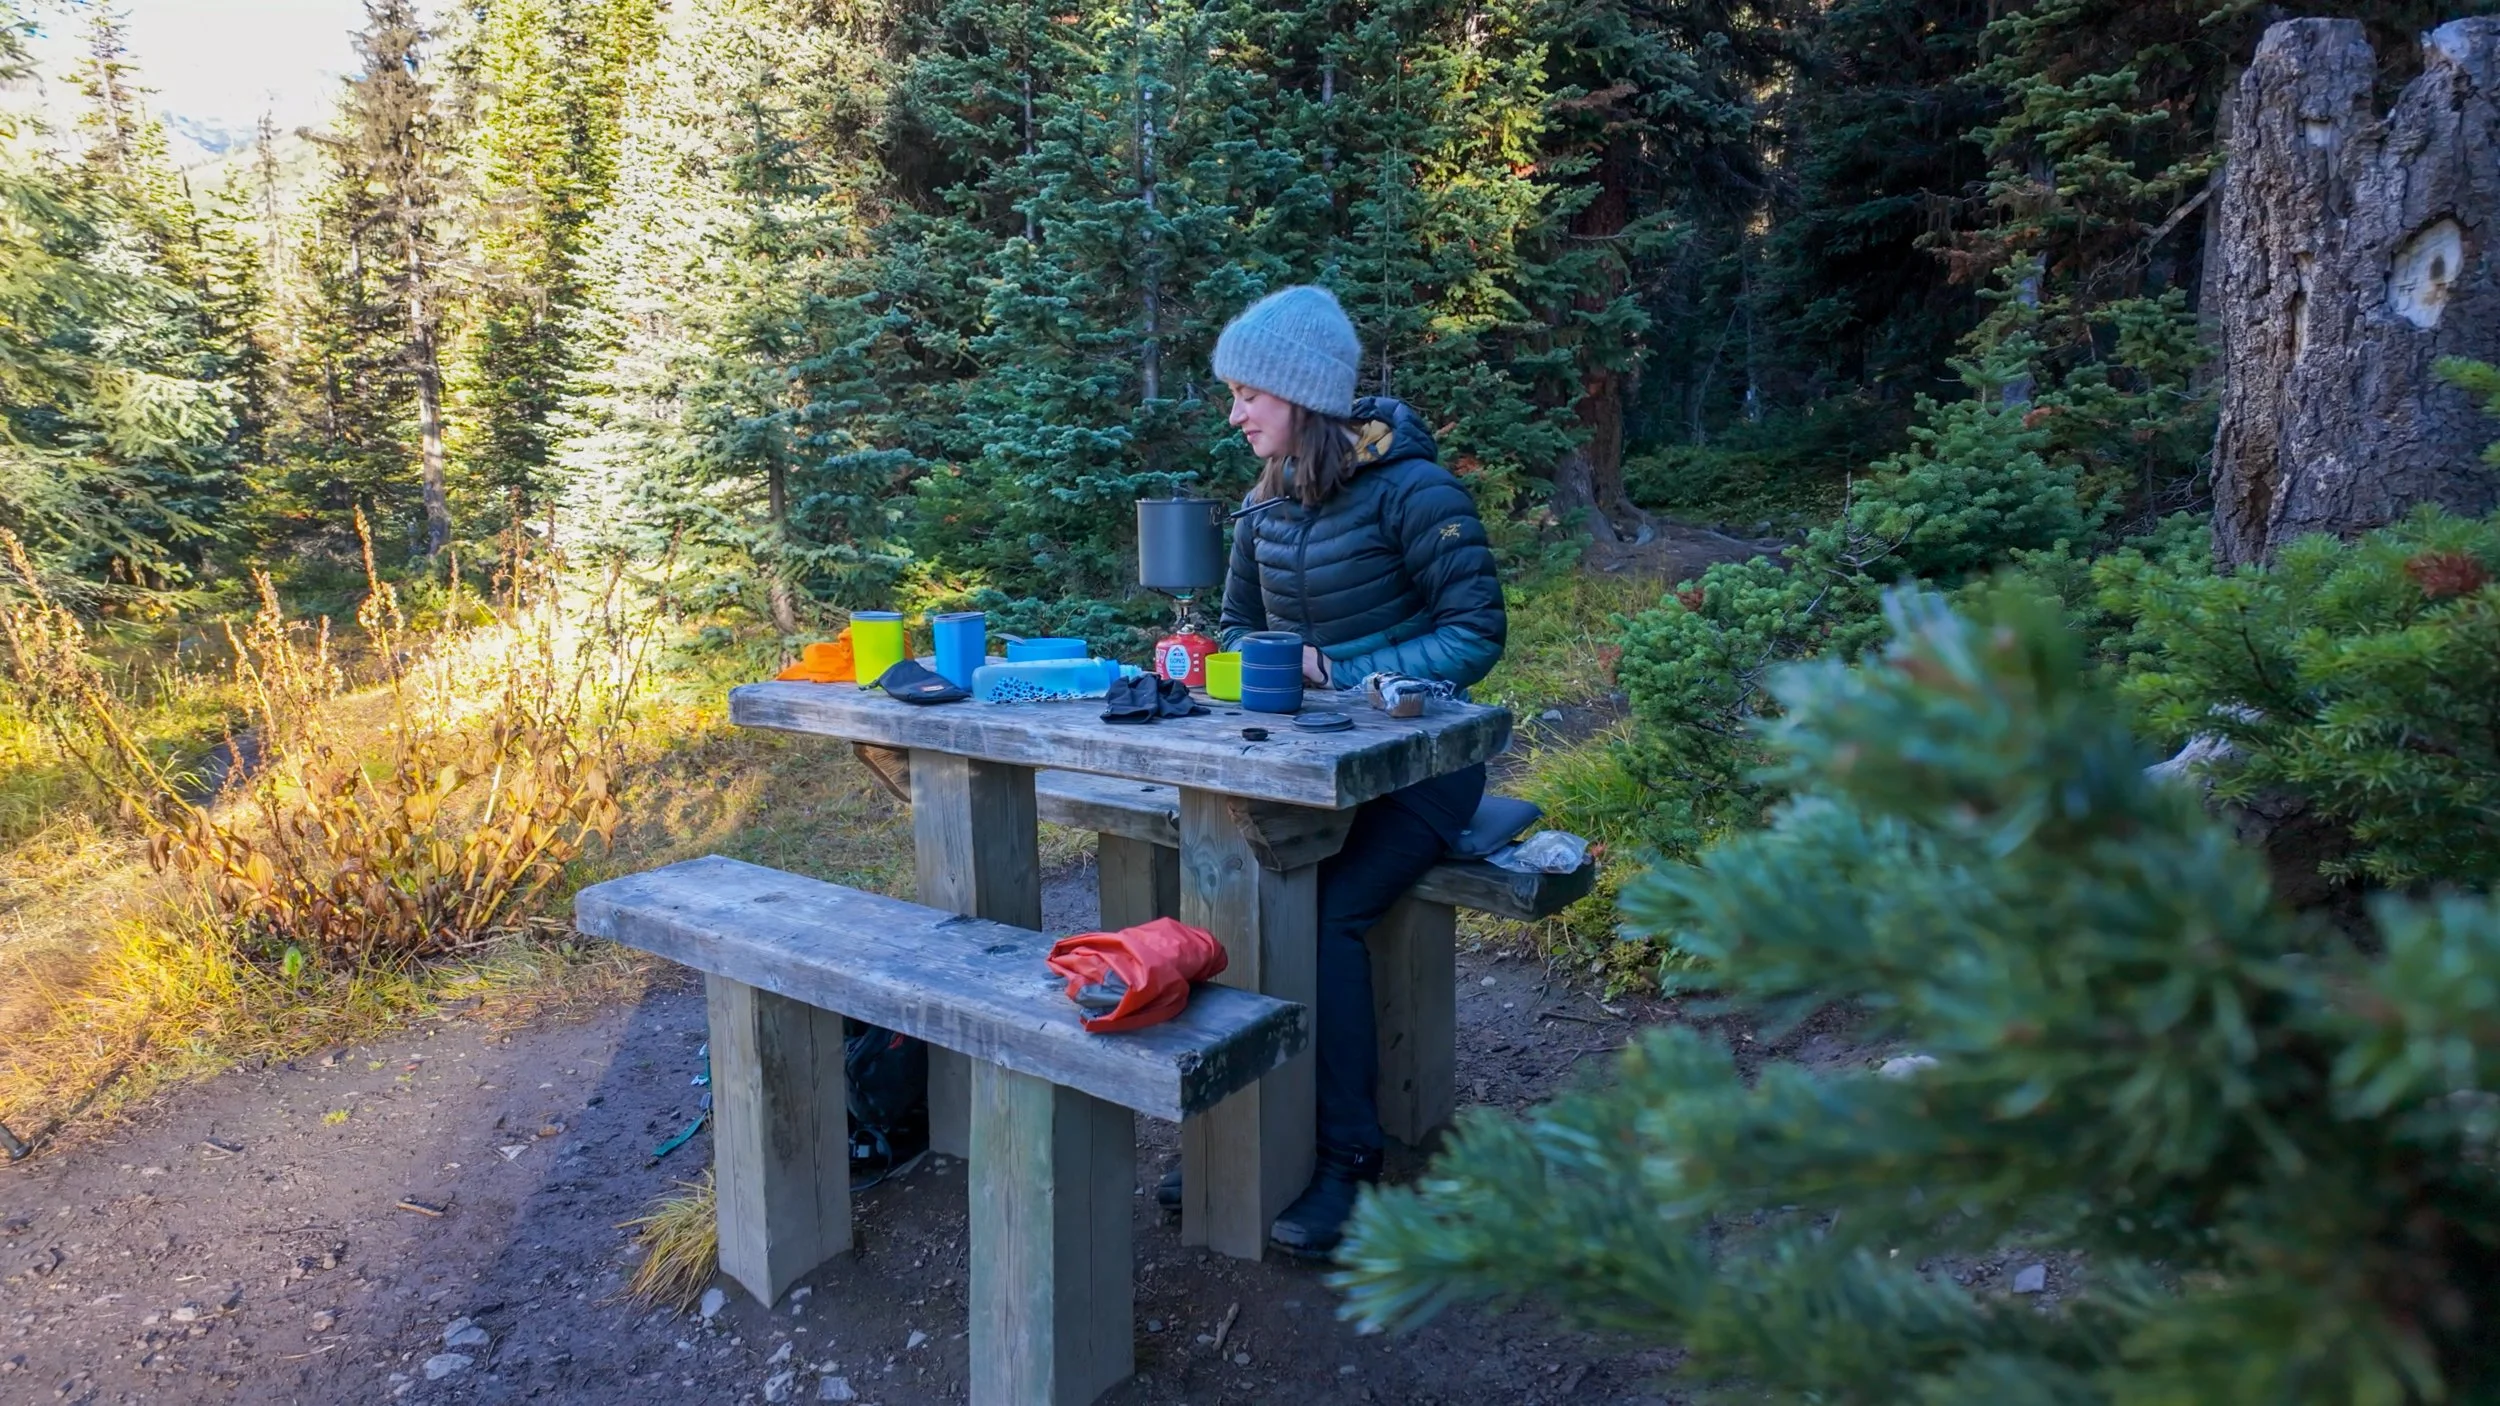
Making dinner at one of the lakeside picnic benches.
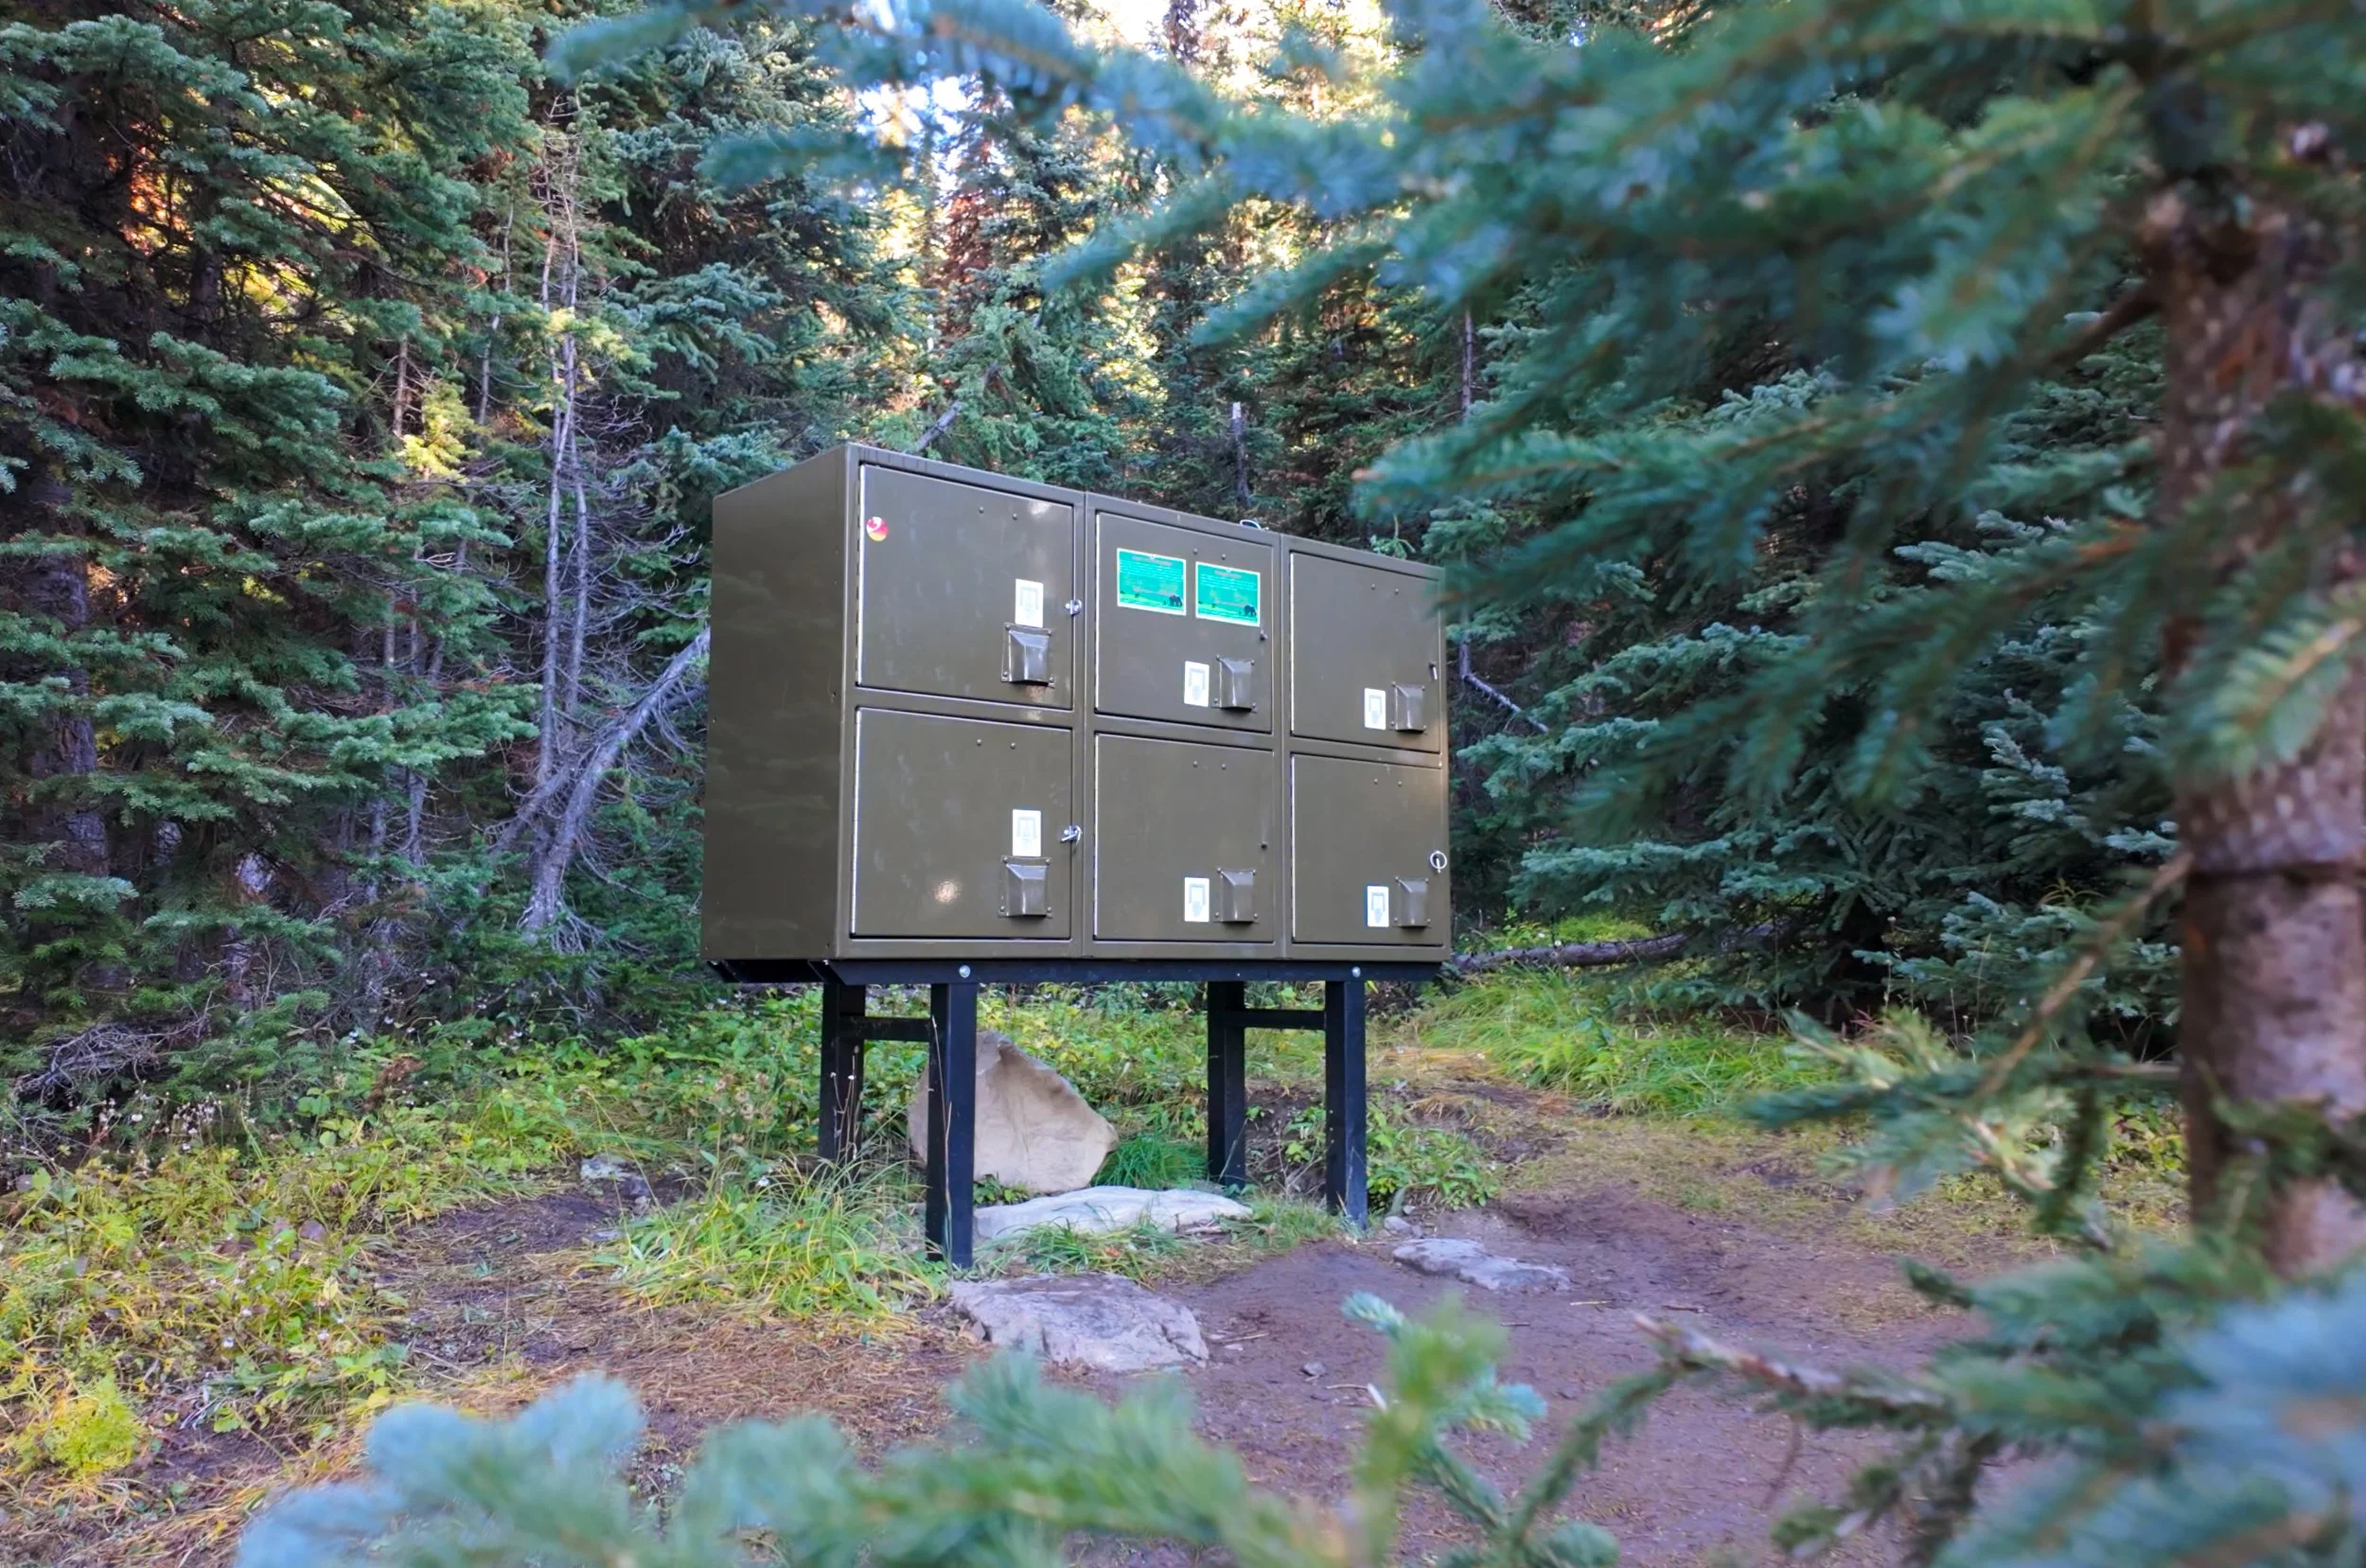
Bear Lockers at Taylor Lake
Things to Know Before You Go
Parks and Conservation Passes: Whether you’re hiking in a national park in Canada or certain provincial parks you’ll most likely need some kind of conservation pass. A Discovery Pass will cover you for the year for all national parks in Canada whilst the Kananaskis Conservation Passcovers the provincial and wildland parks in the Kananaskis region.
Check Trail Conditions Before You Go: Trail conditions in the Rockies can change month to month and year to year. Trails close for wildlife, weather and avalanche hazards. Be sure to double check trail conditions before heading out to avoid any disappointment. You can do so here!
Leave No Trace: When hiking anywhere in the world it’s important that you practice a leave no trace philosophy. This means whatever you hike in to a trail or campground you have to be able to hike out too. There won’t be trash cans or waste disposal in the backcountry and you should never throw trash in any out houses or pit toilets. In recent years, as trails and parks become busier, litter is becoming more of a problem. Don’t add to that problem!
Bears and Wildlife! Wild life is everywhere in the Canadian Rockies, even on trails that are close to town. People and animals have been attacked by bears and other wild life on popular trails in the past so don’t take it for granted.
Most wildlife is looking to avoid human contact so no matter what type of wildlife you see be sure to keep your distance. 30 metres is the minimum recommendation for most species but under any circumstance don’t approach wildlife. Even the cuddliest of critters can be dangerous!
So as always be bear aware, make noise, hike in groups, carry bear spray and, if they’re allowed on trail, keep your dog on a leash!
Offline maps knowing where you’re going is super important as to not get lost. I recommend All Trails Plusfor finding routes and offline mapping allowing you to safely find your way home.
Interested in other multi-day hikesin the Canadian Rockies or maybe day hikes?
What Gear Should I Take?
Through years of hiking and camping in the Rockies as well as working in outdoor retail and producing gear reviews I’ve dialled in my backcountry kit!
Remember at Lake O’Hara there is a bag weight limit on the bus so you still want to keep your bags a decent size. But having the right gear can make your camping trips much more comfortable and enjoyable. A good sleep, a good feed and a lightweight pack is key to a great day on the trail.
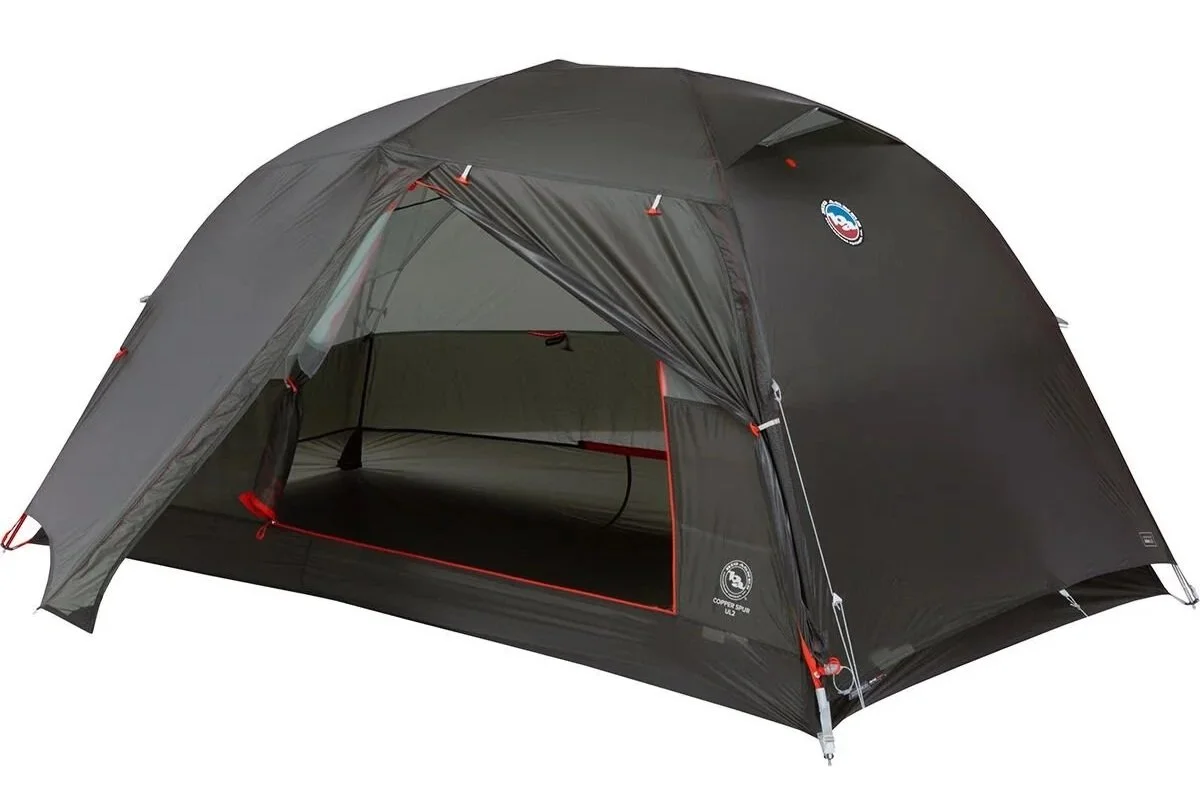
Lightweight Backcountry Tent
I’ve owned the Big Agnes Copper Spur tent for years, in fact I own 2 and it’s never let me down! It’s lightweight, always waterproof and fits perfectly on those backcountry tent pads.
One of the world’s best sellers for good reason
Get it on Backcountry.com
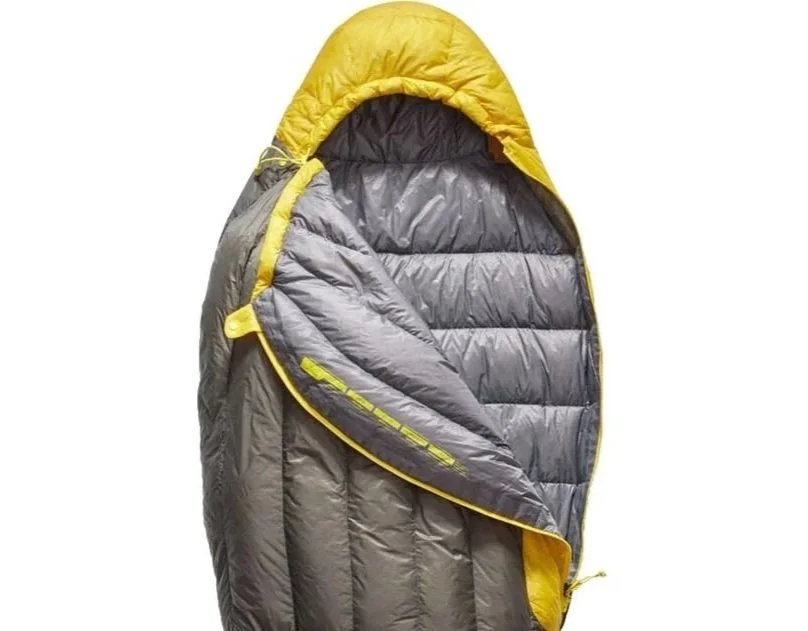
High Quality Sleeping Bag
Getting a high quality down sleeping bag is the best investment I’ve ever made! The Sea to Summit Spark 3 weighs in at 600 grams and packs down to just a few litres whilst keeping me warm down to -8ºC .
Doesn’t take up a lot of room in my bag and keeps be warm!
Get it on Backcountry.com

4 season Sleeping Pad
The Rockies can be cold! Even in the summer the temperature will drop in the mountains. An insulated sleeping pad will help keep the cold off the ground. Both me and my partner use the Nemo Tensor.
Get it on Backcountry.com
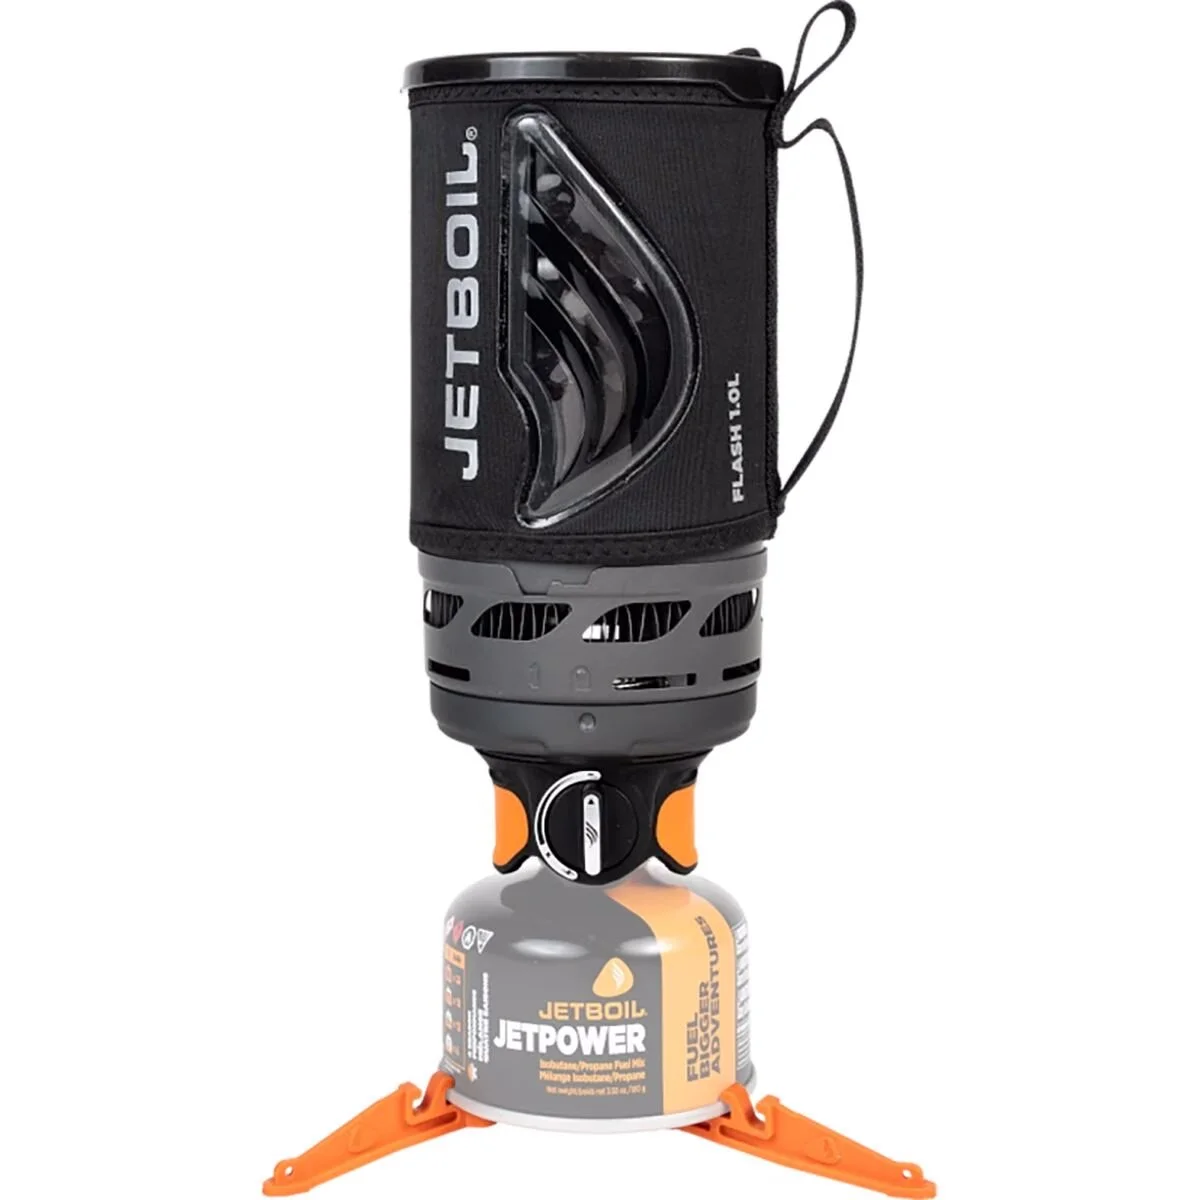
Cooking System
The Jetboil Flash cooking system has become my favourite. It’s incredibly efficient, light and packs down well. You can fire up a hot chocolate on the windiest of ridge lines in just a minute or two!
Get in on Backcountry.com

Water Filter
A Katadyn BeFree has to be the easiest filtration system to use. When out on the backcountry you want to be able to filter and refill your water along the way.
This filter packs down small and filters fast. It’s in my bag on every hike!
Get it on Backcountry.com

Capture Clip
Another item that comes on every hike with me and a must own for every photographer.
Keeps your camera close at hand making capturing moments much faster!
Get it on Peakdesign.com
Looking for Your Next Multi Day Adventure in The Rockies?
The Tamarack Trail is a hidden gem in Waterton.
Lake O’Hara is a must do camping location!
The Berg Lake Trailis one of the best for photography.
Northover Ridge offers a more adventurous overnight trip.